DATEV <> Odoo integration : User documentation
The following documentation will provide you with the information you need to use the much. DATEV <> Odoo integration. The objective is to get you familiarised with the integration by providing relevant information as to the main business processes it covers, and how you can configure it to best suits your needs.
Pre-requisites
DATEV services subscription
To be able to send transaction data, master data and PDF documents to DATEV data center, you must first subscribe to the following data services :
- DATEV Buchungsdatenservice
- DATEV Unternehmen online
To do so, please follow the steps indicated in this DATEV official help article - or reach out to DATEV via your DATEV client account.
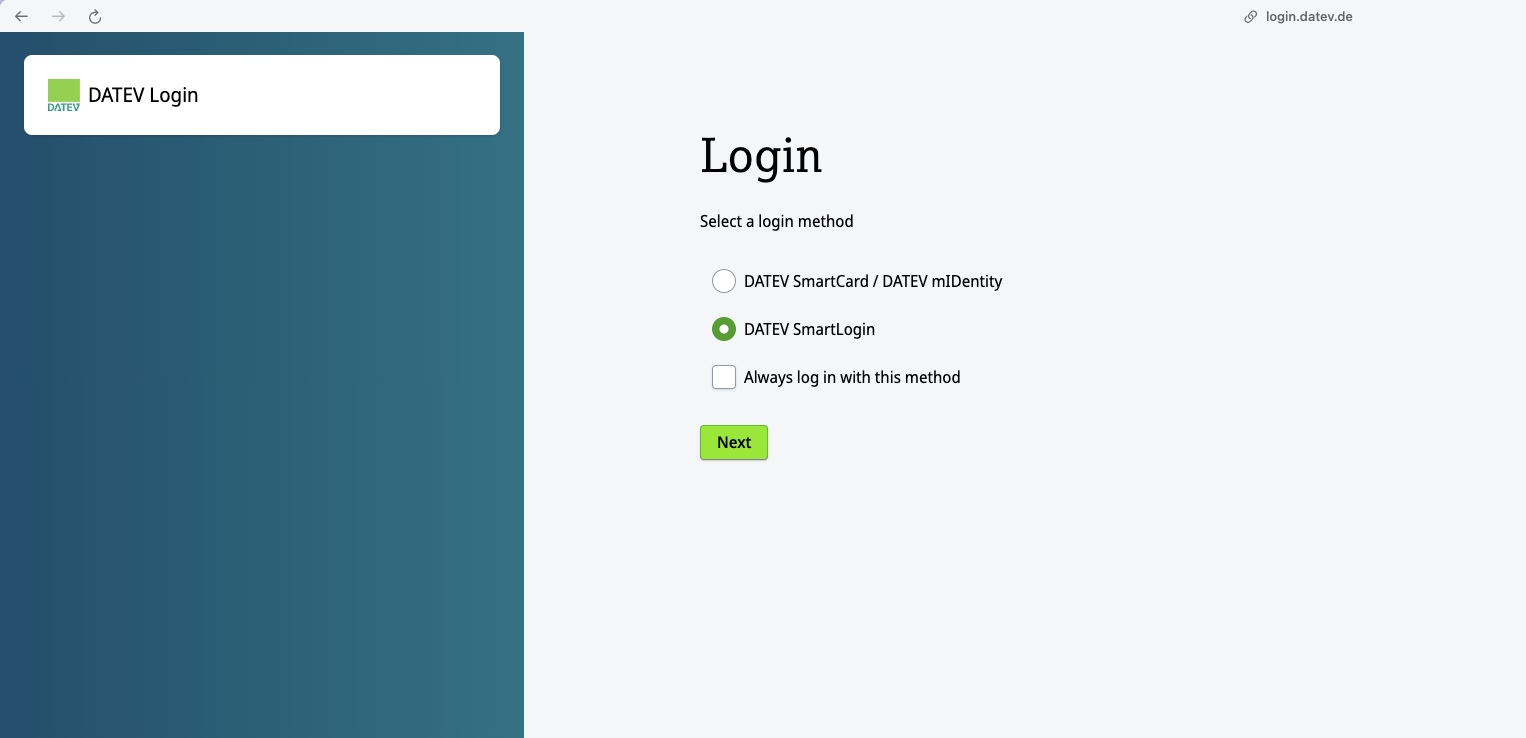
You also need a way to authenticate to DATEV, such as DATEV SmartCard / DATEV mIDentity or DATEV SmartLogin.
Odoo module dependencies
To use the much. Odoo to DATEV Integration please make sure that in your database you have the following Odoo standard modules :
- Accounting - account_accountant
- Germany Accounting - l10n_de
Install the Integration
Install the integration modules
Before activating the integration, make sure that the following modules are installed in your Odoo database :
- much-integration-hub
- much-notify
- much-datev-integration
Activate the integration
Activate the much. DATEV integration module.
- Go to Odoo > Apps and search for much_account_datev.
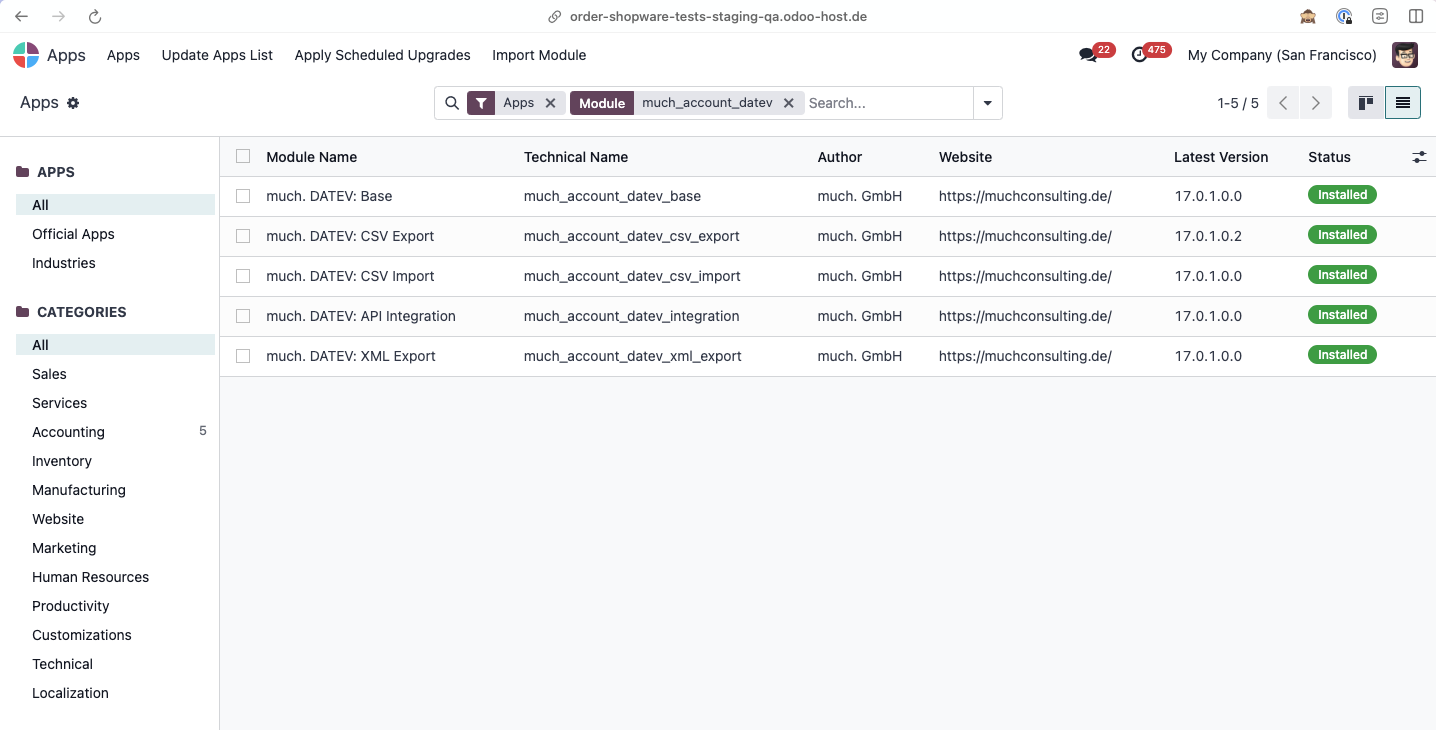
- Select all related modules and click Activate.
- Go to Integration Hub > Settings and make sure the following settings are enabled :
- iHub Logs
- iHub Jobs
- iHub Queue

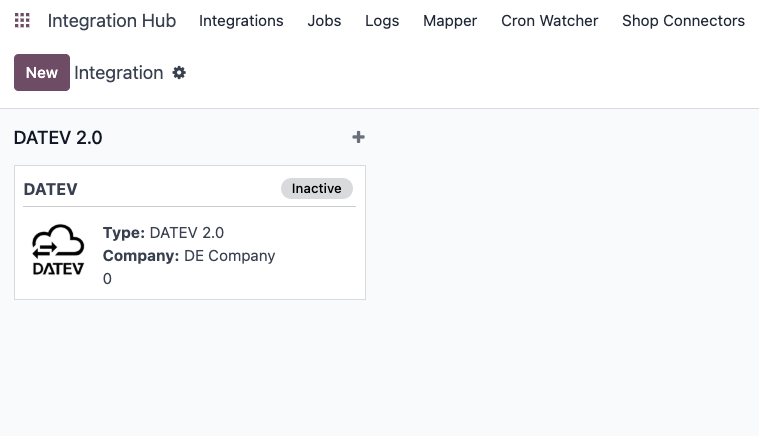
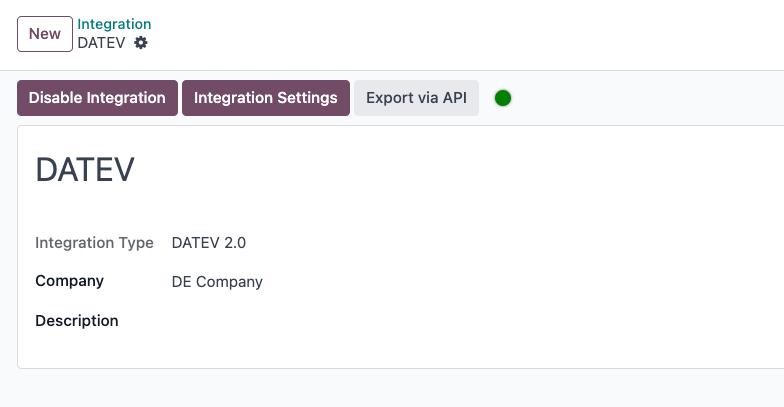
- Back to the Integrations tab, click New
- Add an integration name.
- In the Integration Type field, select DATEV.
- In the Company field, select the Odoo company that this integration will be applied to.
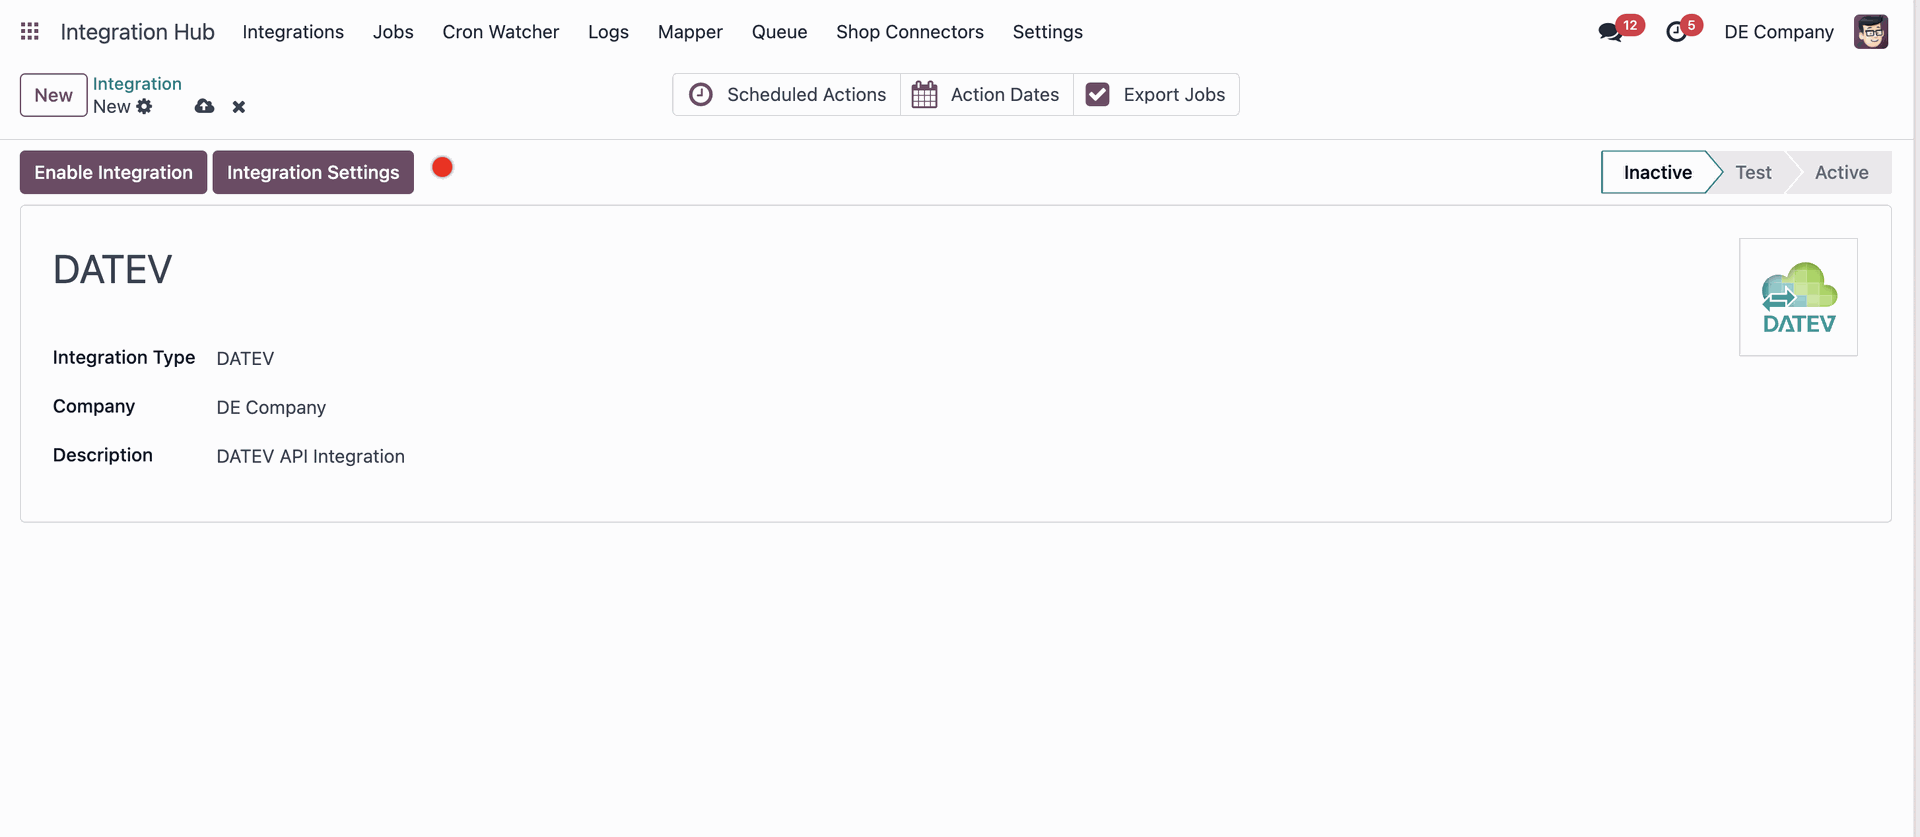
- Click Save.
DATEV Configuration
The much. Odoo to DATEV Integration allows you to export master data, transaction data and PDF documents. The export can be configured to match your accounting needs.
Consultant & Client number
To start using the integration, as well as export DATEV compliant files, you must fill in your DATEV consultant and client number. To do so :
- Go to Settings > Users & Companies > Companies.
- In the company form, fill out the L10N De Datev Consultant Number and L10N De Datev Client Number fields.
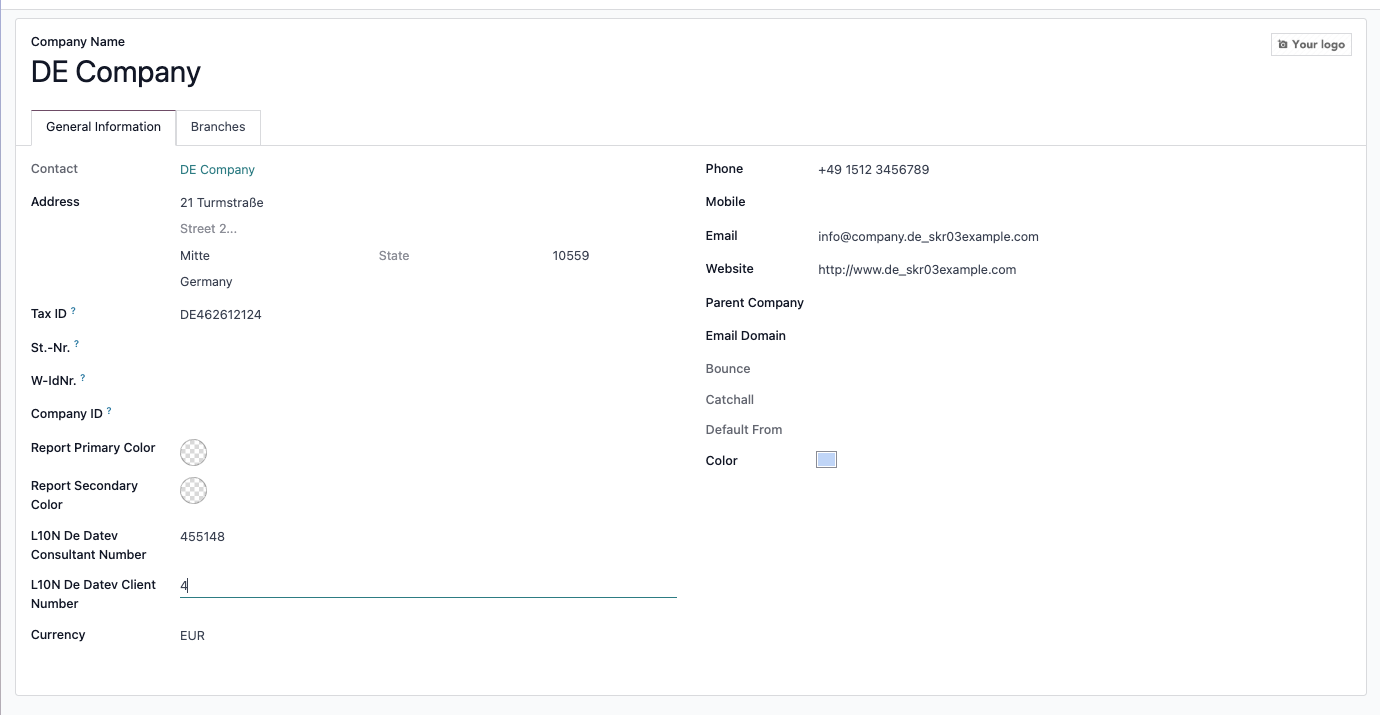
- Click Save.
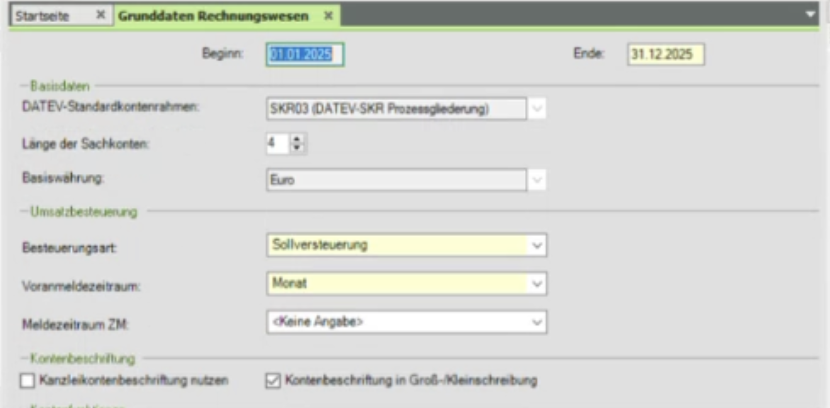
DATEV Settings
To configure the structure of the file that will be sent to DATEV via API or manually exported, please navigate to Settings > DATEV Export.
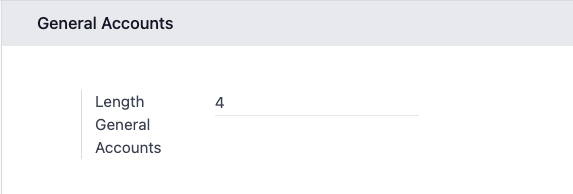
General Accounts
- Length General Accounts : configure the length of the account codes. The length must match the one used in DATEV by your tax accountant. If the code length has more digits than in Odoo, the account code will be extended by 0 in the end.
Settings for account length in Odoo
Settings for account length in DATEV
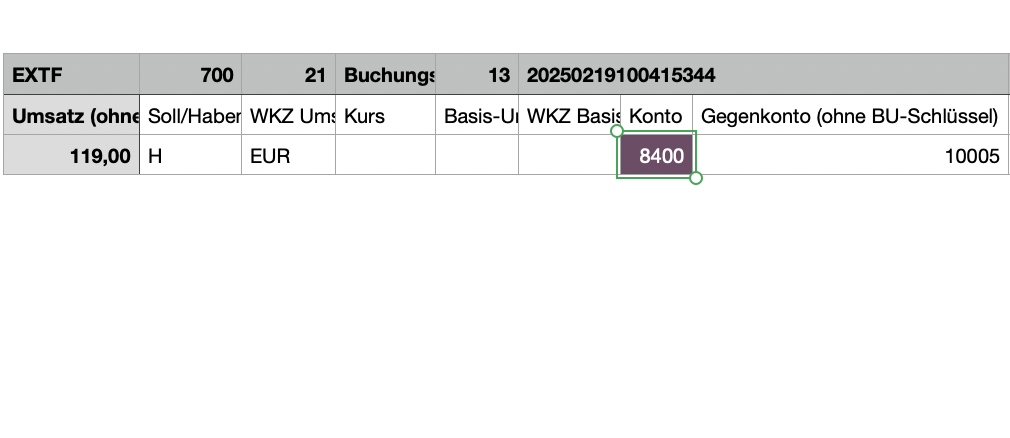
Example of export with length 4

Example of export with length 5
Personal Accounts
- Direct bookings : exports entries booked directly on receivable/ payable accounts instead of the partner account.
- Receivable format : range at which the generation of debtor numbers should start.
- Payable format : range at which the generation of creditor numbers should start.
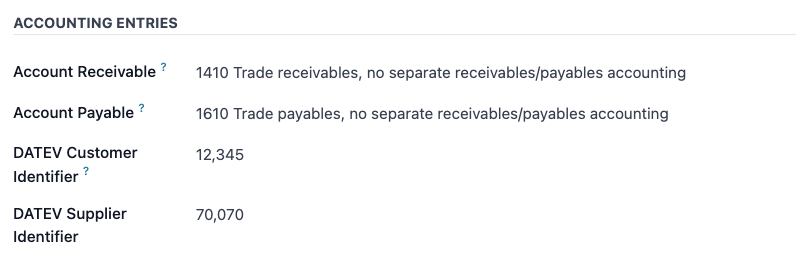
Example of DATEV partner identifiers for ranges 10,000 and 70,000
- DATEV partner number generation : select if you want the number automatically generated on posting of first entry (default) or during the first export.
You can also generate this numbers on a given partner by going to the contact actions :
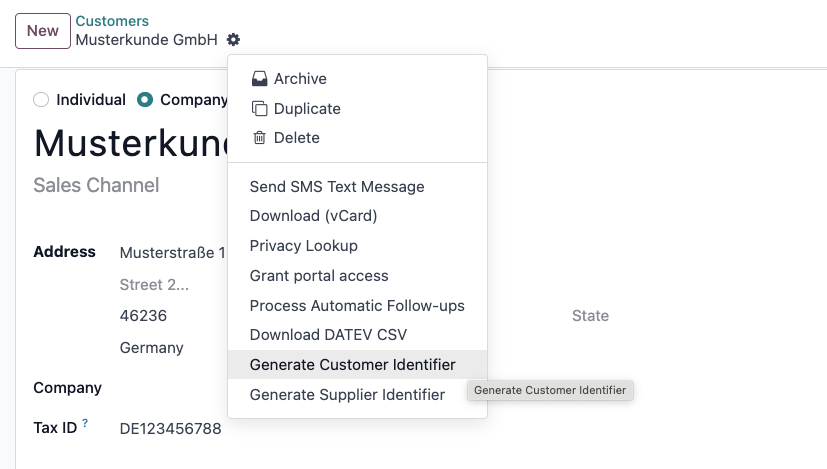
The generation will automatically set the number to the lowest available number within the range.
Column Configuration
The module allows you to edit the columns that will be exported in the accounting entries and master data files.
- List of columns in the DATEV export for accounting entries.
By default, all the field supported by DATEV are present as headers. The integration currently assign values to the following fields :
| Column | Header | Value |
| A | Umsatz (ohne Soll/Haben-Kz) | gross_value |
| B | Soll/Haben-Kennzeichen | soll_haben |
| C | WKZ Umsatz | currency |
| D | Kurs | rate |
| E | Basis-Umsatz | amount_currency |
| F | WKZ Basis-Umsatz | foreign_currency |
| G | Konto | account |
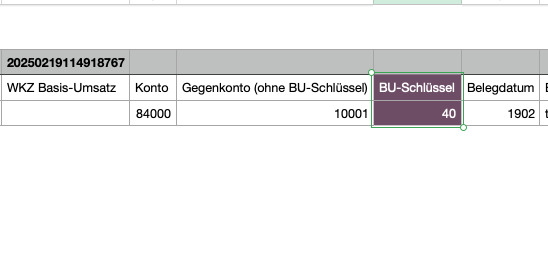
| H | Gegenkonto (ohne BU-Schlüssel) | counteraccount |
| I | BU-Schlüssel | bookingkey |
| J | Belegdatum | date_ddmm |
| K | Belegfeld 1 | reconciled_entry_number |
| L | Belegfeld 2 | date |
| M | Skonto | discount_amount_currency |
| N | Buchungstext | account_move_line_name |
| T | Beleglink | datev_guid |
| AK | KOST1 - Kostenstelle | datev_analytic_plan_acc_1 |
| AL | KOST2 - Kostenstelle | datev_analytic_plan_acc_2 |
| AN | EU-Mitgliedstaat u. UStID | partner_vat |
| AO | EU-Steuersatz | aml_tax_ids |
| DK | Leistungsdatum | service_date |
| DL | Datum Zuord. Steuerperiode | tax_report_date |
| DN | Generalumkehr | general_reversal |
| DS | EU-Mitgliedstaat u. UStID | company_vat |
| DT | U-Steuersatz (Ursprung) | fiscal_tax |
- List of columns in the DATEV export for master data.
By default, all the field supported by DATEV are present as headers. The integration currently assign values to the following fields :
| Column | Header | Value |
| A | Konto | code |
| B | Name (AdressatentypUnternehmen) | company_name |
| D | Name (Adressatentyp natürl. Person) | person_name |
| E | Vorname (Adressatentyp natürl. Person) | firstname_person |
| G | Adressatentyp | natural |
| I | EU-Land | company_country_code |
| J | EU-USt-IdNr. | company_vat |
| K | Anrede | partner_title |
| O | Adressart | hardcoded_str |
| P | Straße | street |
| R | Postleitzahl | zip |
| S | Ort | city |
| T | Land | country |
| Z | Kennz. Korrespondenzadresse | hardcoded_1 |
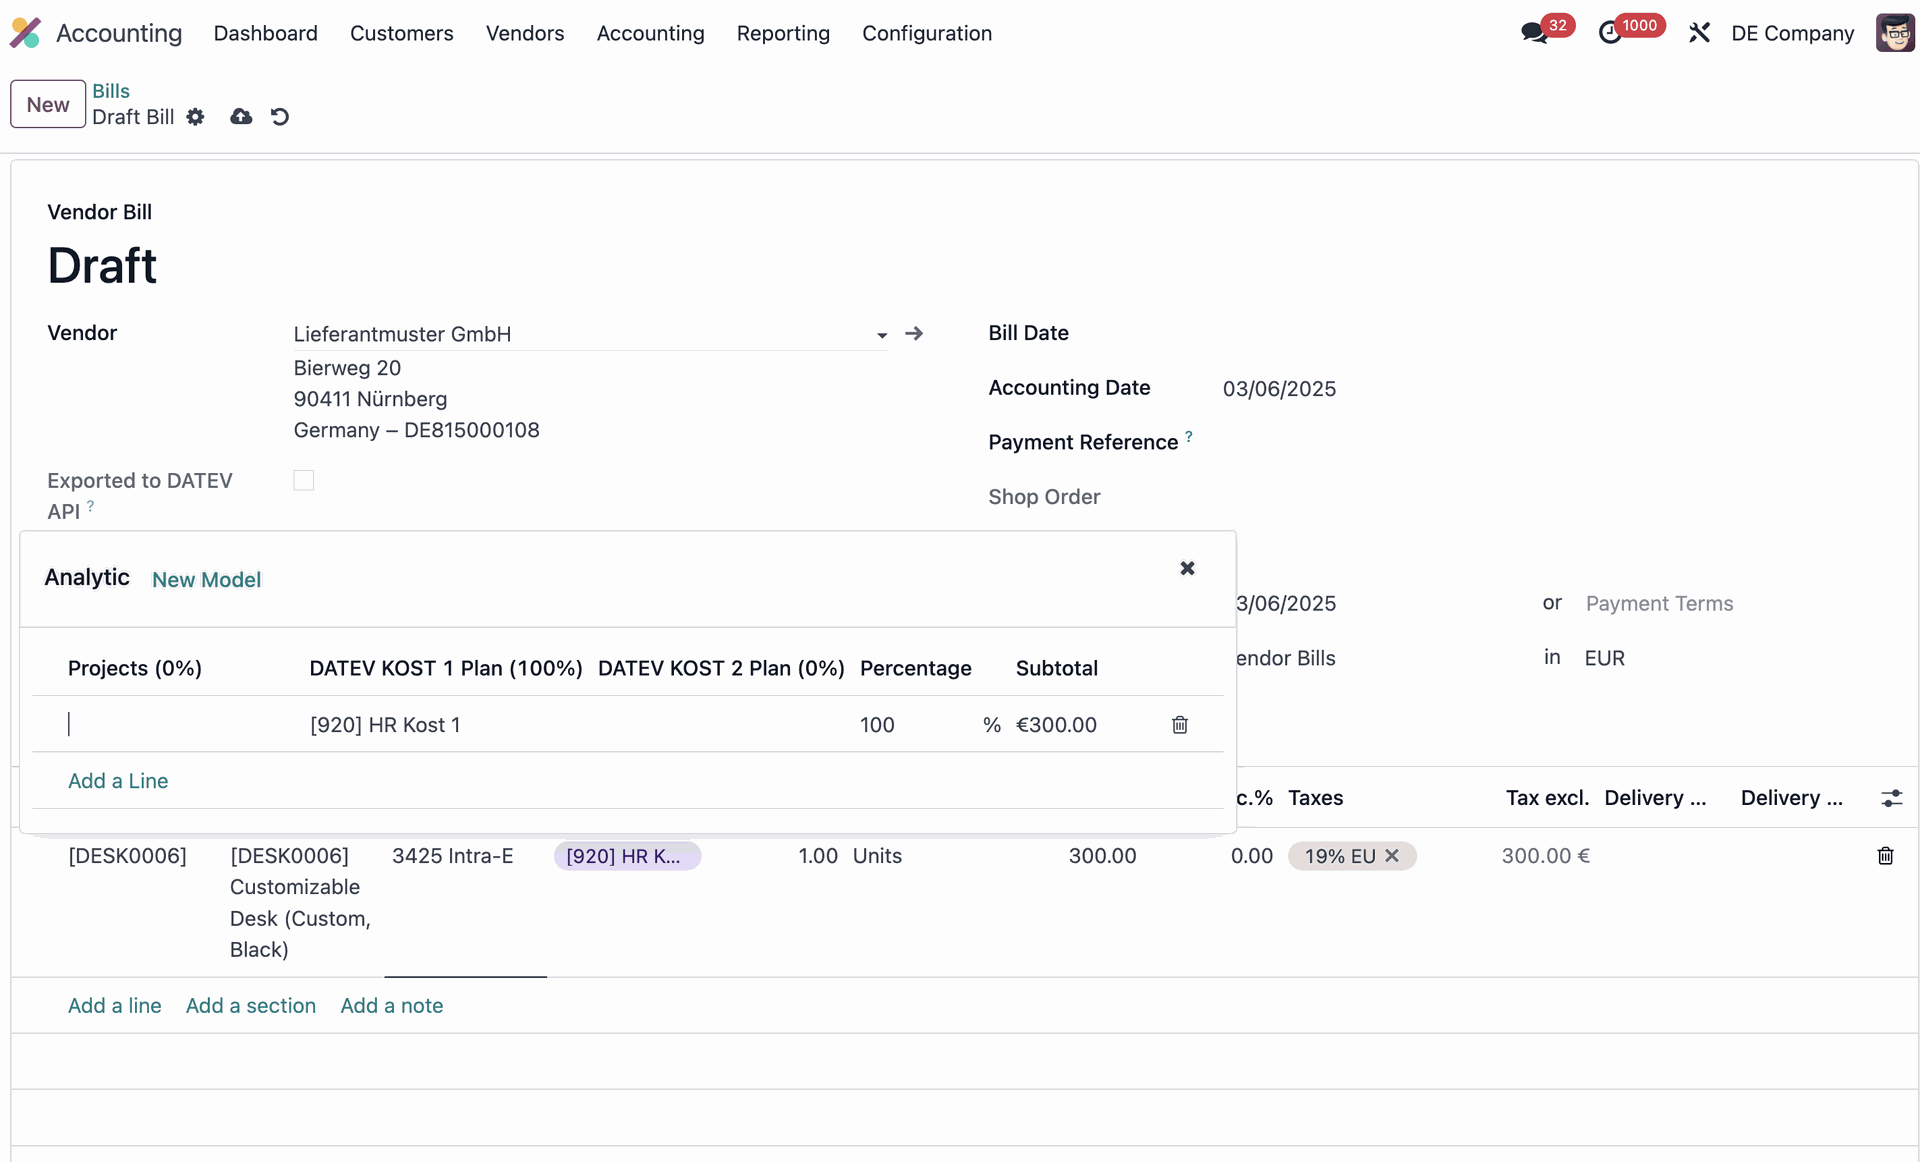
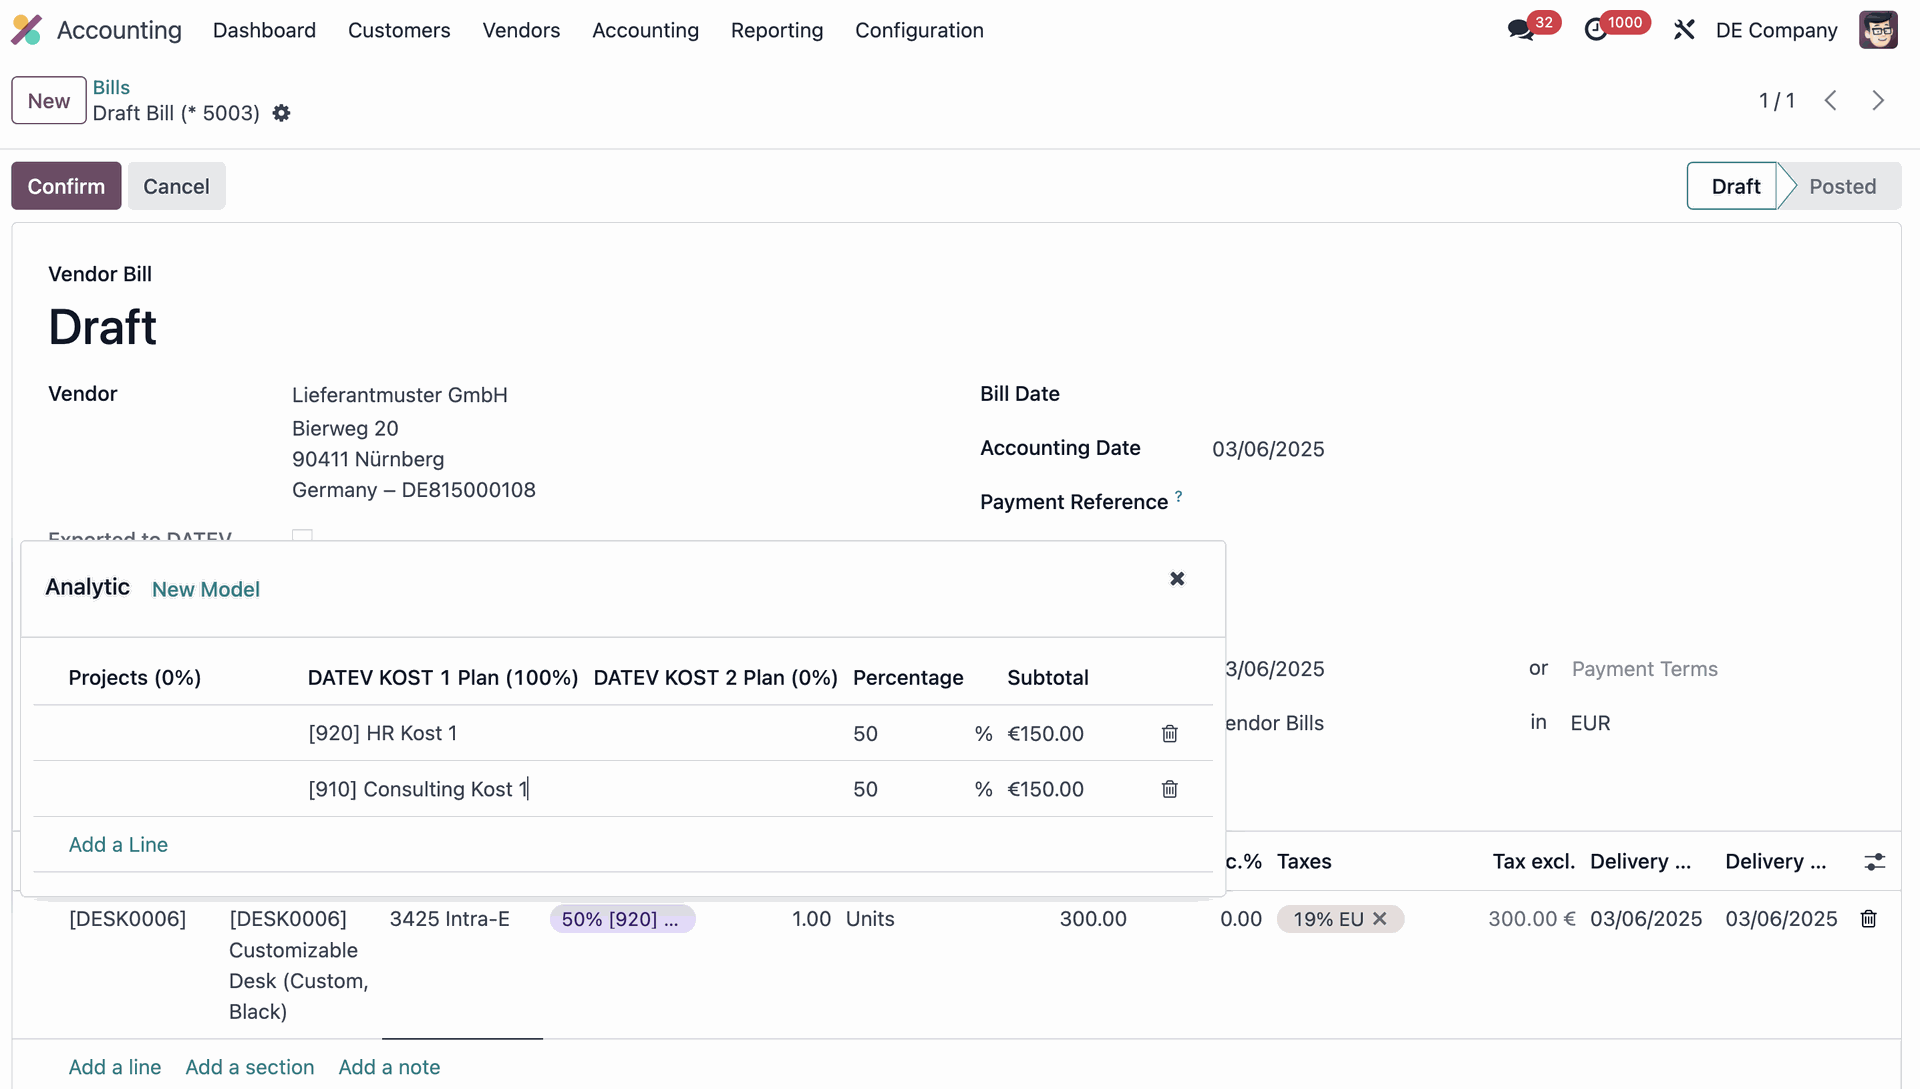
Analytic Account - Export
In the accounting entries export file, you can use columns AK (KOST 1 - Kostenstelle) and AL (KOST 2 - Kostenstelle) to assign cost centers to your entries.
Since DATEV only allows the configuration of 2 cost centers, we allow to configure the corresponding Analytic Plans in Odoo.

Configuration of cost centers in the DATEV export settings
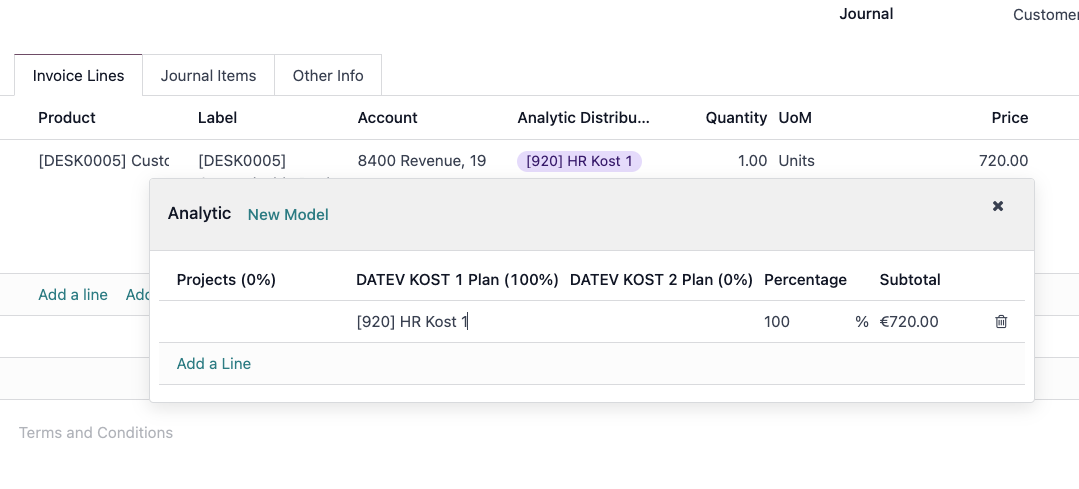
Cost assignment on a vendor bill
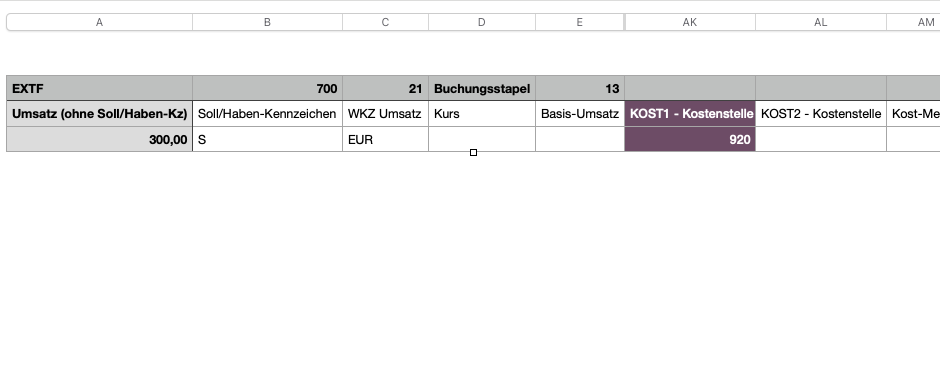
Code of the analytic account in the DATEV export
- After choosing the corresponding Odoo plans, you can't edit the configuration.
- DATEV only allows a 100% cost distribution, which means that if you have more than 1 analytic plan assigned to an entry, you must split the entry in multiple lines according to the analytic % to reflect the correct distribution in DATEV.
✅
⛔
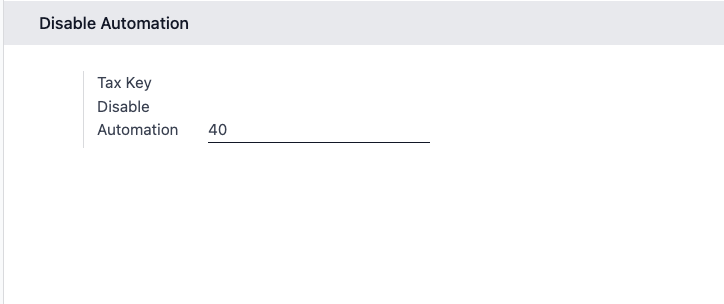
Disable Automation
By default, if you manually remove taxes on an entry booked on an automated account, we will add 40 as value in column I (BU-Schlüssel). This will prevent that it will be added au in DATEV again, due to the automated nature of the account.
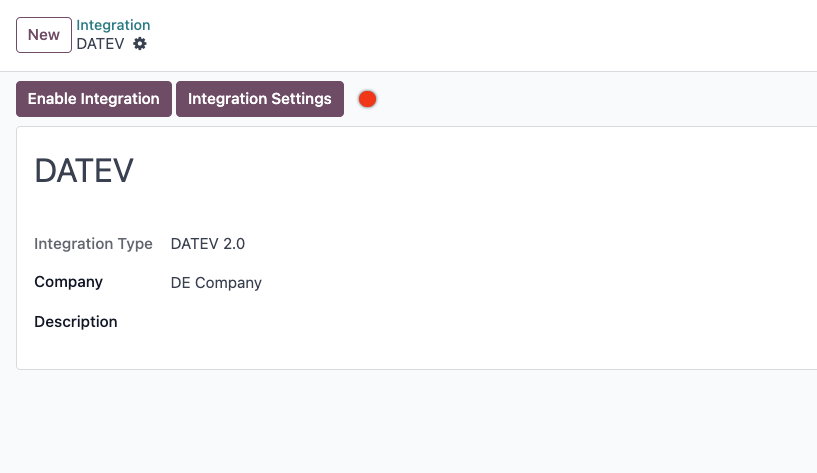
Integration Settings
Now that the DATEV structure has been configured, you can configure the integration, by going to Integration Hub > DATEV Integration > Integration Settings.
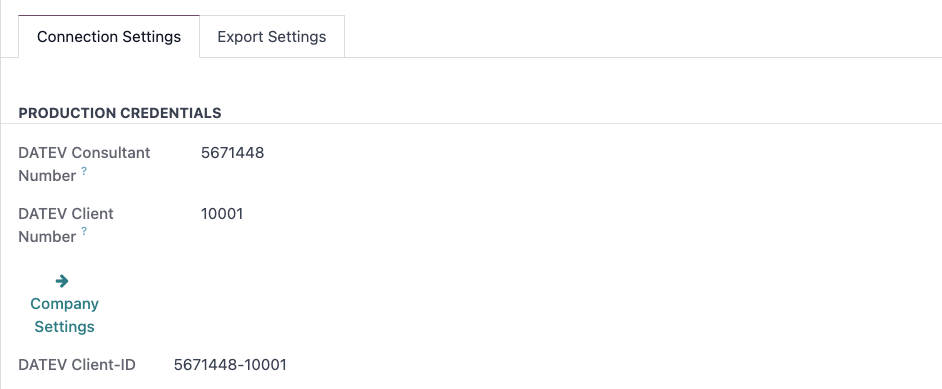
Connection Settings
- Make sure that your consultant and client number are correct. If not, you can click on Company Settings to adjust them.
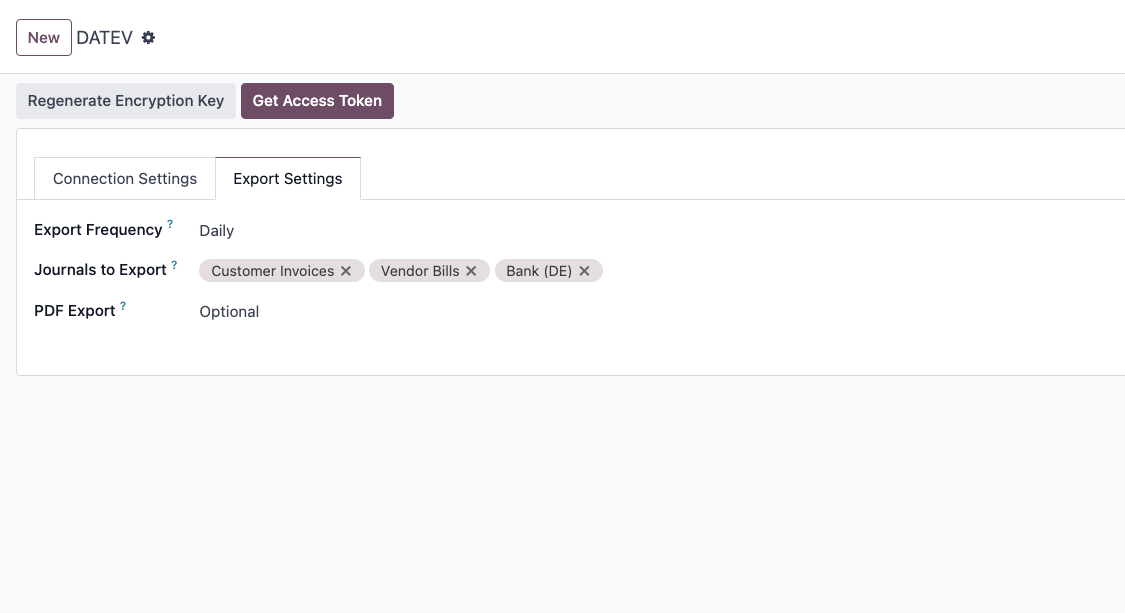
Export Settings
- Export Frequency : choose at what frequency the automated action that will send your accounting entries and master data will run.
- Journals to Export : choose which journals should be exported to DATEV.
- PDF Export : default to Optional. If set to Mandatory, the entries with no PDFs attached will not be exported to DATEV.
Authenticate to DATEV
As a last step to enable the integration to run, you must authenticate to DATEV.
Get your access token
- Go to Integration Hub > DATEV > Integration Settings.
- Click Get Access Token.

- Login to DATEV with your preferred login method.
- Once login is successful, the token status will be green.

- You can revoke the access to DATEV anytime by clicking "Revoke Tokens".
Enable the integration
- Once you are connected to DATEV, simply click Enable Integration. The integration status will go from Inactive to Active.
- You can turn off the integration at any time, either by clicking Disable Integration or by clicking Revoke Tokens.
Odoo <> DATEV Workflows
Automated DATEV API Export
As mentioned before, the integration will automatically send your financial data and related PDFs on the configured frequency and journals.
If needed, you can also trigger the API export manually :
- Go to Integration Hub > DATEV and click Export via API (you have to be authenticated to see the action)
- Select the journals and timeframe you want to export to DATEV.
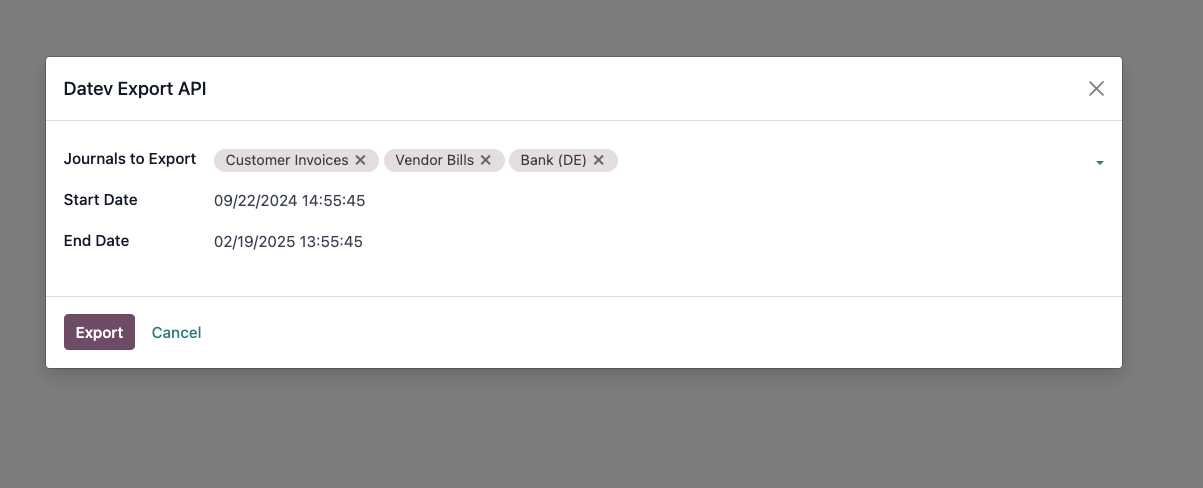
- Click Export.
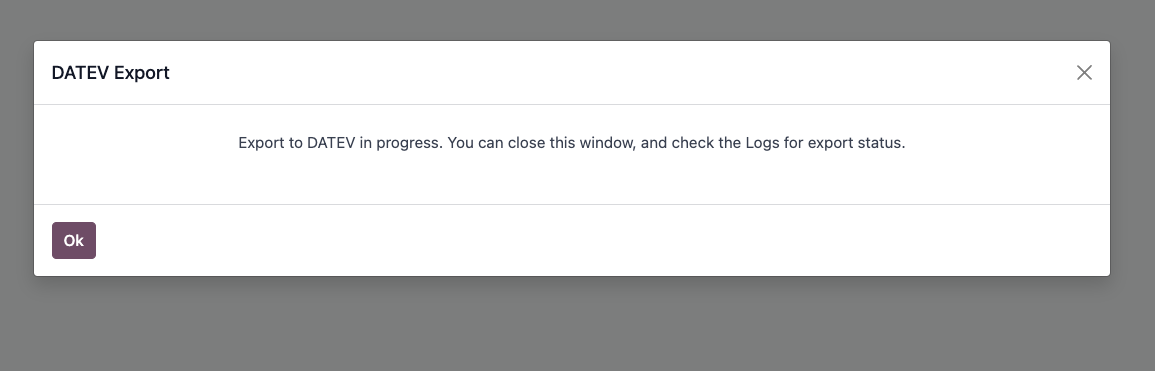
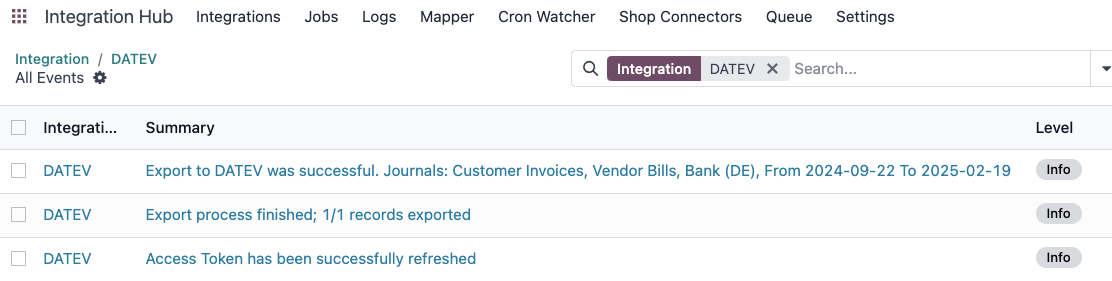
- After a few seconds (or minutes if you have a lot of data), you can go to the logs to see the status of your export :
Manual DATEV Export
Our module also allows you to export DATEV data manually, either in csv, csv + PDFs, or XML.
Single Record Export
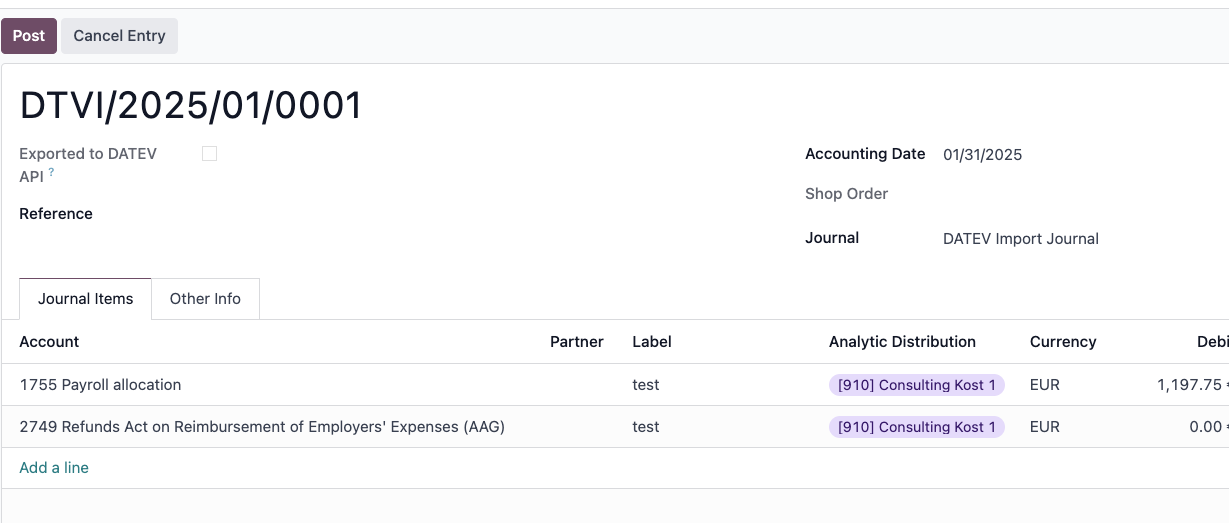
You can export the DATEV file for a specific entry. To do so :
- Go to Accounting, open the entry you want to export and click on Actions.
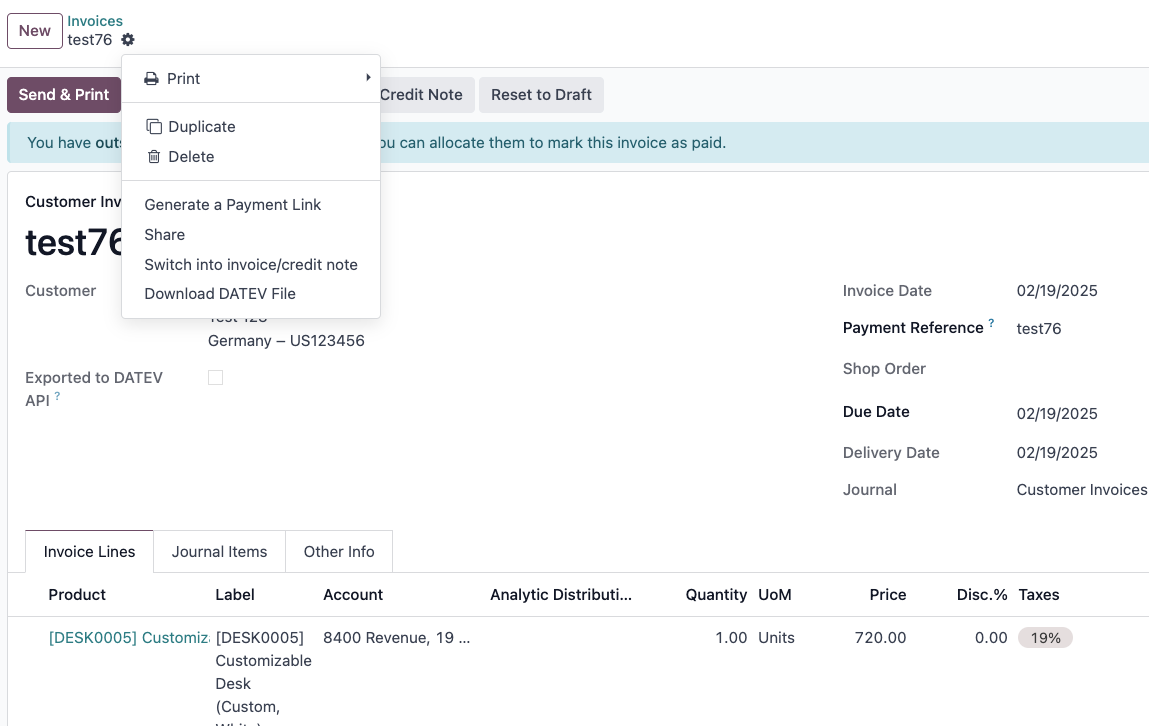
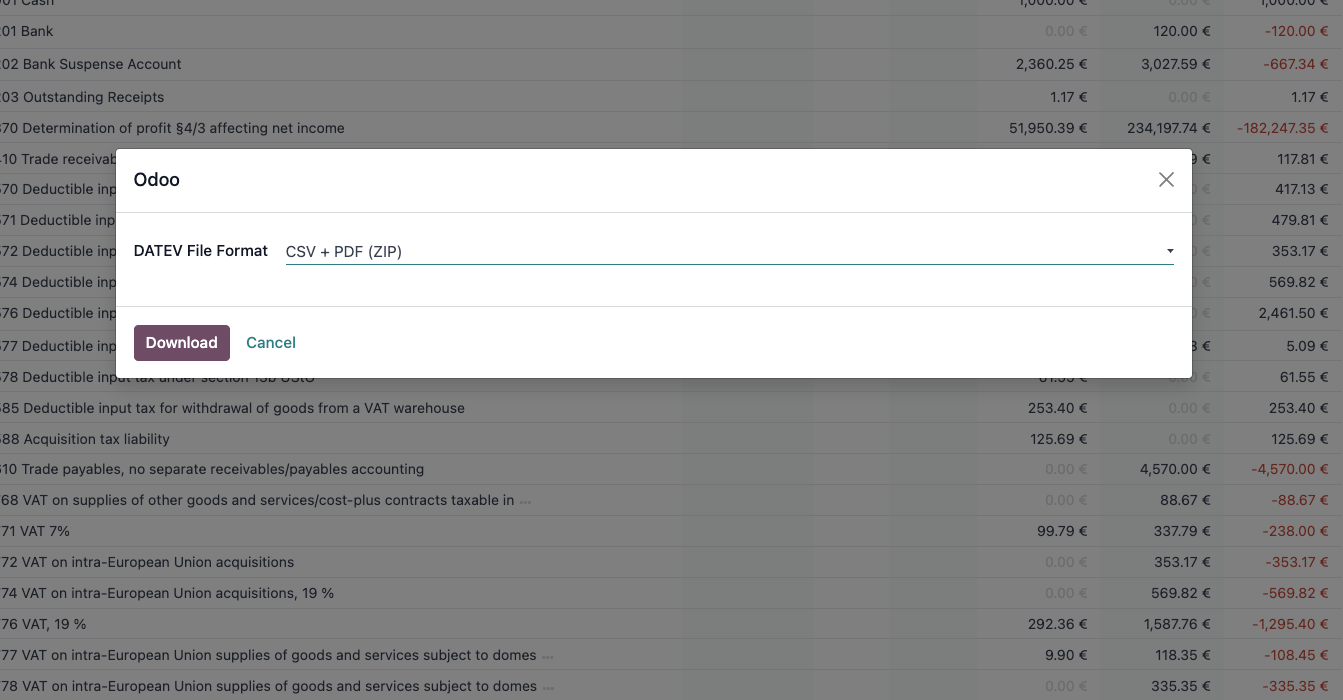
- Click the Download DATEV File button, and in the pop up, select the desired format.

- Click Download.
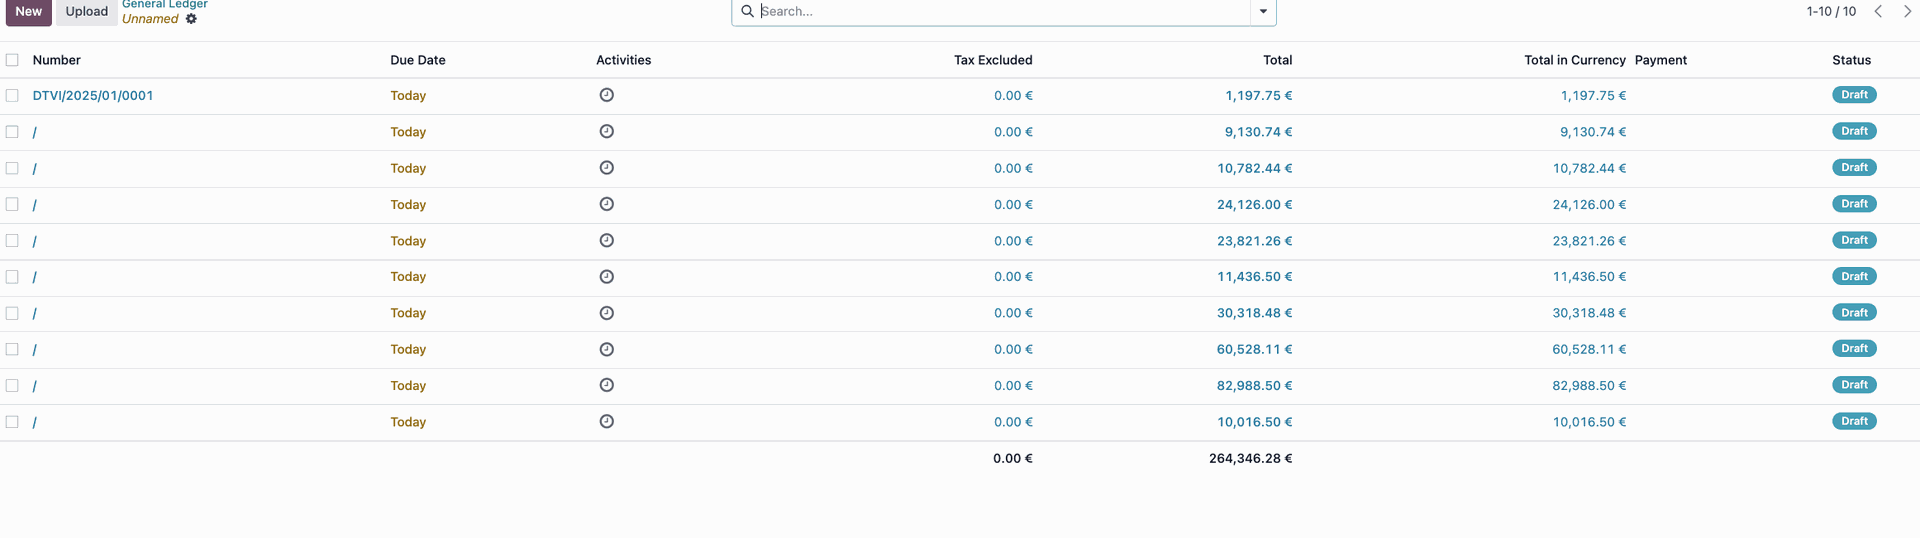
General Ledger Export
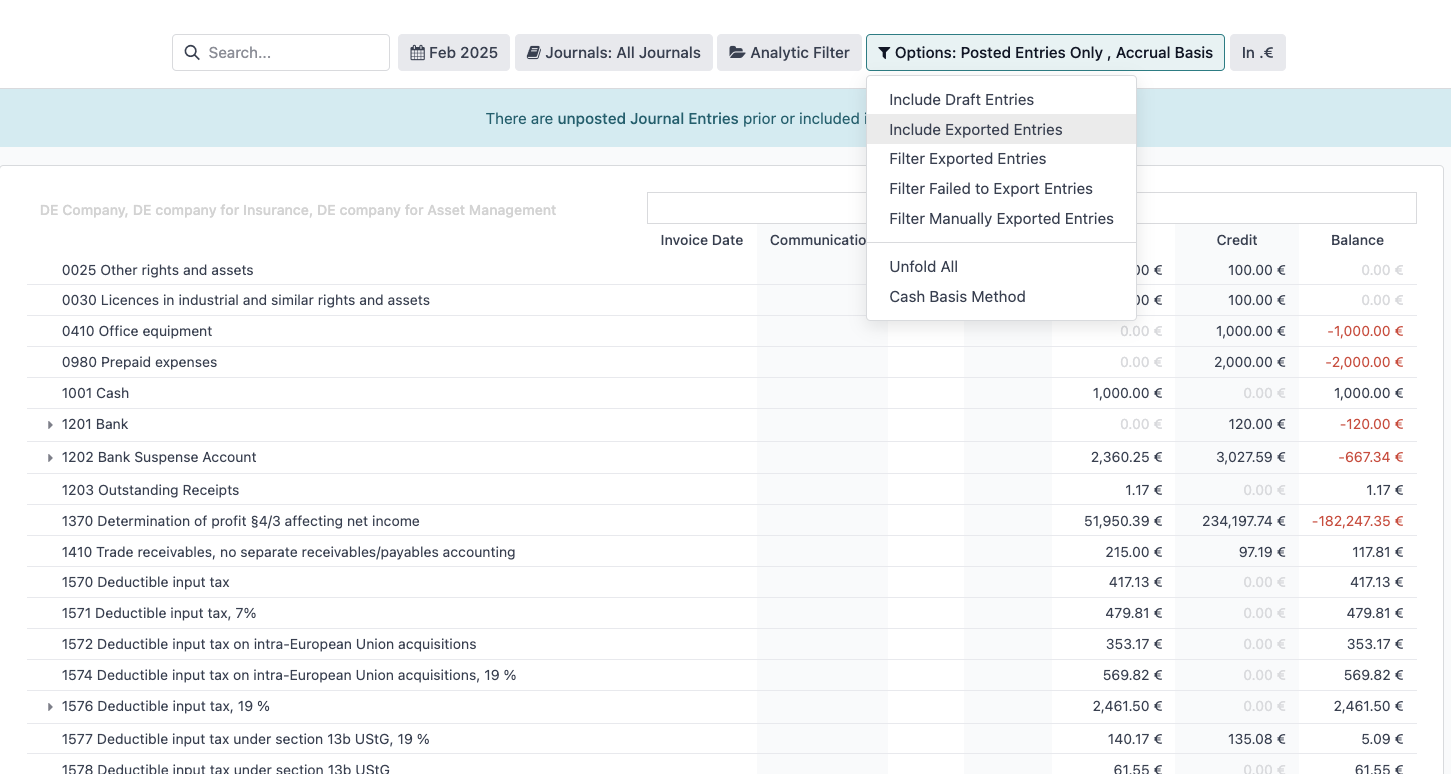
You can also export all your entry for specific journals and timeframe. To do so:
- Go to Accounting > Reporting > General Ledger.
- Use the filters to select your desired Journals and time period. By default, already exported entries will excluded. If you want to include them, simply click the filter option and select Include Exported Entries.
- Once done with your filtering, click on the down arrow or testing wheel on the top left corner, and select Download DATEV File.
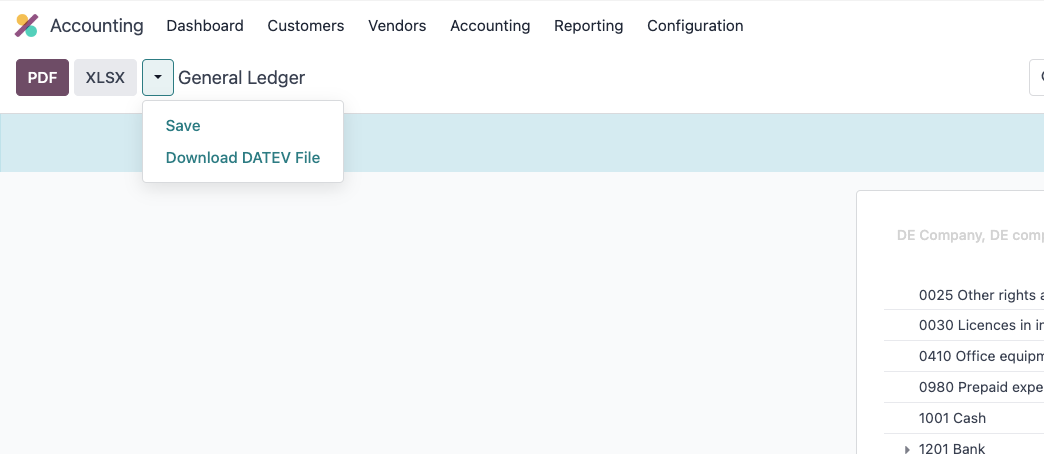
- In the pop up, select the desired format and click Download.
Other Filtering Options
If you want to quickly visualise all your exported entries, via API or Manually, as well as the Failed ones, you can use the following filters :
- Filter Exported Entries
- Filter Failed to Export Entries
- Filter Manually Exported Entries

DATEV Import
The module also gives you the ability to Import data that was previously exported from DATEV. This is useful for example when you first setup your Odoo, to register all your existing partners and their respective DATEV partner id.
To import a DATEV file in Odoo :
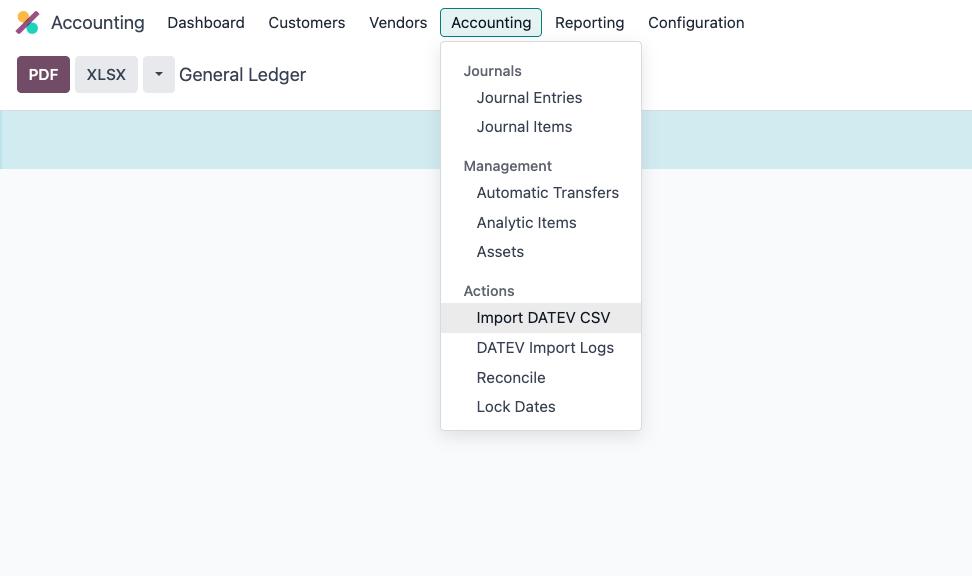
- Go to Accounting > Accounting and click Import DATEV CSV.
- In the pop-up, fill the following information
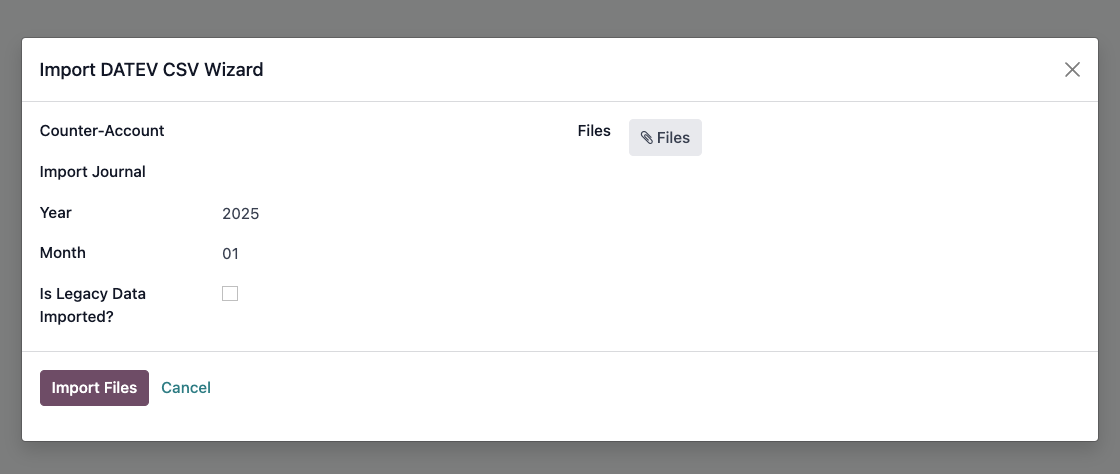
- Counter-Account : Gegenkonto.
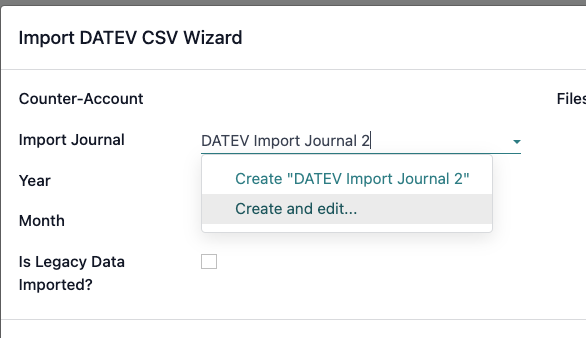
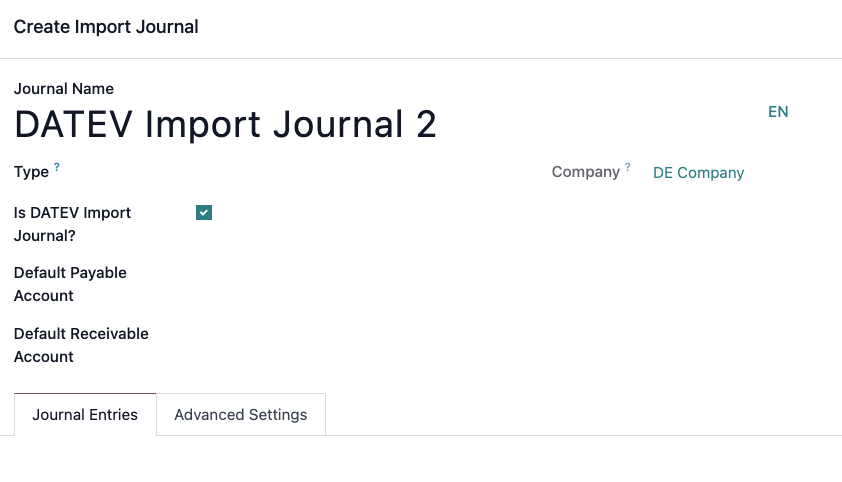
- DATEV Import journal: If you don't have 1 created yet, you must create one and select the Is DATEV Import Journal option.
- Select the Year and Month of the Import.
- Upload your file and click Import Files.