PayPal Official Integration: User Documentation
This guide provides step-by-step instructions on how to set up and use the PayPal Official Integration module in Odoo. This module allows you to offer a complete suite of PayPal payment options to your customers, including Pay Later, Venmo, and credit cards.
1. Install the modules
1. Get the PayPal modules on your Odoo database. The following modules need to be added :
- payment_paypal_suite
- payment_paypal_integration
- payment_paypal_vaulting
- paypal_merchant_configurator
- paypal_webhook_base
- website_sale_paypal
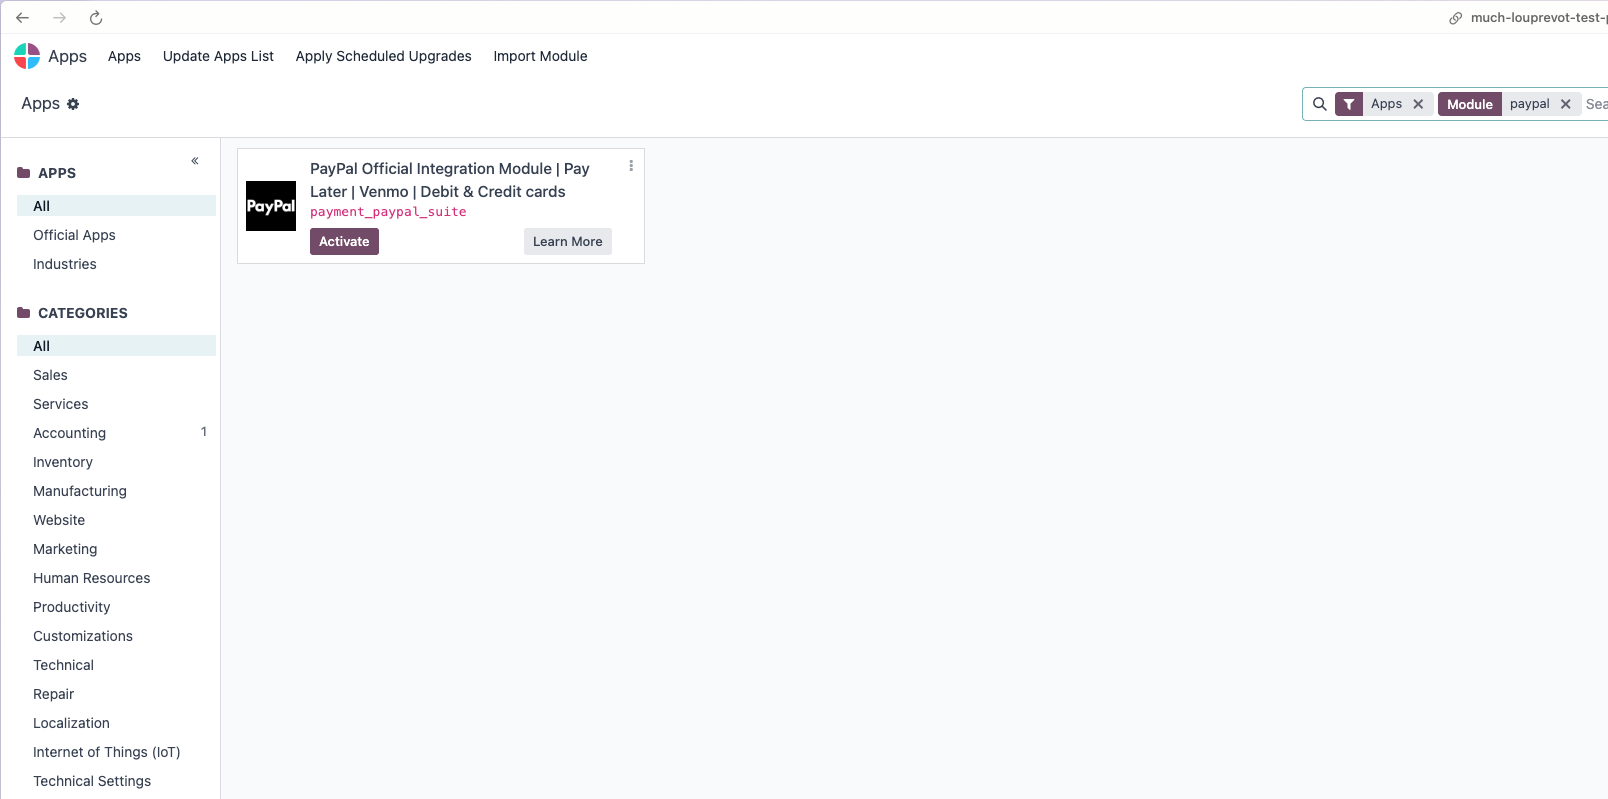
2. Activate the modules
- Navigate to the Apps application.
- Click "Update Apps List"
- Search for paypal.
- Click activate.
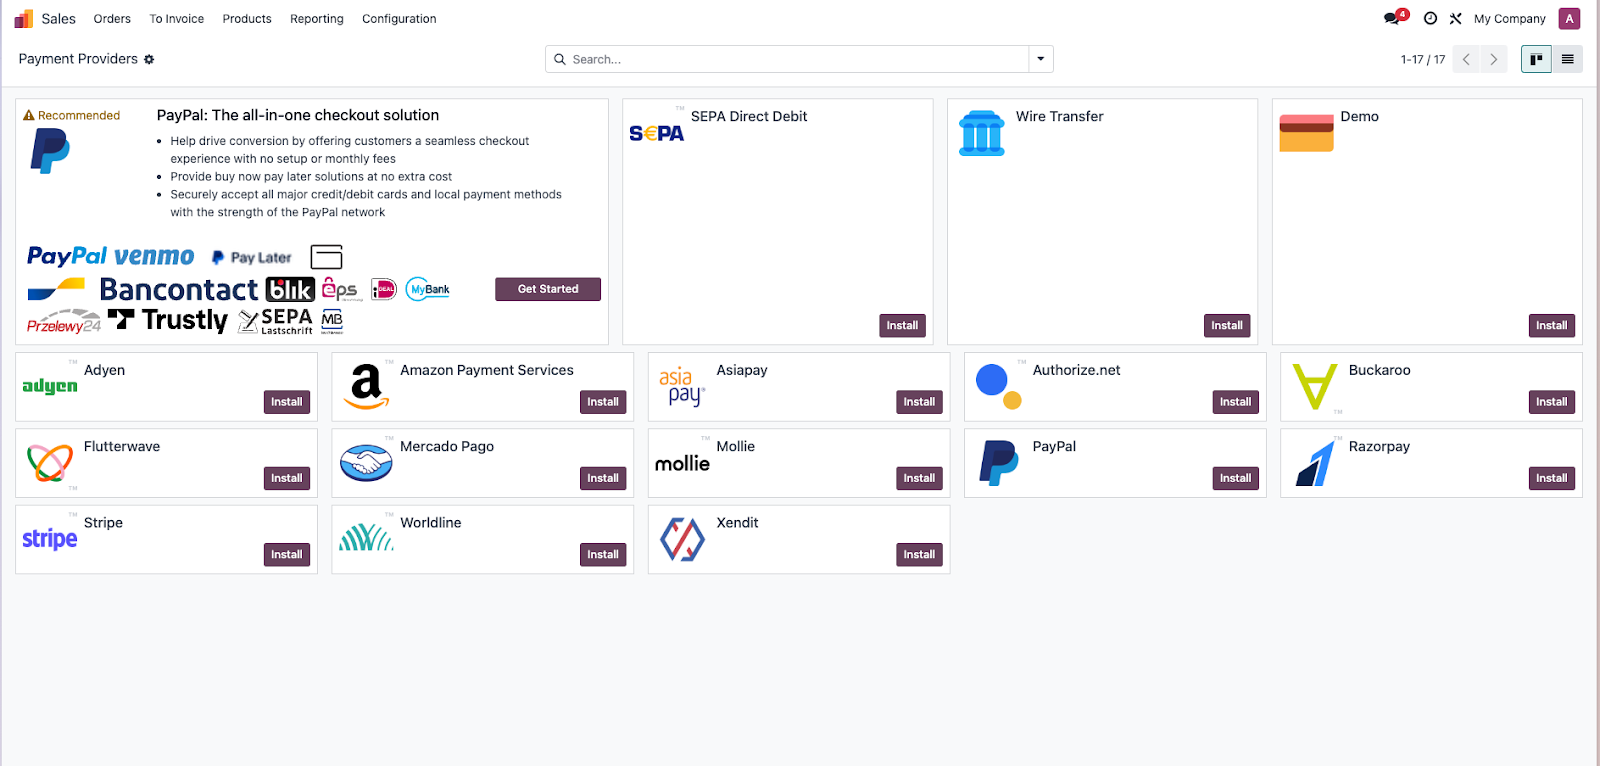
2. Initial Setup: Connecting Your PayPal Account
After installing the modules, you need to connect your Odoo instance to your PayPal Business account.
Navigate to Website > Configuration > Payment Providers.
(Alternatively, you can go to Invoicing > Configuration > Payment Providers).
Find PayPal Business Integration in the list. It is highlighted as "Recommended."
Click on the Get Started button.
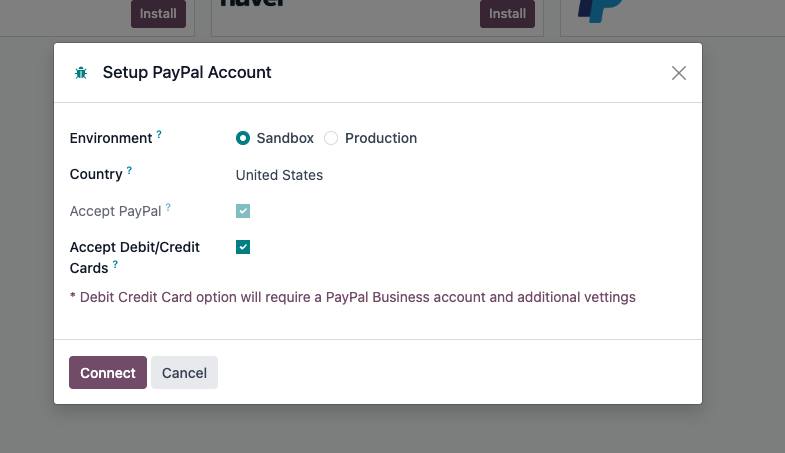
A setup wizard will appear. You must fill in two fields:
Environment: Choose Sandbox if you want to test the connection with a test PayPal account. Choose Production to connect your real account and accept live payments.
Country: Select the country where your PayPal Business account is registered.
Accept Debit/Credit Cards: Check this box if you want to offer advanced credit and debit card processing directly on your checkout page.
5. Click the Connect button in the wizard.
6. A new PayPal popup window will open.
Log in to your existing PayPal Business account.
If you do not have one, you can sign up for a new account.
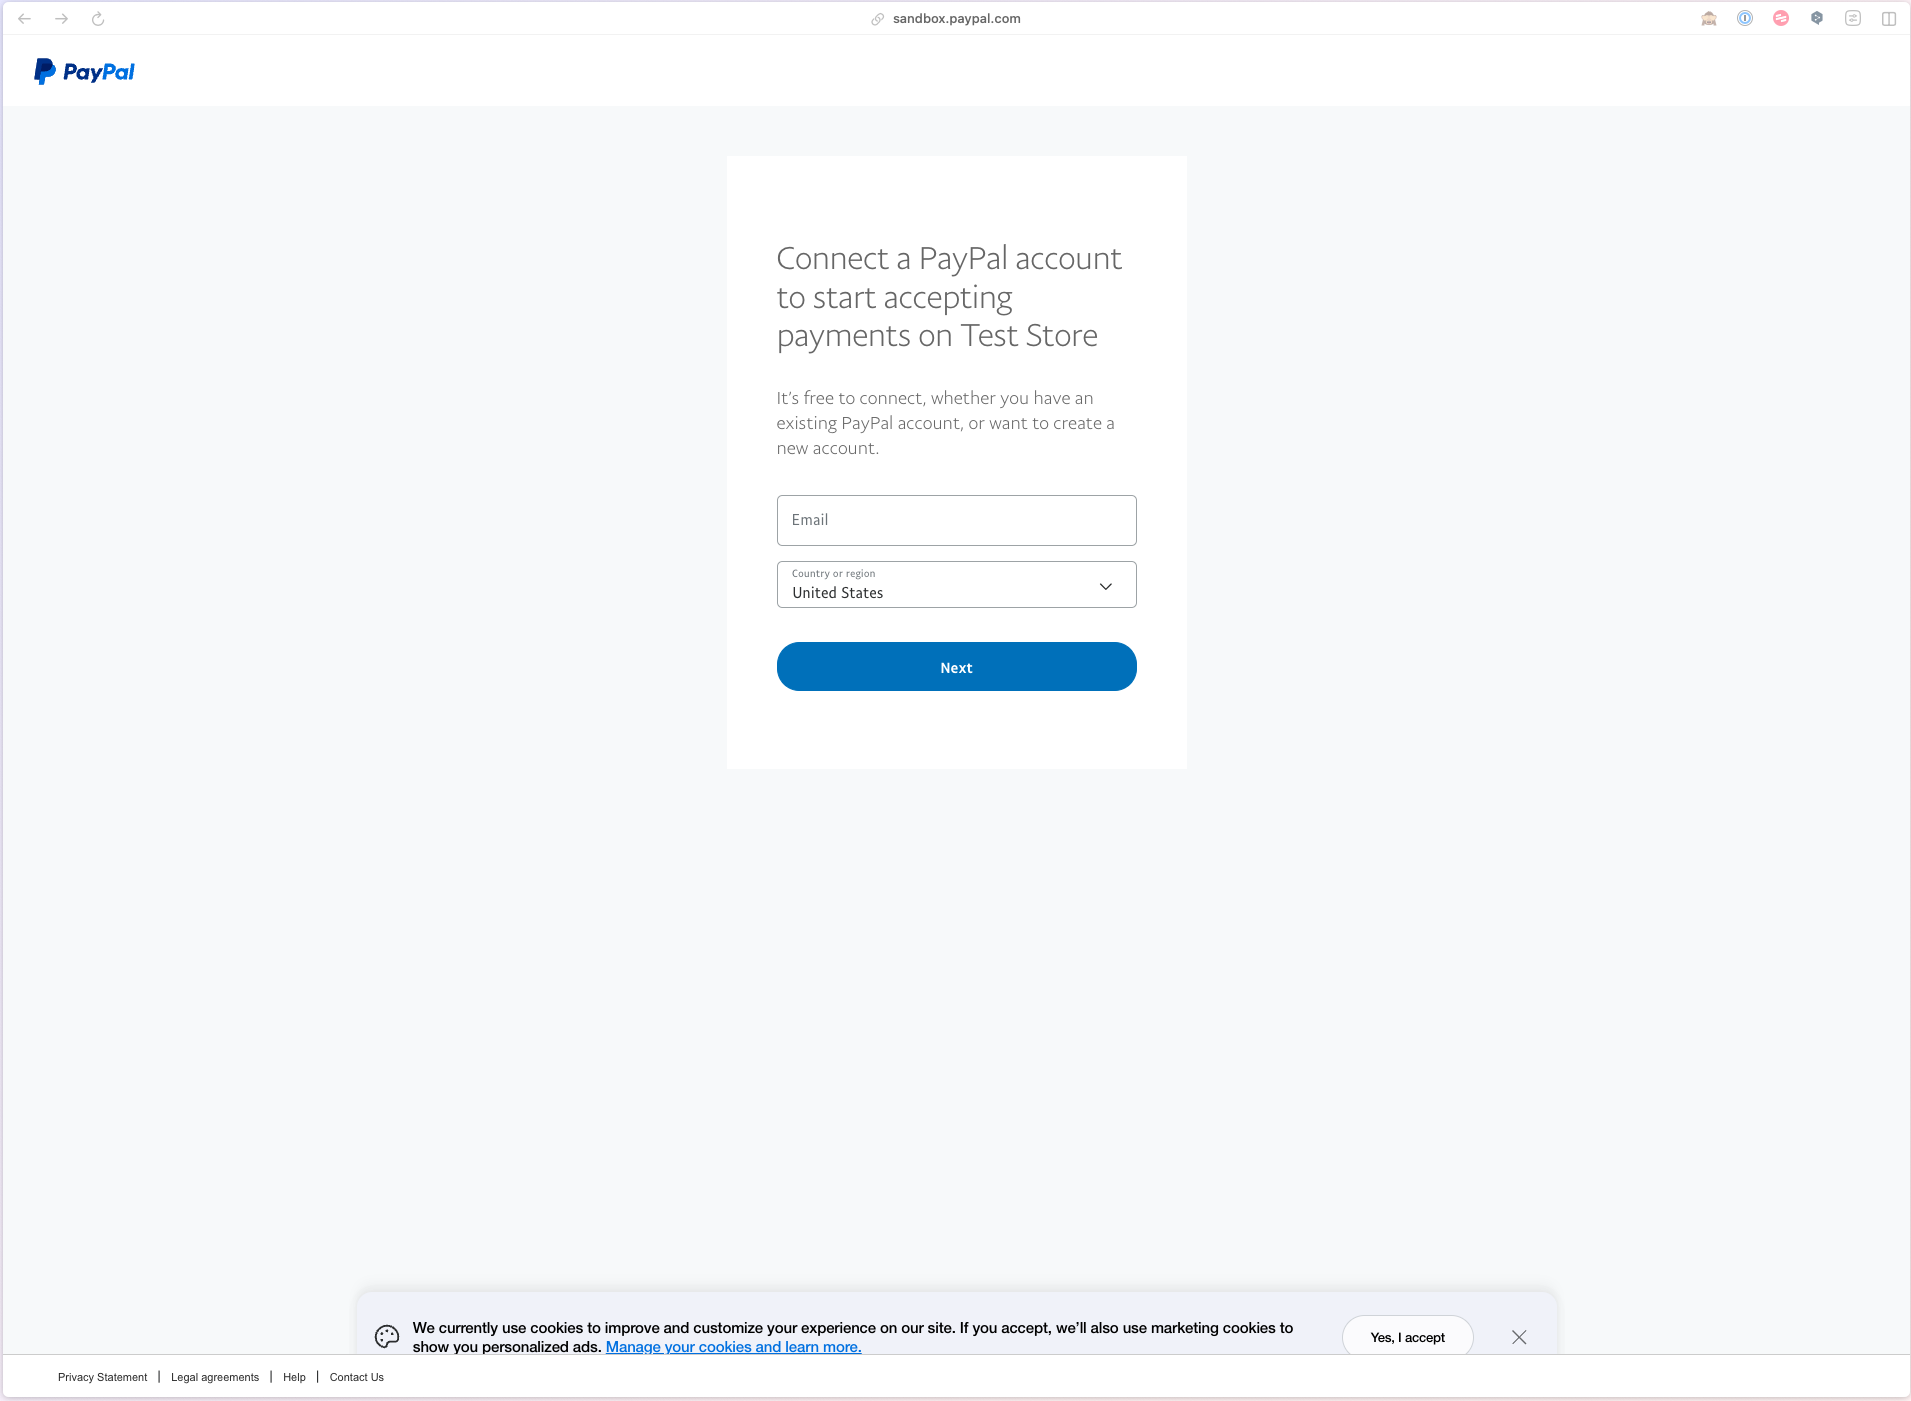
7. Follow the on-screen instructions in the PayPal popup to grant permission for Odoo to connect to your account.
8. Once finished, the popup will close automatically. You will be returned to Odoo, and the Credentials tab will now be filled in with your Merchant ID, Client ID, and other details.
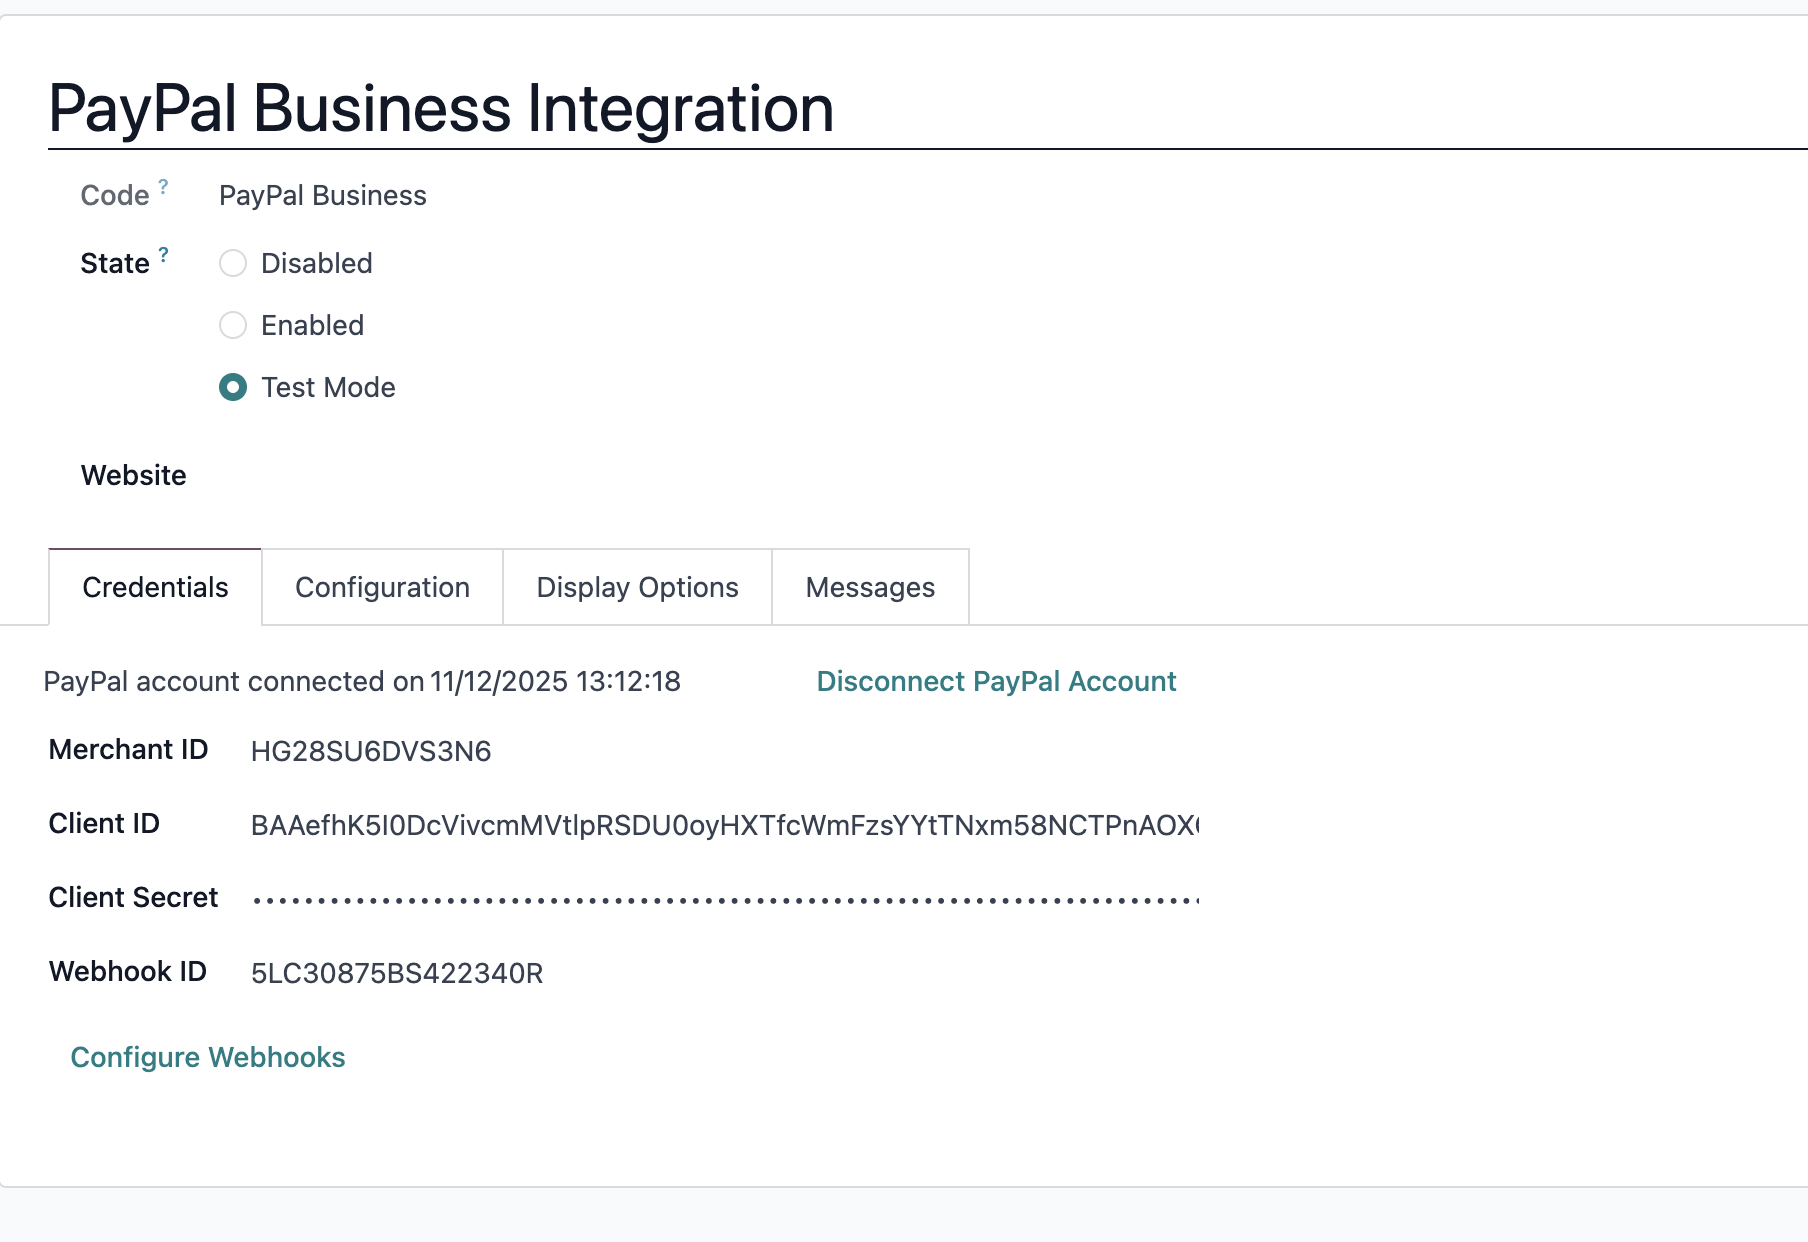
Your account is now connected! The final step is to click Publish (top) to make the payment method available to your customers.
2. Configuring Your Payment Options
You have full control over which payment methods are offered. On the same PayPal Business Integration provider form, click the Configuration tab.
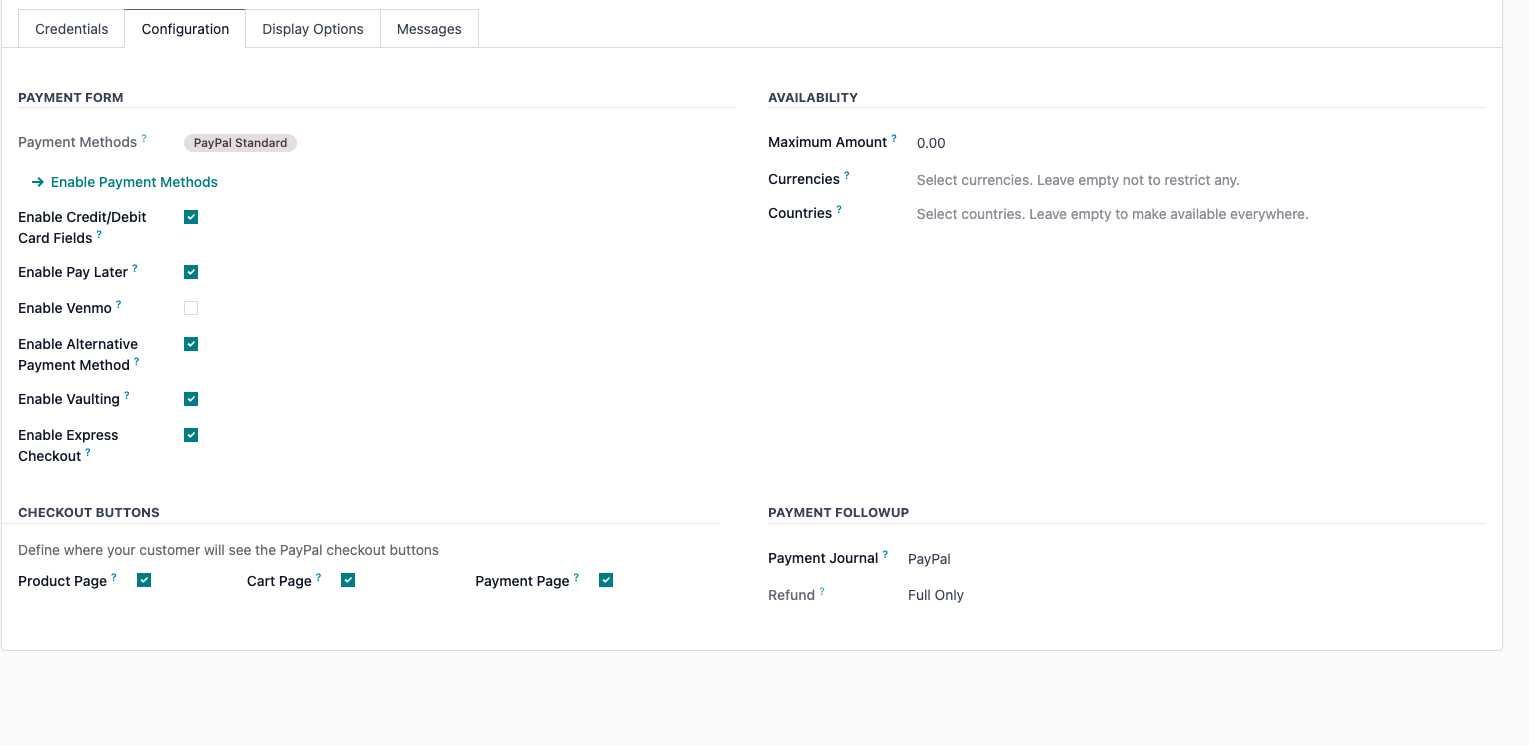
Here you can toggle the main payment types on or off:
Enable Credit/Debit Card Fields: Check this to allow customers to type their credit card details directly on your Odoo checkout page.
Enable Pay Later: Check this to offer PayPal's "Pay in 4" or "Pay Monthly" installment options to your customers. This is a powerful way to increase sales.
Enable Venmo: (For US merchants) Check this to allow customers in the US to pay with their Venmo account.
Enable Alternative Payment Method: Check this to automatically show local payment methods to international customers (e.g., iDEAL in the Netherlands, Bancontact in Belgium).
Enable Vaulting: Highly recommended. Check this to allow your customers to securely save their payment methods (PayPal, Venmo, or credit card) for faster checkout on future purchases.
Enable Express Checkout: Check this to show PayPal buttons on your Product and Cart pages (not just the final payment page), allowing for a quicker checkout process.
Payment Follow-up
Select which journal you want to create the transaction on. Default to PayPal.
3. Customizing Your Website's Appearance
You can control how PayPal's messages appear on your website. Go to the Display Options tab.
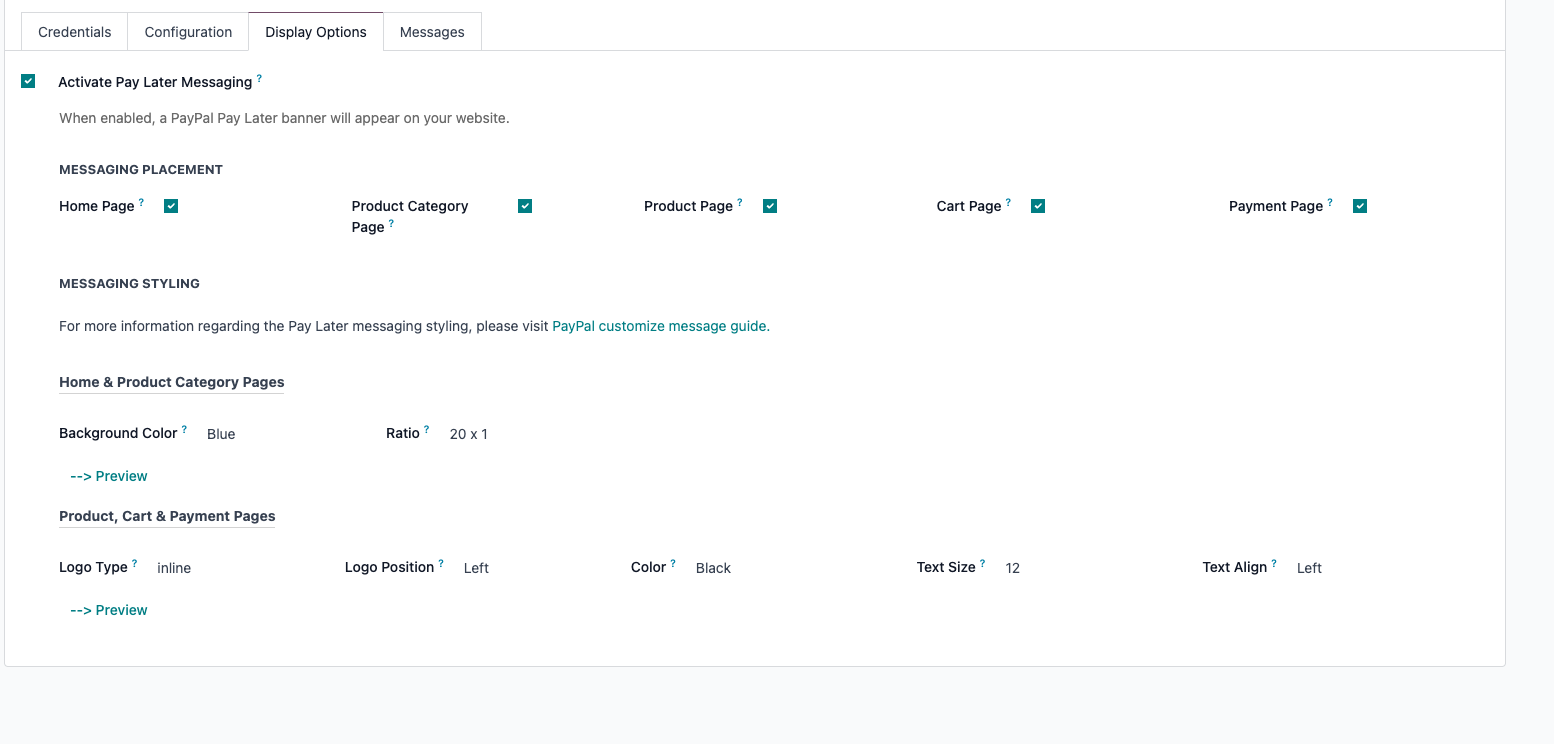
Pay Later Messaging
If you enabled "Pay Later," you can promote it across your site:
Activate Pay Later Messaging: Check this box to turn on promotional banners.
Messaging Placement: Check the boxes for every page where you want to show a Pay Later banner (e.g., Home Page, Product Page, Cart).
Messaging Styling: Customize the look of the banners (color, ratio) and text messages (logo, text color, size) to match your site's branding. You can click the --> Preview button to see how it will look.
Venmo Messaging
If you enabled "Venmo," you can add a simple message to your site:
Activate Venmo Messaging: Check this to show a "We accept Venmo" message.
Messaging Placement: Choose where on your site this message should appear.
4. How Your Customers Pay
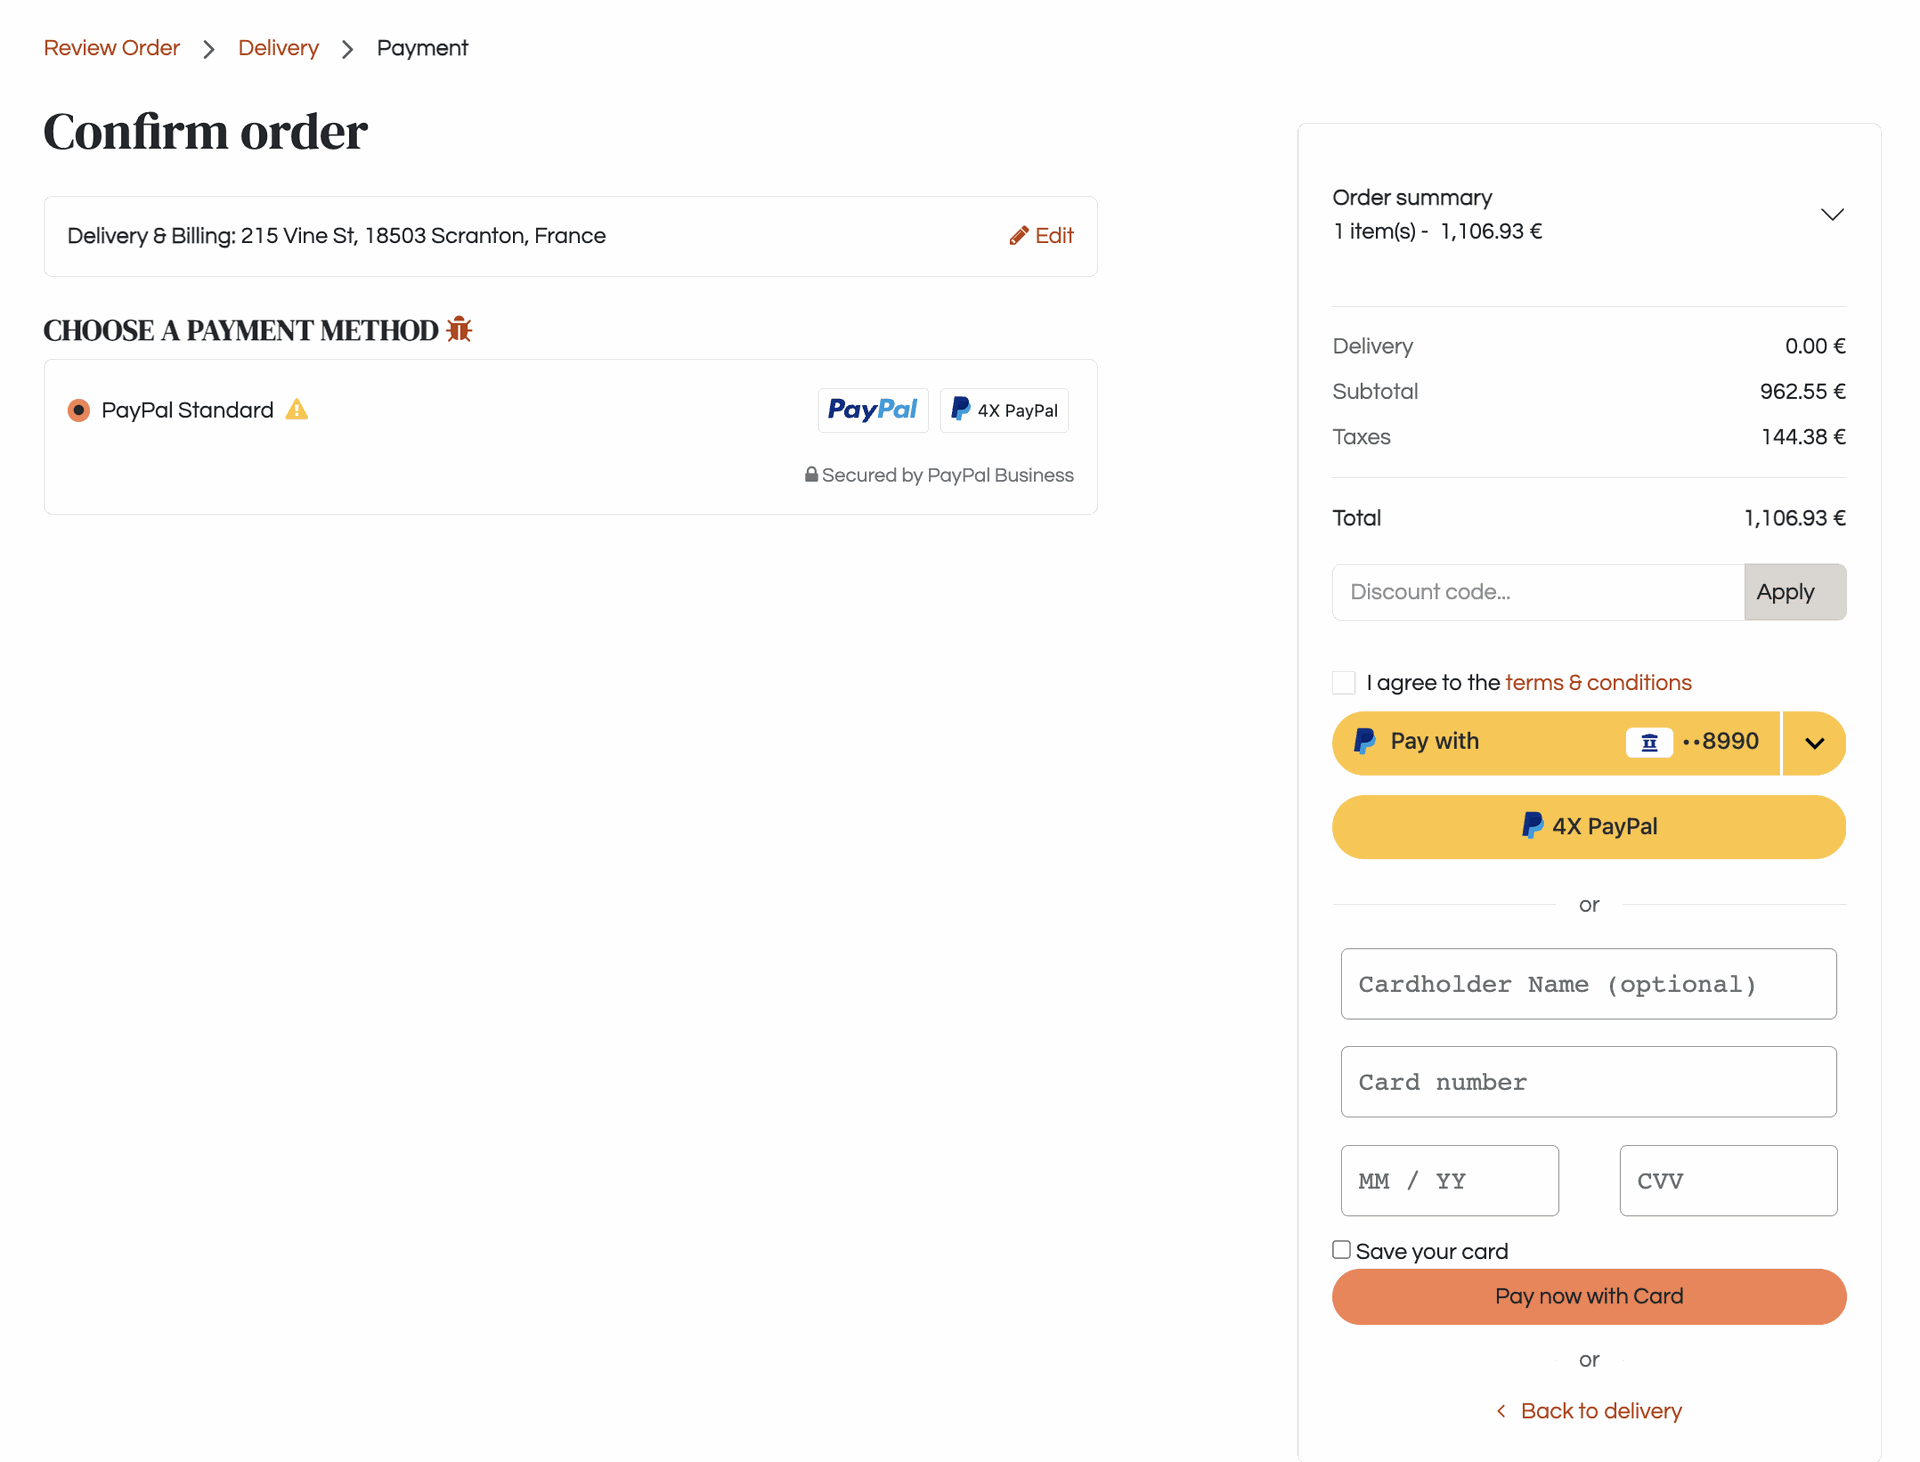
Once published, your customers will see the new payment options during checkout.
Standard Checkout: On the final payment page, the customer will see all the options you enabled, such as PayPal, Pay Later, and the credit card fields.
Express Checkout: If you enabled this, customers will see a PayPal button earlier in the process, on the Product and Cart pages. When they click it, they log in to PayPal, approve the payment, and are returned to Odoo to review their shipping and confirm the final order.
Saving a Payment: If "Vaulting" is on, a logged-in customer paying with a credit card will see a "Save your card" checkbox. Their PayPal and Venmo accounts can also be saved for future use.
5. Managing Saved Payment Methods (Customer Portal)
Customers who create an account on your website can manage their saved payment methods.
The customer logs in to their account and navigates to My Account.
They click on Payment Methods.
On this page, they can:
See a list of all their saved PayPal accounts, Venmo accounts, and credit cards.
Set a Default PayPal or Venmo account for future one-click payments.
Delete any payment method they no longer want to use.

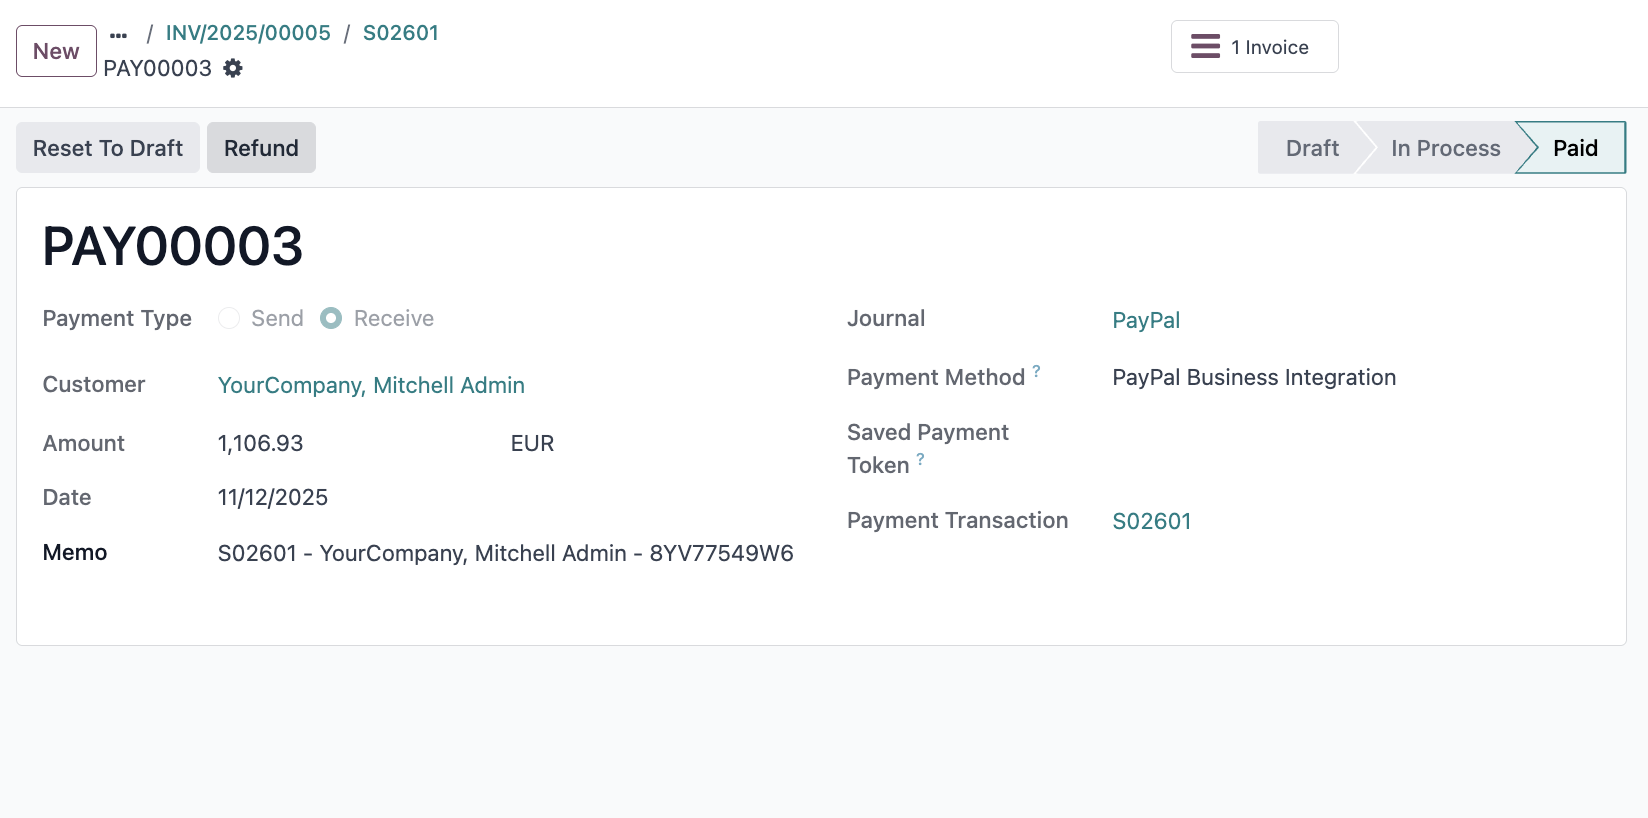
6. Managing Payments as an Admin
Issuing a Refund
You can refund a customer's PayPal payment directly from Odoo.
Open the Sales Order that was paid for.
Click the Transaction smart button.
Open the transaction record (it should be in a "Done" state).
Click the REFUND button. This will process the refund through PayPal and create a corresponding refund transaction in Odoo.
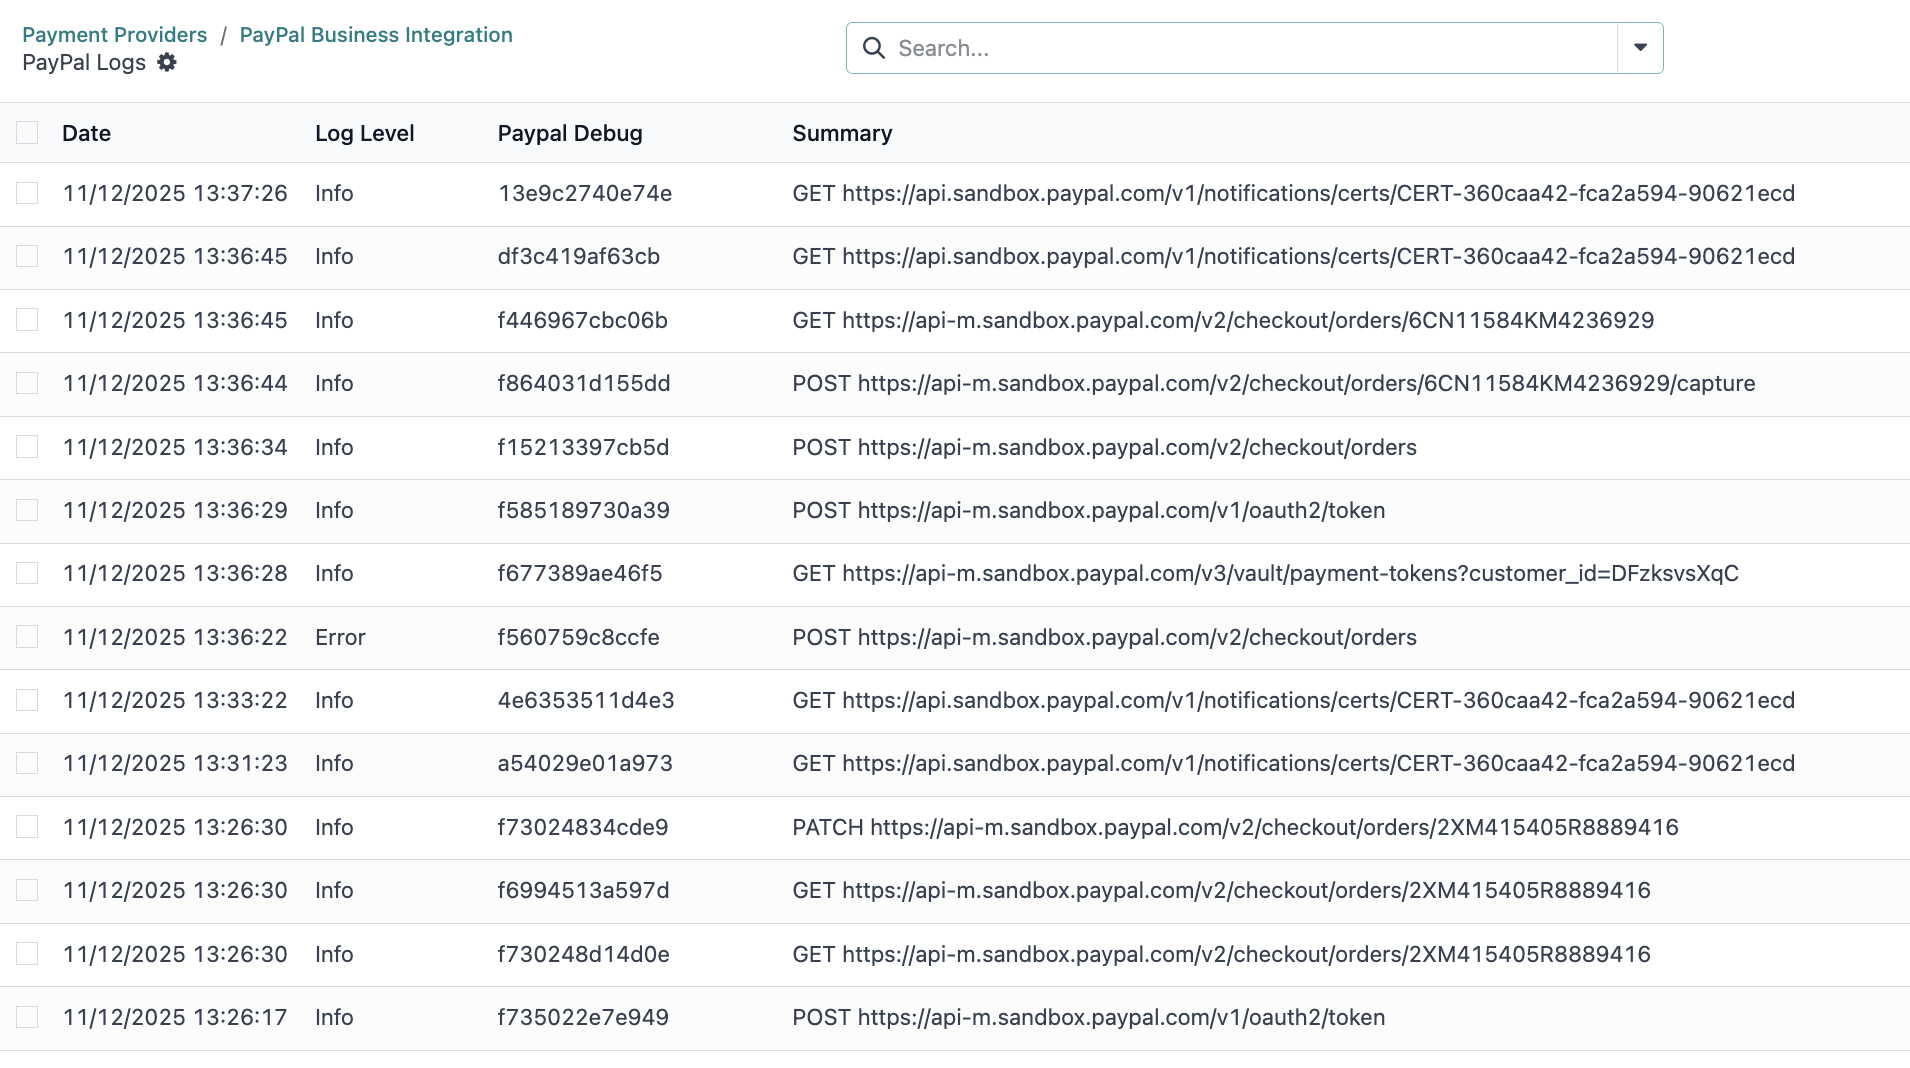
Troubleshooting: Logs and Queues
If you ever need to troubleshoot an issue, you have two powerful tools on the PayPal Provider form:
Logs (Smart Button): Click the Logs button to see a complete history of all API requests sent to PayPal and the responses received.
Queue (Smart Button): Click the Queue button to see the list of incoming webhooks from PayPal. This queue ensures that no updates (like a payment confirmation) are missed, even if your site is temporarily down.