DATEV <> Odoo integration : User documentation
The following documentation will provide you with the information you need to use the much. DATEV <> Odoo integration. The objective is to get you familiarised with the integration by providing relevant information as to the main business processes it covers, and how you can configure it to best suits your needs.
Do you need support with our module? Open a ticket
Pre-requisites
Required subscriptions (only for API)
Required DATEV Subscriptions.
For a client (company) to appear as accessible and functional via the API, the client registered in the DATEV datacenter must be subscribed to one of the following online data services. Without one of these, you cannot perform accounting actions (like sending invoices or documents). Additionally, the user getting the access token to sent the data must have the correct access rights to these services.
- Client registration
You must ask your tax advisor to order for your client number one of the following services :
- DATEV Buchungsdatenservice [Recommended]
Full accounting integrations. Allows transferring booking data (transactions), master data, and document images between Odoo and DATEV
- DATEV Rechnungsdatenservice 1.0 or 2.0
Allows uploading PDF images to DATEV Unternehmen online.
(Note: The older "Rechnungsdatenservice 1.0" is more limited and generally used only for simple document uploads to Unternehmen online, but 2.0 is the standard for modern API integrations).
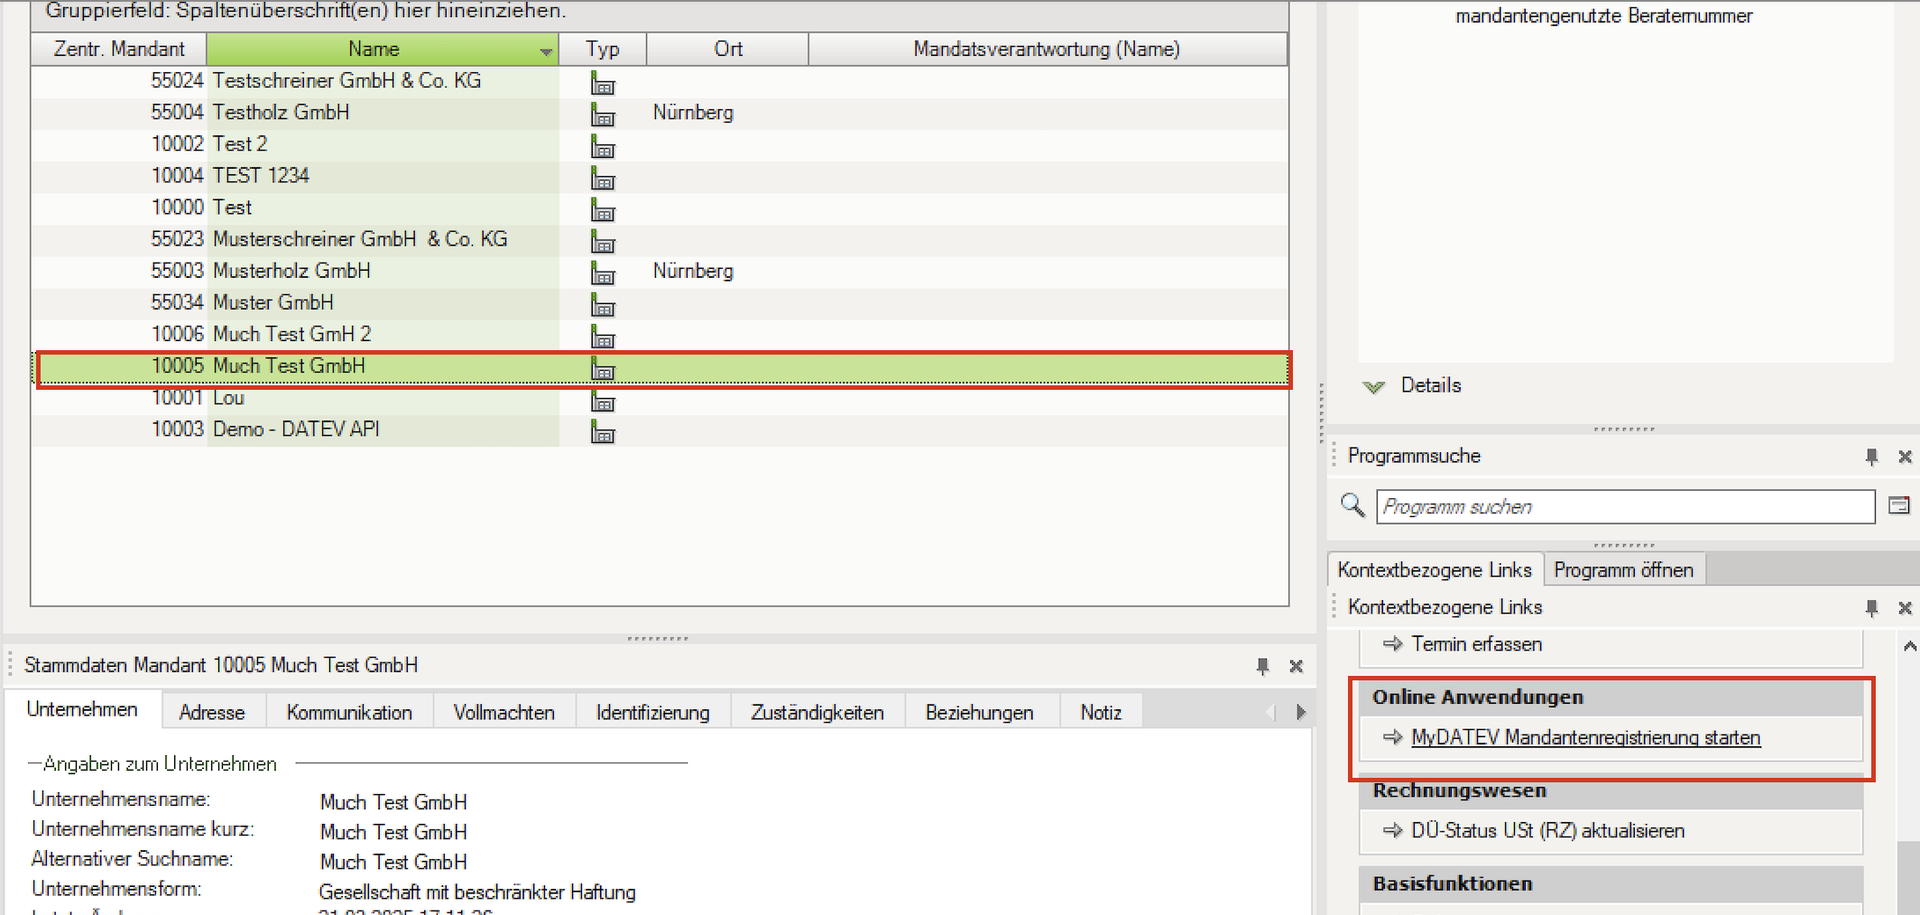
The order for these services can be done in DATEV Arbeitsplatz under → MyDATEV Mandantenregistrierung starten
2. User rights
Once your client number is subscribed to the required services, you must have a way to authenticate to DATEV via Odoo. This is usually done via DATEV SmartCard / DATEV mIDentity or DATEV SmartLogin.
The user that will authenticate must be given access rights to use the ordered services, otherwise the access token won't enable the integration to send data to DATEV.
Giving user rights can is done via DATEV Rechteverwaltung online.
Required much. Subscription.
When you purchase the DATEV API module from much. you'll receive an API key by email (1 by Odoo instance used)
Store this key securely, as it will be needed during the integration setup.
Odoo dependencies
To use the much. Odoo to DATEV Integration please make sure that in your database you have the following Odoo standard modules :
- Accounting - account_accountant
- Germany Accounting - l10n_de
Install the modules
Install the integration modules
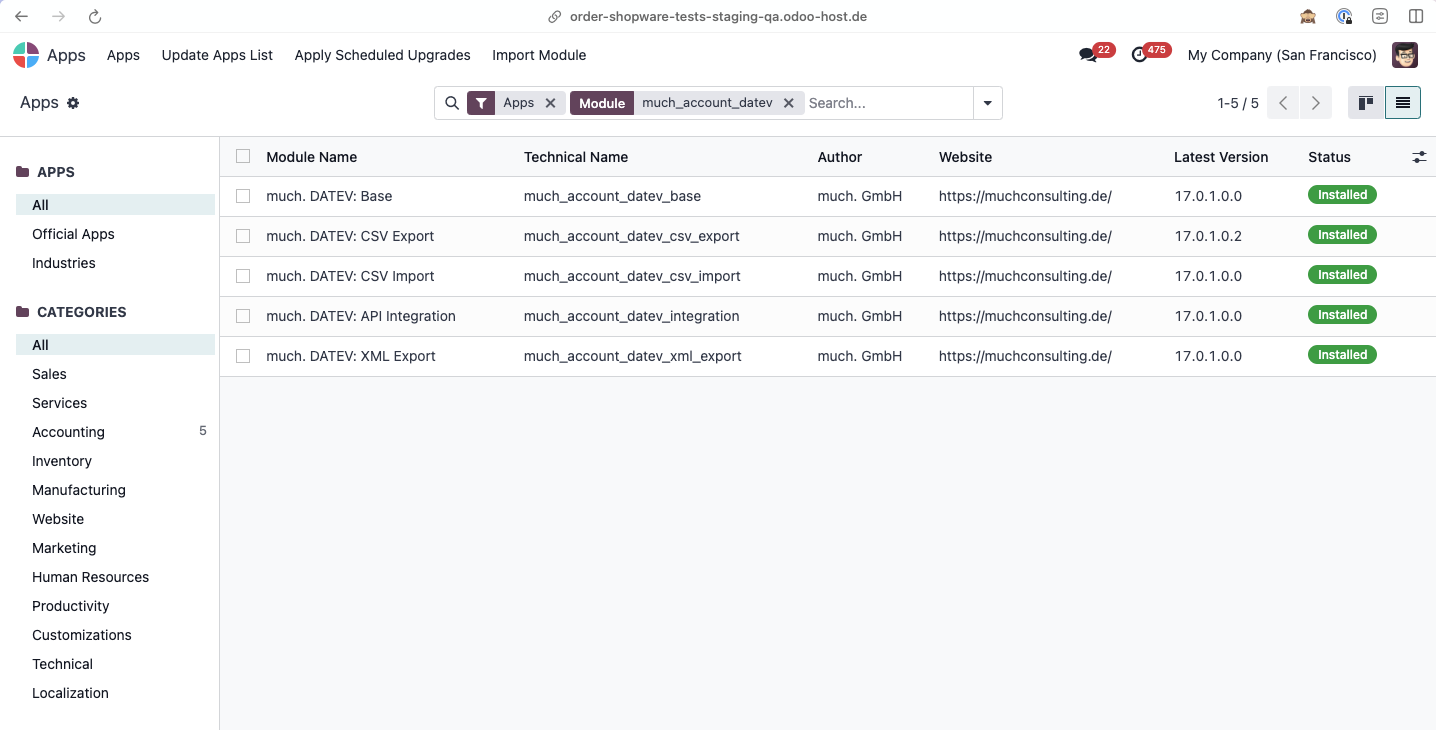
From the Apps, install the following modules :
- much_account_datev_base
- much_account_datev_csv_export
- much_account_datev_csv_import
- much_account_datev_xml_export
- much-integration-hub (*)
- much-notify (*)
- much-datev-integration (*)
(*)Only if you purchased the API export.
Activate the integration (Only for API)
- Go to Integration Hub > Settings and make sure the following settings are enabled :
- iHub Logs
- Info
- Debug
- Warning
- iHub Jobs
- iHub Queue

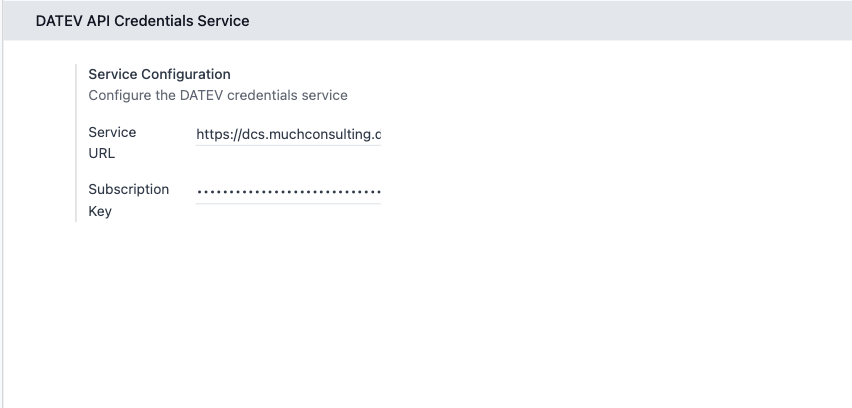
- Go to DATEV Export, scroll to the bottom of the page and add the Subscription key received by email for the related Odoo instance.
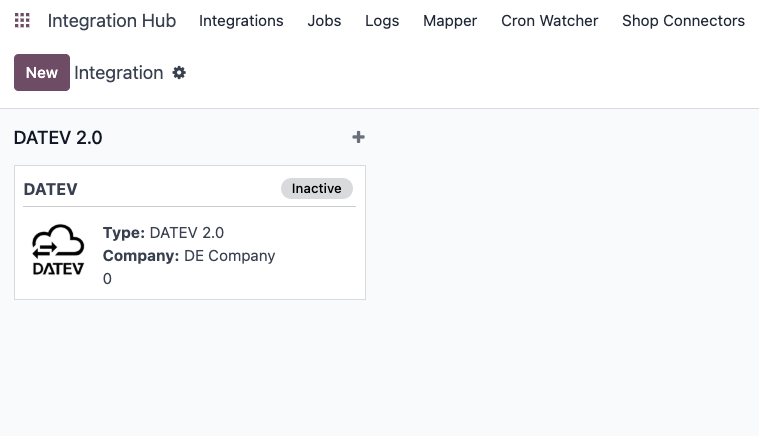
- Back to the Integrations tab, click New
- Add an integration name.
- In the Integration Type field, select DATEV.
- In the Company field, select the Odoo company that this integration will be applied to.
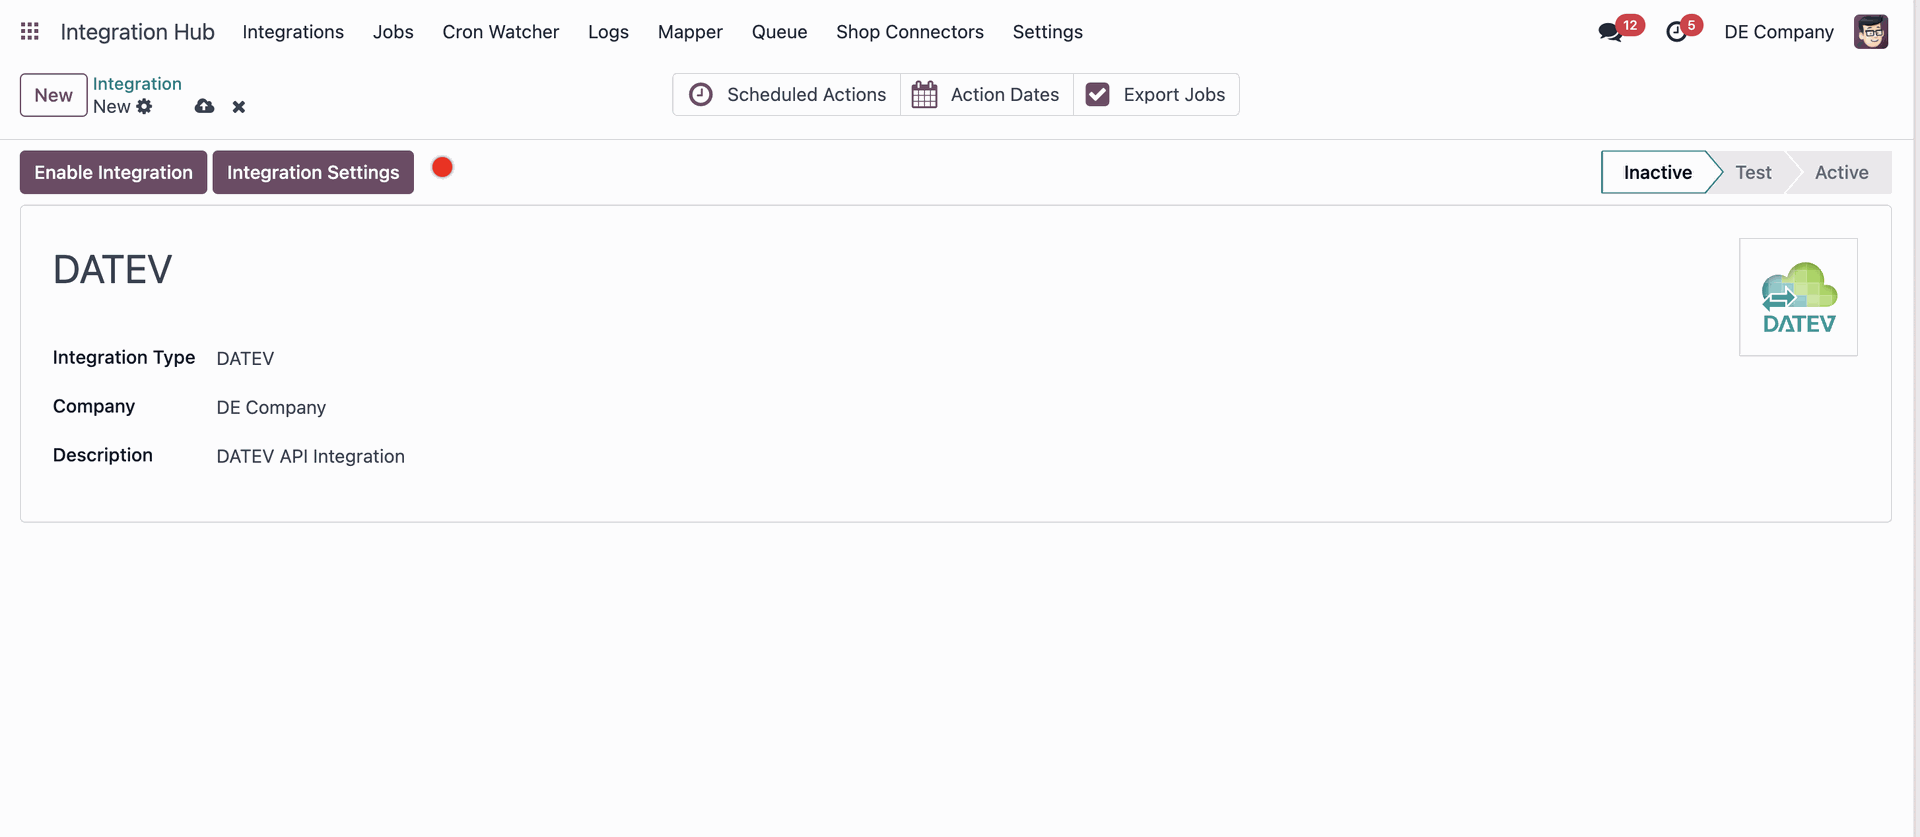
- Click Save.
Configuration
The much. Odoo to DATEV Integration allows you to export master data, transaction data and PDF documents. The export can be configured to match your accounting needs.
Consultant & Client number
To start using the integration, as well as export DATEV compliant files, you must fill in your DATEV consultant and client number. To do so :
- Go to Settings > Users & Companies > Companies.
- In the company form, fill out the L10N De Datev Consultant Number and L10N De Datev Client Number fields.
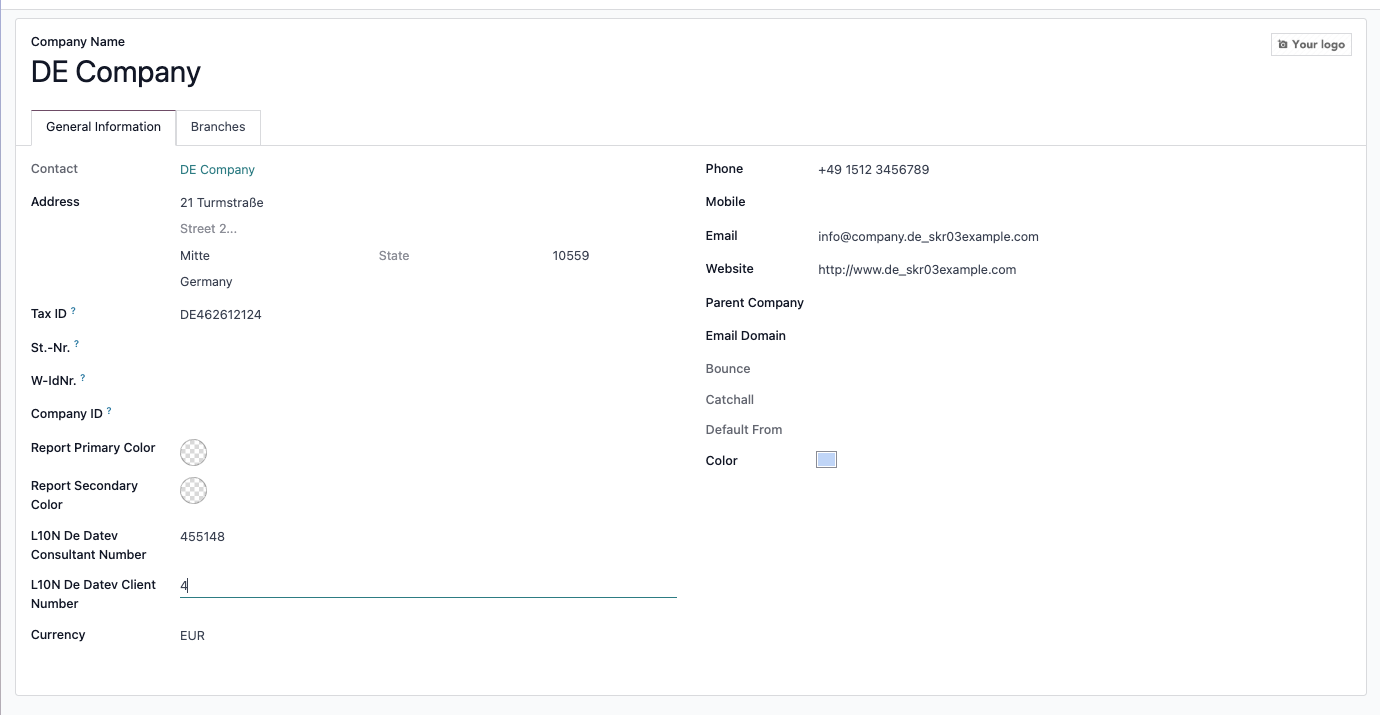
- Click Save.
DATEV Settings
To configure the structure of the file that will be sent to DATEV via API or manually exported, please navigate to Settings > DATEV Export.
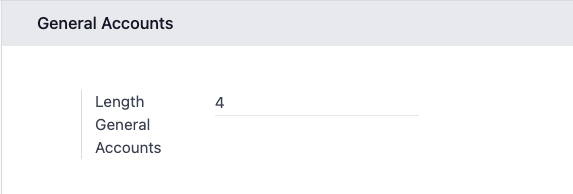
General Accounts
- Length General Accounts : configure the length of the account codes. The length must match the one used in DATEV by your tax accountant. If the code length has more digits than in Odoo, the account code will be extended by 0 in the end.
Settings for account length in Odoo
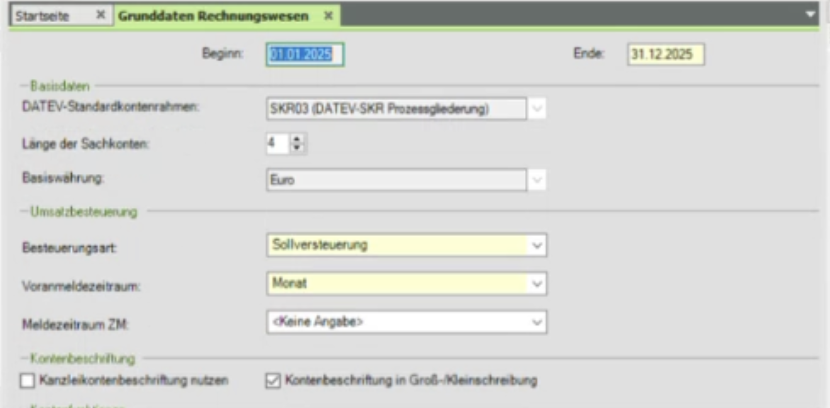
Settings for account length in DATEV
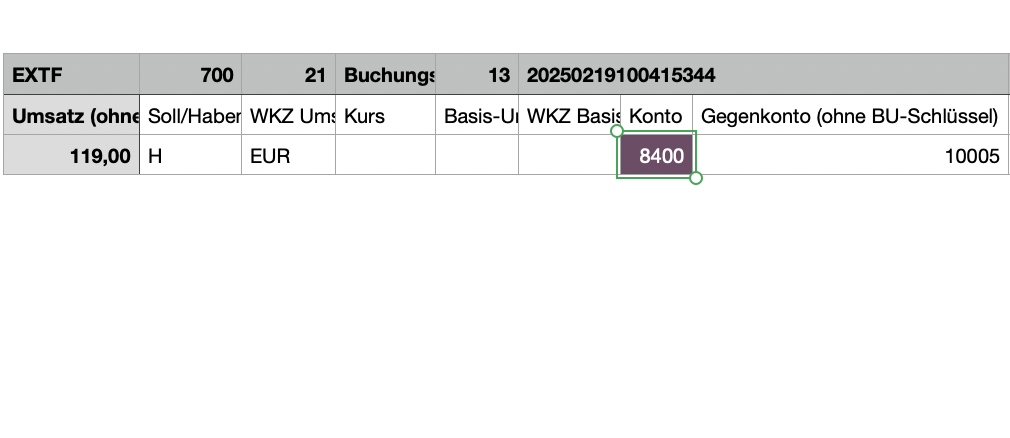
Example of export with length 4

Example of export with length 5
Personal Accounts
- Direct bookings : exports entries booked directly on receivable/ payable accounts instead of the partner account.
- Receivable format : range at which the generation of debtor numbers should start.
- Payable format : range at which the generation of creditor numbers should start.
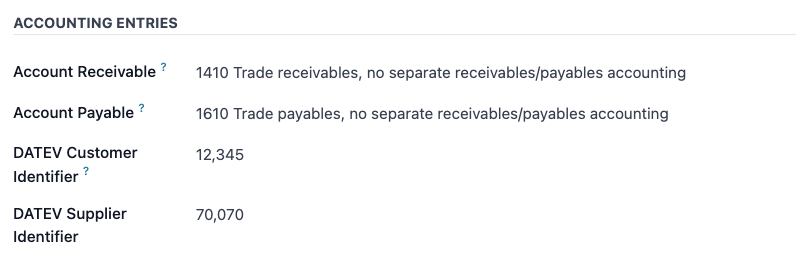
Example of DATEV partner identifiers for ranges 10,000 and 70,000
- DATEV partner number generation : select if you want the number automatically generated on posting of first entry (default) or during the first export.
The generation will automatically set the number to the lowest available number within the range.
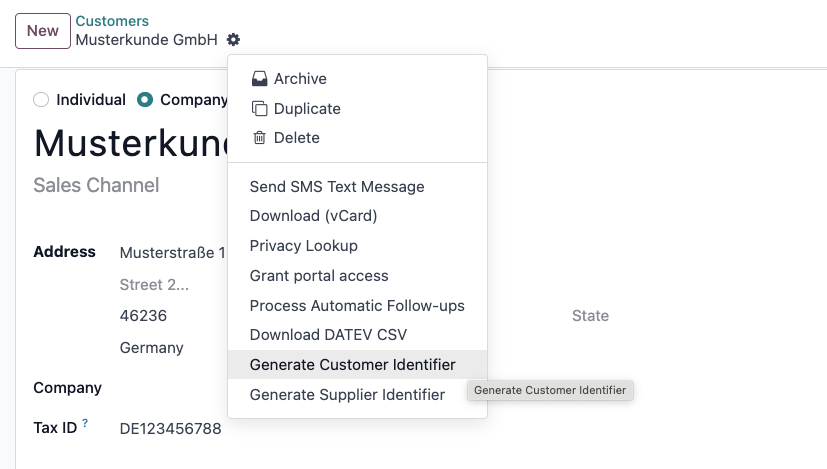
You can also generate this numbers on a given partner by going to the contact actions and clicking "Generate Customer Identifier" (debtor number) or "Generate Supplier Identifier" (creditor number) :
Column Configuration
The module allows you to edit the columns that will be exported in the accounting entries and master data files.
- List of columns in the DATEV export for accounting entries.
By default, all the field supported by DATEV are present as headers. The integration currently assign values to the following fields :
| Col. | Header (DE) | Value Name (UI Display) | Technical Value Name | Odoo Field & Export Logic |
| A | Umsatz (ohne Soll/Haben-Kz) | Bruttowert | gross_value | The line's gross amount (total with tax), formatted as a German decimal (e.g., "119,00"). |
| B | Soll/Haben-Kennzeichen | Soll/Haben Kennzeichen | soll_haben | A letter indicating debit/credit: 'S' (Soll/Debit) or 'H' (Haben/Credit). |
| C | WKZ Umsatz | Währung | currency | The 3-letter currency code (e.g., "EUR") from the journal entry line. |
| D | Kurs | Kurs | rate | The exchange rate, formatted as a German decimal. Only filled if the line's currency is different from the company's currency. |
| E | Basis-Umsatz | Basisumsatz | amount_currency | The line's amount converted to the company's base currency. Only filled for foreign currency lines. |
| F | WKZ Basis-Umsatz | Fremdwährung | foreign_currency | The company's currency code (e.g., "EUR"). Only filled if the line's currency is not the company currency. |
| G | Konto | Konto | account | The account code for the journal item line (e.g., "4400"). |
| H | Gegenkonto (ohne BU-Schlüssel) | Gegenkonto | counteraccount | The counter-account code (Gegenkonto), which is the move's main balancing account (e.g., the partner's AR/AP account). |
| I | BU-Schlüssel | Buchungsschlüssel | bookingkey | The DATEV Tax Key (BU-Schlüssel). This is automatically calculated based on the line's tax configuration. |
| J | Belegdatum | Datum (DDMM) | date_ddmm | The Belegdatum (document date) from the journal move, formatted as DDMM (e.g., "2810"). |
| K | Belegfeld 1 | Rechnungsnummer für Auszifferung | reconciled_entry_number | The reference for clearing/reconciliation. For bank entries, it's the reconciled invoice number. For purchase bills, it's the Vendor Reference (ref). |
| L | Belegfeld 2 | Datum | date | The line's Due Date (date_maturity). It's only filled if the account and counteraccount are the same. |
| M | Skonto | Skonto | discount_amount_currency | The discount amount on the line (discount_amount_currency), formatted as a German decimal. |
| N | Buchungstext | Rechnungszeilenname | account_move_line_name | The Label from the journal item line. If multiple lines are grouped (e.g., same product and tax), their labels are joined. |
| O-S | ... | (empty) | Not set by default. | |
| T | Beleglink | GUID | datev_guid | The Beleglink. This is the unique GUID from the invoice's datev_guid field, formatted as BEDI "...". |
| U-AJ | ... | (empty) | Not set by default. | |
| AK | KOST1 - Kostenstelle | KOST1 | datev_analytic_plan_acc_1 | The analytic account code mapped to KOST1 in the DATEV settings. |
| AL | KOST2 - Kostenstelle | KOST2 | datev_analytic_plan_acc_2 | The analytic account code mapped to KOST2 in the DATEV settings. |
| AM | Kost-Menge | (empty) | Not set by default. | |
| AN | EU-Mitgliedstaat u. UStID | EU-Mitgliedstaat u. UStID | partner_vat | The partner's VAT number. Only filled if the partner is in a non-German EU country. |
| AO | EU-Steuersatz | EU-Steuersatz | aml_tax_ids | The tax rate (e.g., "19,00"). Only filled if the partner is in a non-German EU country. |
| AP-CR | ... | (empty) | Not set by default. | |
| DK | Leistungsdatum | Leistungsdatum | service_date | Optional: Not implemented by default (provides an empty string). |
| DL | Datum Zuord. Steuerperiode | Datum Zuord. Steuerperiode | tax_report_date | Optional: Not implemented by default (provides an empty string). |
| DM | Fälligkeit | (empty) | Not set by default. | |
| DN | Generalumkehr | Generalumkehr | general_reversal | General Reversal flag. '1' if it's a reversal move with a matching total, '0' otherwise. |
| DO-DR | ... | (empty) | Not set by default. | |
| DS | EU-Mitgliedstaat u. UStID | EU-Mitgliedstaat u. UStID (Company) | company_vat | The company's VAT number. Only filled if the partner is in a non-German EU country. |
| DT | U-Steuersatz (Ursprung) | U-Steuersatz (Ursprung) | fiscal_tax | The original tax rate (as a German decimal) before any fiscal position mapping was applied. |
| DU | Abw. Skontokonto | (empty) | Not set by default. |
Additional Accounting Entry Fields
These are the fields available in the module that are not included in the default export setup. You can add them to your export configuration.
| Value Name (UI Display) | Technical Value Name | Odoo Field & Export Logic |
| Auftragsnummer | order_number | The Sales Order name (invoice_origin) associated with the line. |
| Buchungssatzreferenz | bookingreference | The Belegfeld 1 value. For purchase bills, this is the ref (Vendor Reference). For all others, it's the Odoo invoice/move name. |
| Zahlungsreferenz | paymentreference | The Payment Reference (payment_reference) field from the invoice. |
| Journal ID | journal_id | The database ID of the Odoo Journal (e.g., 7). |
| Journalname | journal_name | The user-facing name of the Odoo Journal (e.g., "Customer Invoices"). |
| Kontoname | account_name | The user-facing name of the line's account (e.g., "Product Sales"). |
| Lieferadresse (Land) | shipping_address_country | The 2-letter country code of the partner's shipping address. |
| Partnername | partner_name | The name of the partner on the journal move line. |
| Rechnungsaddresse (Land) | invoice_address_country | The 2-letter country code of the partner's invoice address. |
| Rechnungsname | account_move_name | The Display Name (display_name) of the journal move (e.g., "INV/2024/00001"). |
| Rechnungsnummer | inv_number | The Invoice Name (name) of the journal move, with spaces removed. |
| Kostenstelle 1 (Code) | cost_centre_1 | Deprecated. Provides an empty string. |
| Kostenstelle 2 (Code) | cost_centre_2 | Deprecated. Provides an empty string. |
| Kostenstelle 1 (Name) | cost_centre_1_name | Deprecated. Provides an empty string. |
| Kostenstelle 2 (Name) | cost_centre_2_name | Deprecated. Provides an empty string. |
| Dateiname | filename | The filename of the system-generated PDF attachment for the invoice (invoice_pdf_report_id). |
| Rechnungsdatum | invoice_date | The Invoice Date (invoice_date) from the move, formatted as DDMM. |
| Buchungstyp | booking_type | The booking type. "AA" (down payment), "SR" (customer invoice), or "SO" (other). |
- List of columns in the DATEV export for master data.
By default, all the field supported by DATEV are present as headers. The integration currently assign values to the following fields :
| Col. | Header (DE) | Value Name (UI Display) | Technical Value Name | Odoo Field & Export Logic |
| A | Konto | Konto | code | The partner's DATEV Identifier (e.g., 10001 or 70001) from l10n_de_datev_identifier_customer or l10n_de_datev_identifier. |
| B | Name (AdressatentypUnternehmen) | Name (Firma) | company_name | The partner's Name, but only if the partner is a Company. |
| C | Unternehmensgegenstand | (empty) | (N/A) | Not set by default. |
| D | Name (Adressatentyp natürl. Person) | Name (Person) | person_name | The partner's Name, but only if the partner is an Individual. |
| E | Vorname (Adressatentyp natürl. Person) | Vorname | firstname_person | The partner's First Name (assumes "Firstname Lastname" format). Only for Individuals. |
| F | Name (Adressattyp keine Angabe) | (empty) | (N/A) | Not set by default. |
| G | Adressatentyp | Addressatentyp | natural | The partner type: '1' for Individual (person) or '2' for Company. |
| H | Kurzbezeichnung | (empty) | (N/A) | Not set by default. |
| I | EU-Land | EU-Land | company_country_code | The partner's 2-letter Country Code. Only for Companies. |
| J | EU-USt-IdNr. | EU-USt-IdNr. | company_vat | The partner's VAT number without the country prefix. Only for Companies. |
| K | Anrede | Anrede | partner_title | The partner's Title (e.g., "Mr.", "Mrs."). |
| L-N | ... | (empty) | (N/A) | Not set by default. |
| O | Adressart | Adressart (STR) | hardcoded_str | A hardcoded value that always exports the string "STR". |
| P | Straße | Straße | street | The Street from the partner's address. |
| Q | Postfach | (empty) | (N/A) | Not set by default. |
| R | Postleitzahl | PLZ | zip | The Zip/Postal Code from the partner's address. |
| S | Ort | Ort | city | The City from the partner's address. |
| T | Land | Land | country | The 2-letter Country Code from the partner's address (e.g., "DE"). |
| U-Y | ... | (empty) | (N/A) | Not set by default. |
| Z | Kennz. Korrespondenzadresse | Kennz. Korrespondenzadresse | hardcoded_1 | A hardcoded value that always exports the number '1'. |
| AA-IT | ... | (empty) | (N/A) | All other columns up to "Letzte Frist" are not set by default. |
Additional Partner Data Fields
These are the fields available in the module that are not included in the default export setup. You can add them to your export configuration.
| Value Name (UI Display) | Technical Value Name | Odoo Field & Export Logic |
| The partner's Email (email). | ||
| Nachname | lastname_person | The partner's Last Name (assumes "Firstname Lastname" format). Only for Individuals. |
| SteuerID | vat | The partner's VAT number (vat). |
| Telefon | phone | The partner's Phone number (phone). |
| Website | website | The partner's Website (website). |
| IBAN 1...10 | iban_1...iban_10 | The IBAN (acc_number) from one of the partner's saved Bank Accounts (up to 10). |
| BIC 1...10 | bank_1...bank_10 | The BIC/SWIFT code (bank_id.bic) from one of the partner's saved Bank Accounts (up to 10). |
| Lastschrift IBAN 1...10 | dd_iban_1...dd_iban_10 | The IBAN (partner_bank_id.acc_number) from one of the partner's active SEPA Direct Debit Mandates (up to 10). |
| Lastschrift ID 1...10 | dd_identifier_1...dd_identifier_10 | The Mandate Reference (name) from an active SEPA Mandate. |
| Lastschrift Startdatum 1...10 | dd_start_date_1...dd_start_date_10 | The Start Date (start_date) from an active SEPA Mandate. |
| Lastschrift Enddatum 1...10 | dd_end_date_1...dd_end_date_10 | The End Date (end_date) from an active SEPA Mandate. |
Analytic Account - Export
In the accounting entries export file, you can use columns AK (KOST 1 - Kostenstelle) and AL (KOST 2 - Kostenstelle) to assign cost centers to your entries.
Since DATEV only allows the configuration of 2 cost centers, we allow to configure the corresponding Analytic Plans in Odoo.

Configuration of cost centers in the DATEV export settings
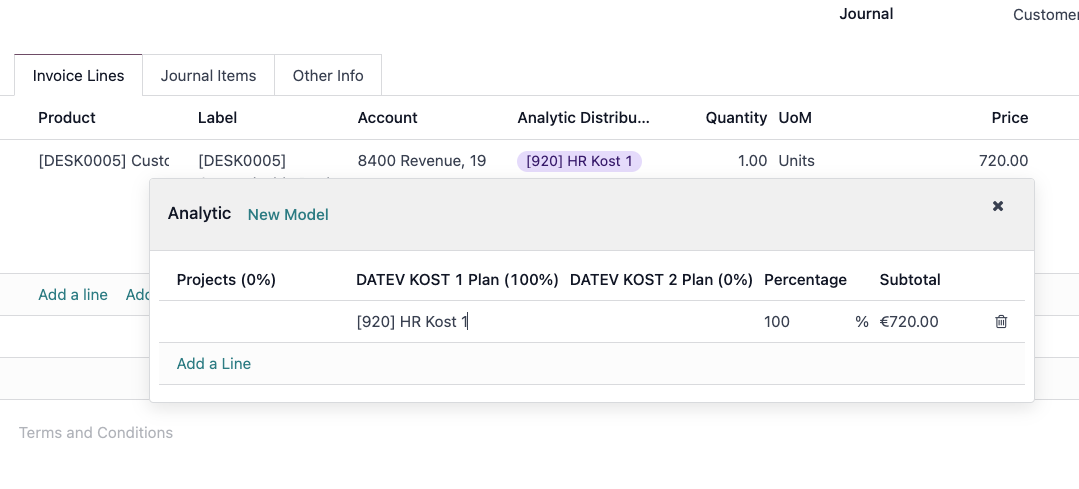
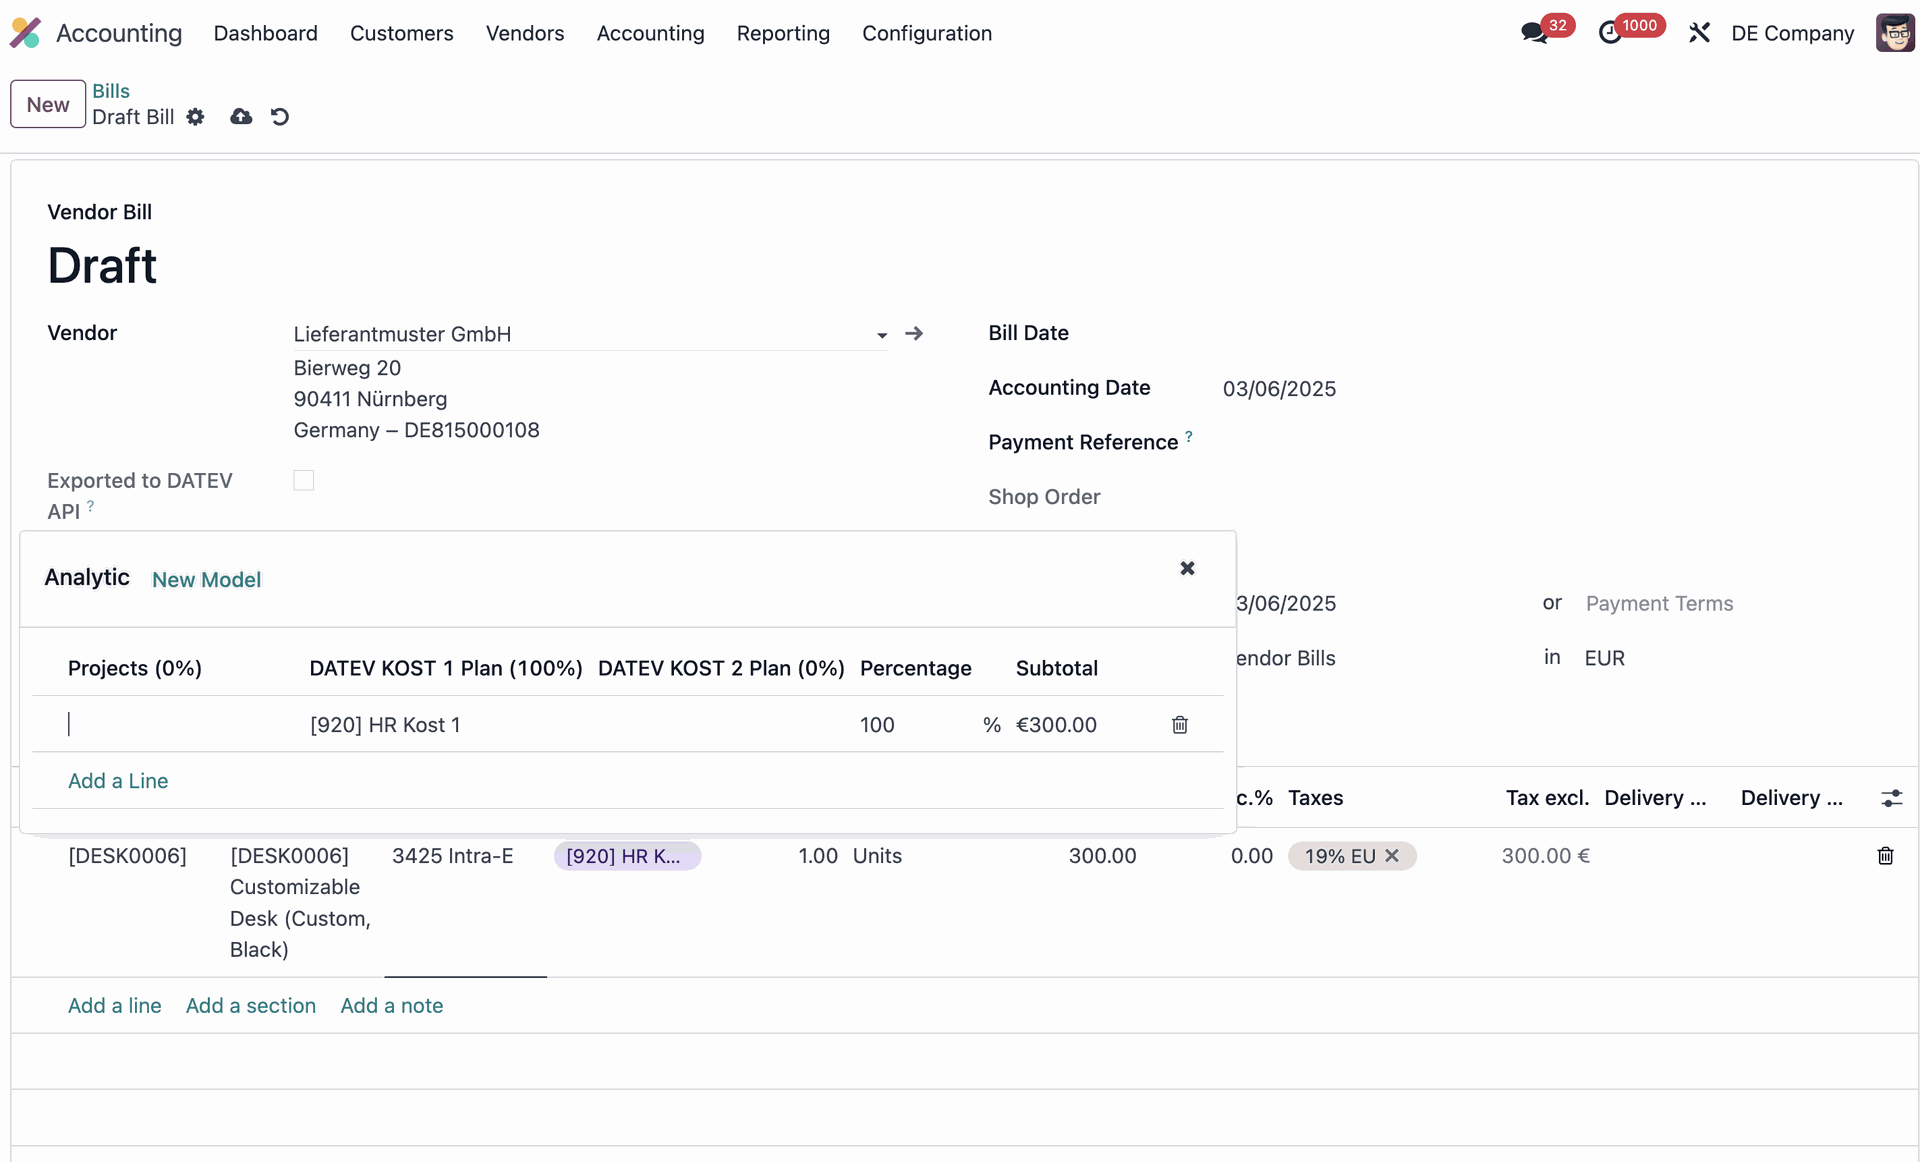
Cost assignment on a vendor bill
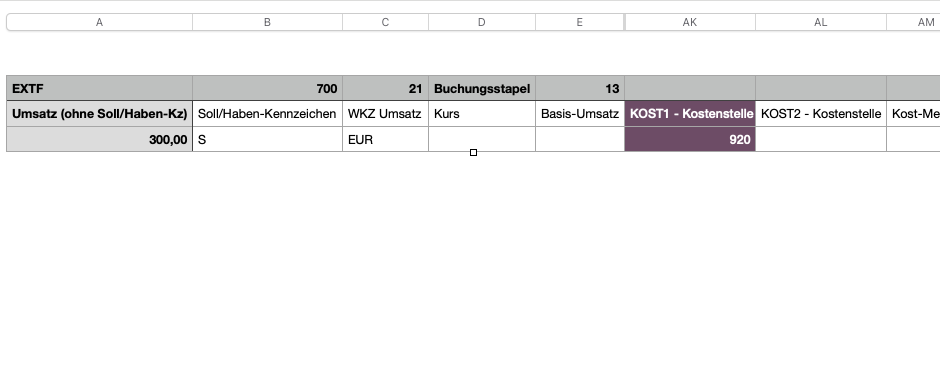
Code of the analytic account in the DATEV export
- After choosing the corresponding Odoo plans, you can't edit the configuration.
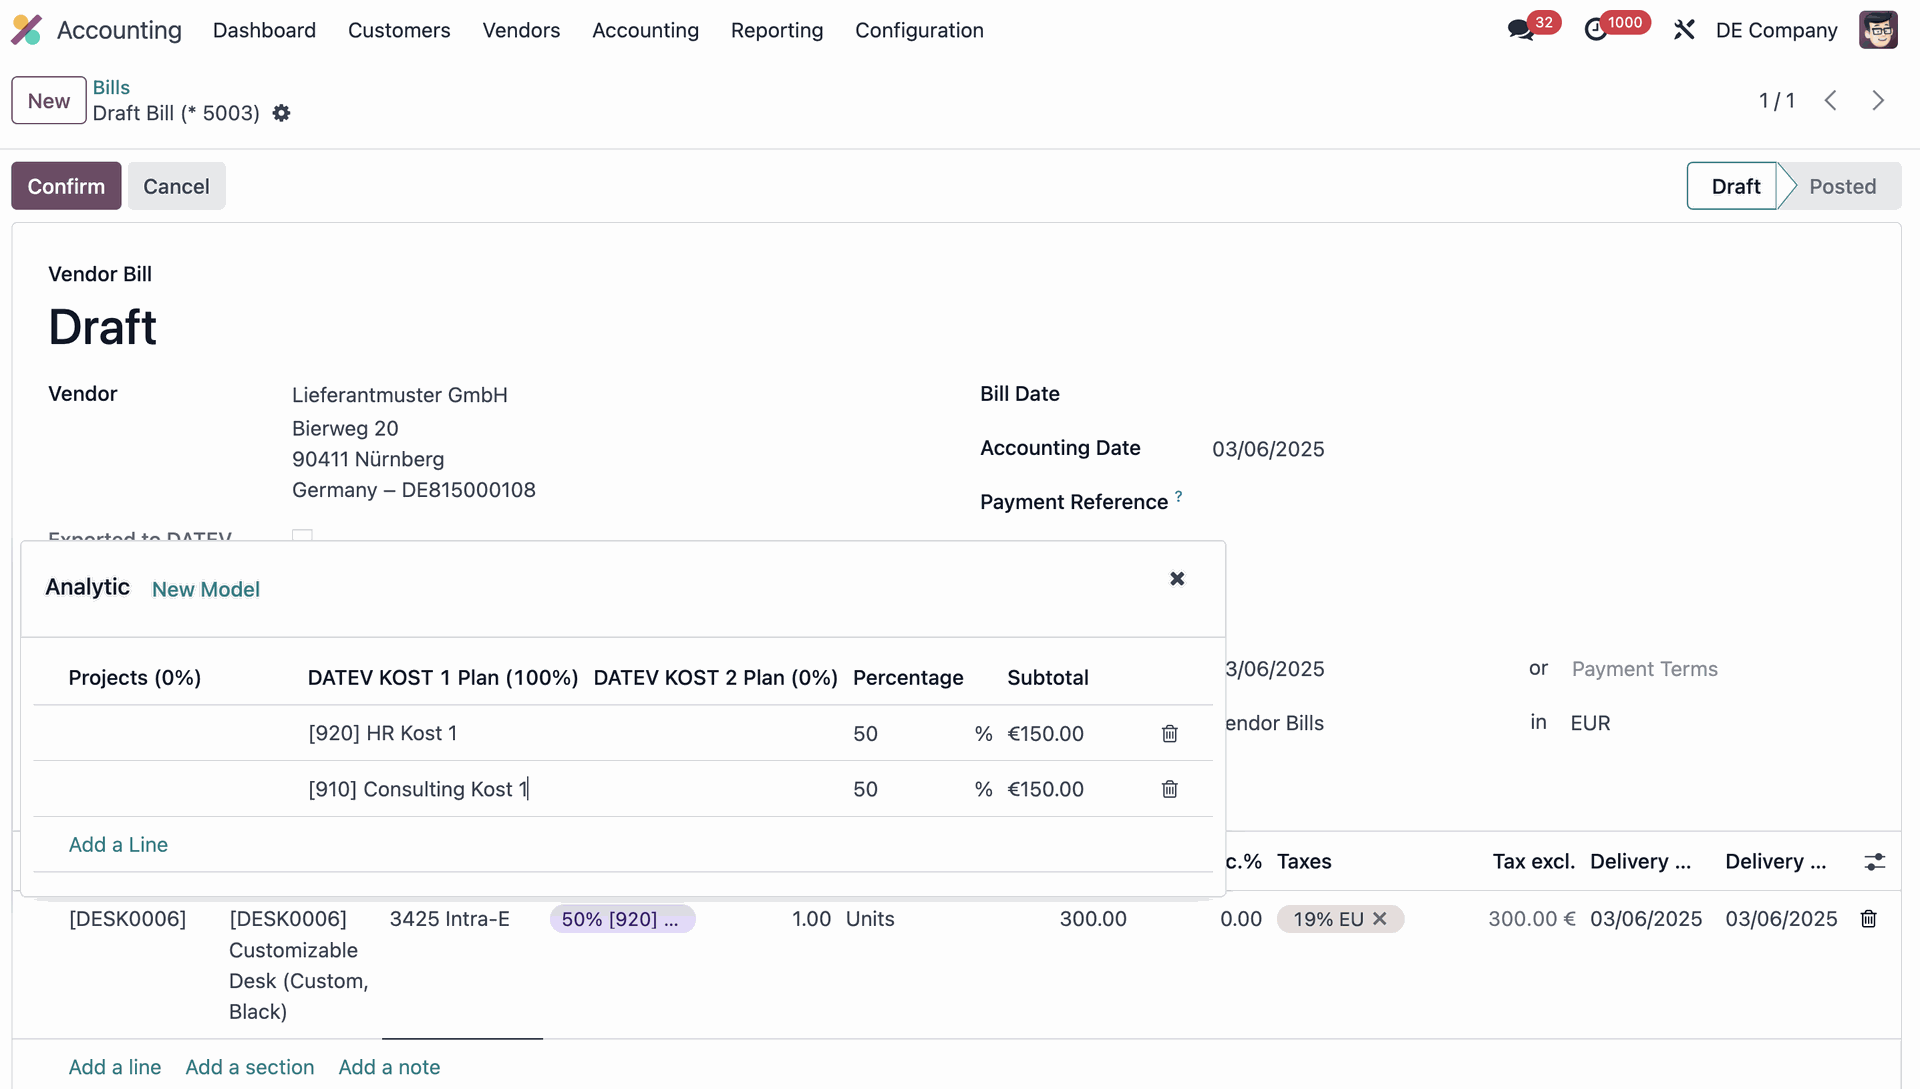
- DATEV only allows a 100% cost distribution, which means that if you have more than 1 analytic plan assigned to an entry, you must split the entry in multiple lines according to the analytic % to reflect the correct distribution in DATEV.
✅
⛔
Export Settings
- G/L Export Batch Size : This setting defines the number of general ledger entries processed in a single batch during DATEV exports to optimize performance.
- Export Encoding : this setting allows administrators to specify the character encoding used when generating DATEV CSV export files. This ensures compatibility with different DATEV software versions or regional requirements for character handling. Options are :
- Latin-1 : widely used for importing files in DATEV. Ensures special german characters formatting.
- UTF-8: default Odoo encoding for CSV file export.
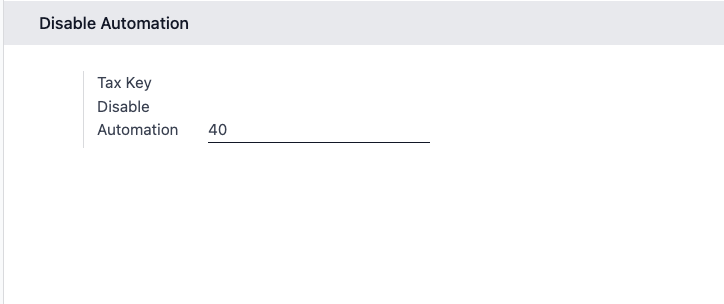
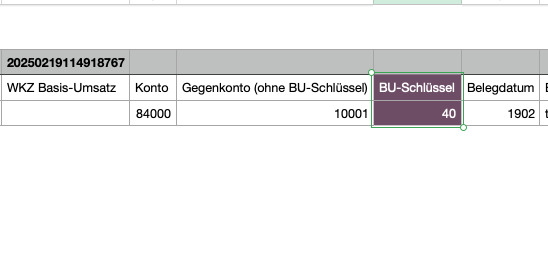
Disable Automation
By default, if you manually remove taxes on an entry booked on an automated account, we will add 40 as value in column I (BU-Schlüssel). This will prevent that it will be added au in DATEV again, due to the automated nature of the account.
Integration Settings (Only for API)
Now that the DATEV structure has been configured, you can configure the integration, by going to Integration Hub > DATEV Integration > Integration Settings.
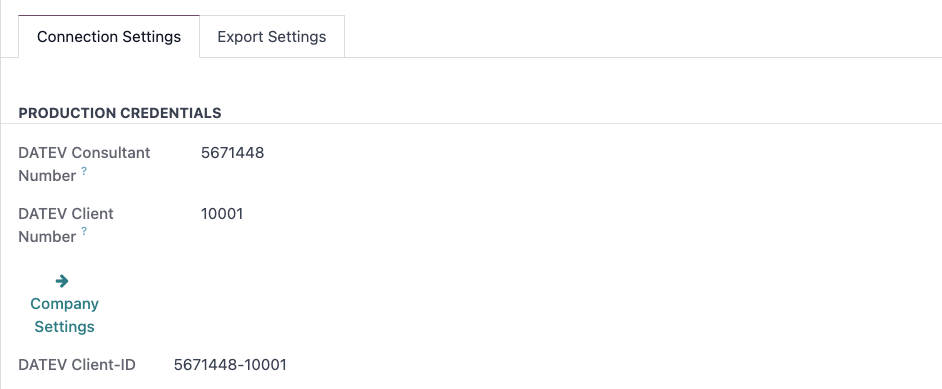
Connection Settings
- Make sure that your consultant and client number are correct. If not, you can click on Company Settings to adjust them.
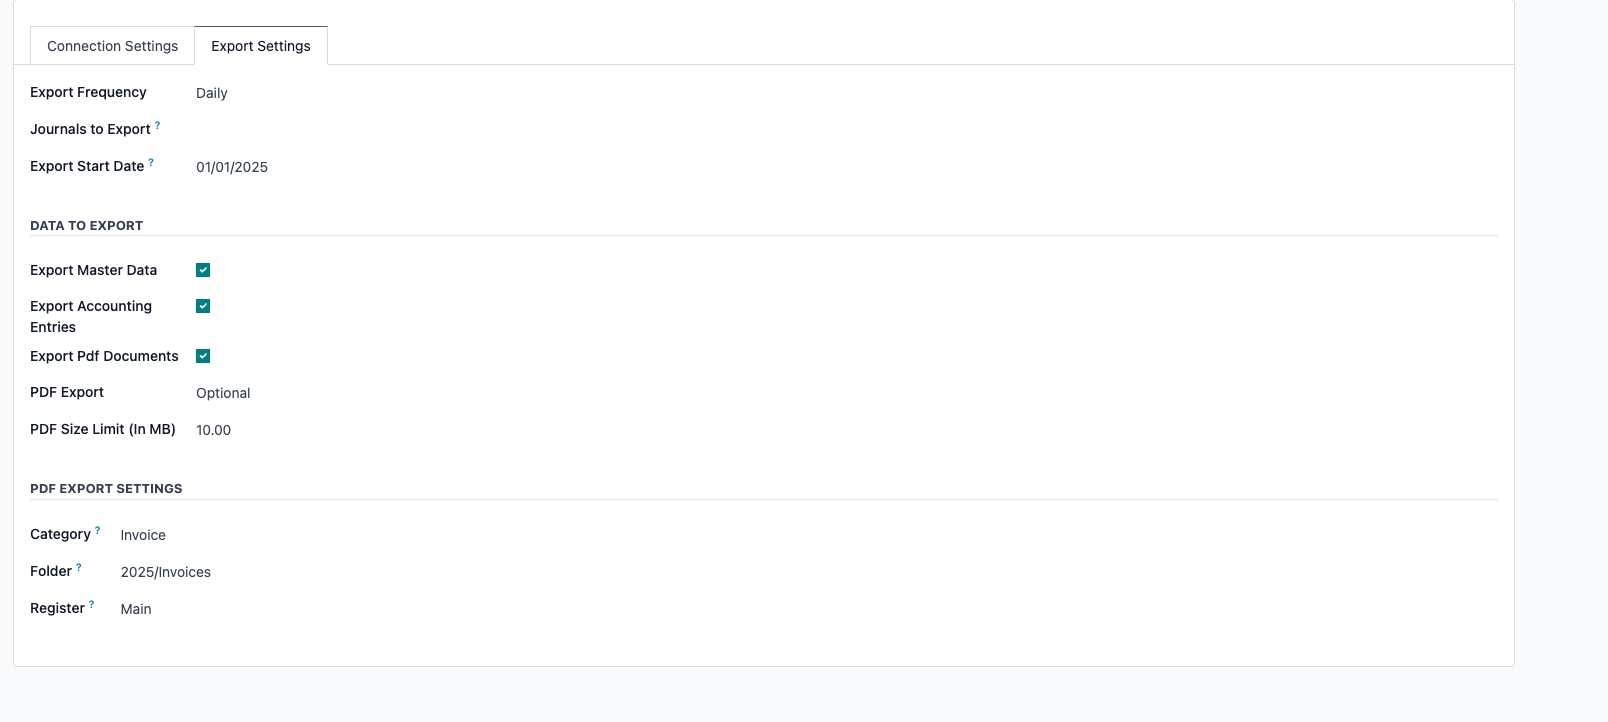
Export Settings
- Export Frequency : choose at what frequency the automated action that will send your accounting entries and master data will run.
- Journals to Export : choose which journals should be exported to DATEV.
- Data Selection for Export: Within the integration settings (Integration Hub -> Integrations -> DATEV -> Export Settings), you can precisely select which types of data to include in the API export:
Export Master Data (Partners)
Export Accounting Entries (Journal Entries)
Export PDF Documents (Invoice/Bill PDFs)
Note: If no data type is selected, the integration will be automatically disabled.
- Configurable Export Start Date:
A new Export Start Date field has been added under Integration Hub -> Integrations -> DATEV -> Export Settings.
This date defines the earliest point from which automated (scheduled) exports will gather data.
The PDF Export option (Optional/Mandatory) determines if the entire export job fails when a required PDF is missing.
A PDF Size Limit can be set to prevent attempting to upload excessively large files.
When Export PDF Documents is enabled, you can now configure the Category, Folder, and Register used when uploading PDFs to DATEV Unternehmen Online (Belegverwaltung) via the API. These settings are found under Integration Hub -> Integrations -> DATEV -> Export Settings.
Authenticate to DATEV (Only for API)
As a last step to enable the integration to run, you must authenticate to DATEV.
Get your access token
- Go to Integration Hub > DATEV > Integration Settings.
- Click Get Access Token.

- Login to DATEV with your preferred login method.
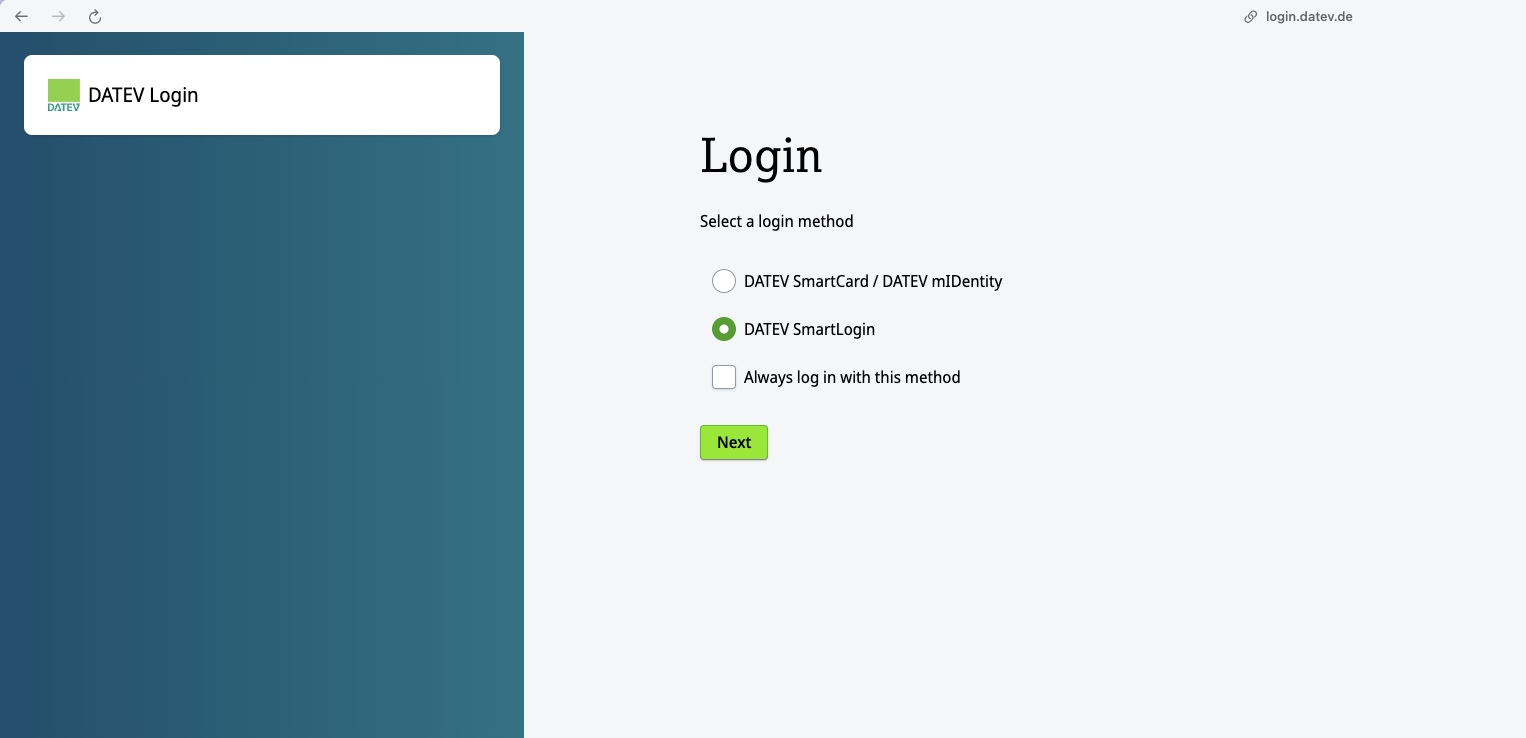
- Once login is successful, the token status will be green.

- You can revoke the access to DATEV anytime by clicking "Revoke Tokens".
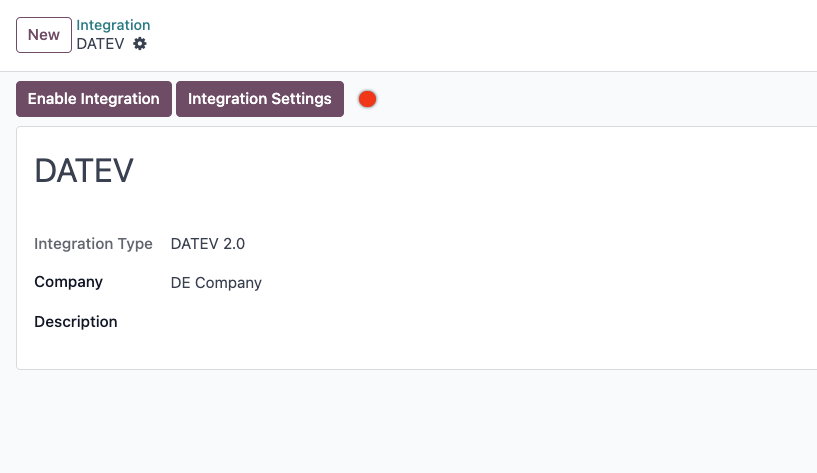
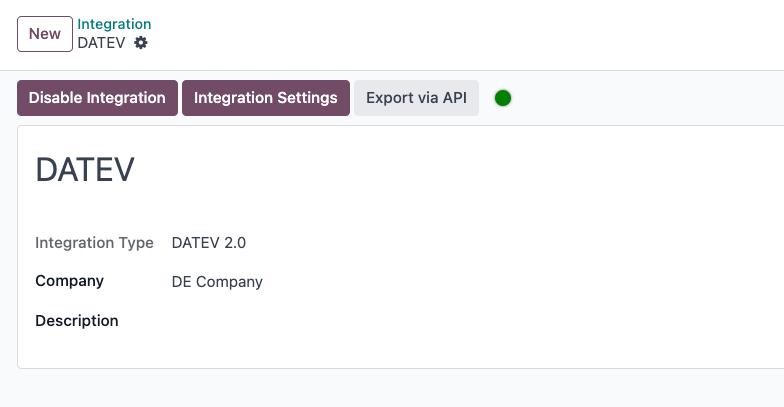
Enable the integration
- Once you are connected to DATEV, simply click Enable Integration. The integration status will go from Inactive to Active.
- You can turn off the integration at any time, either by clicking Disable Integration or by clicking Revoke Tokens.
Usage
DATEV API Export
Scheduled Exports
As mentioned before, the integration will automatically send your financial data and related PDFs on the configured frequency and journals.
If needed, you can also trigger the API export manually :
- Go to Integration Hub > DATEV and click Export via API (you have to be authenticated to see the action)
- Select the journals and timeframe you want to export to DATEV.
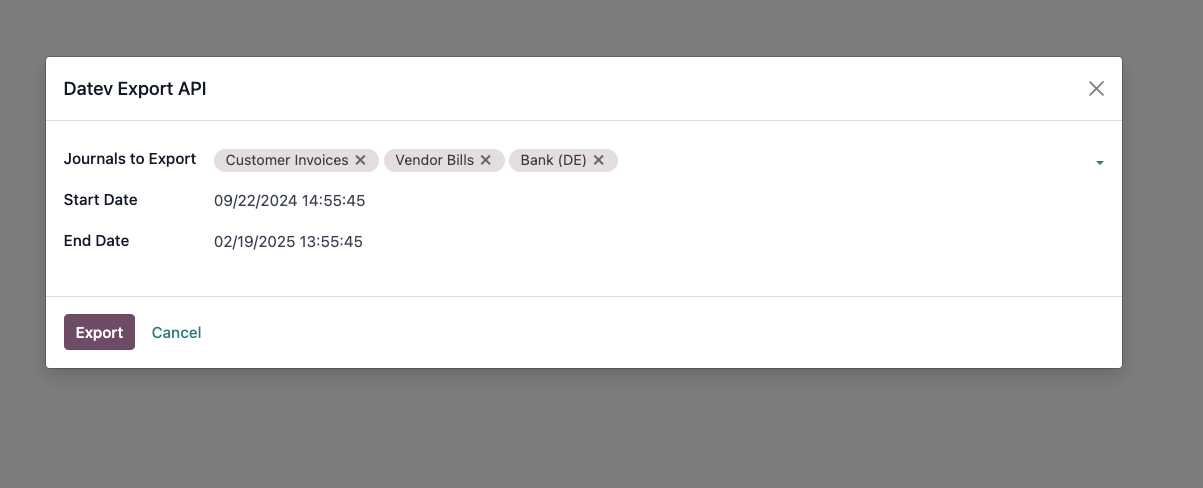
- Click Export.
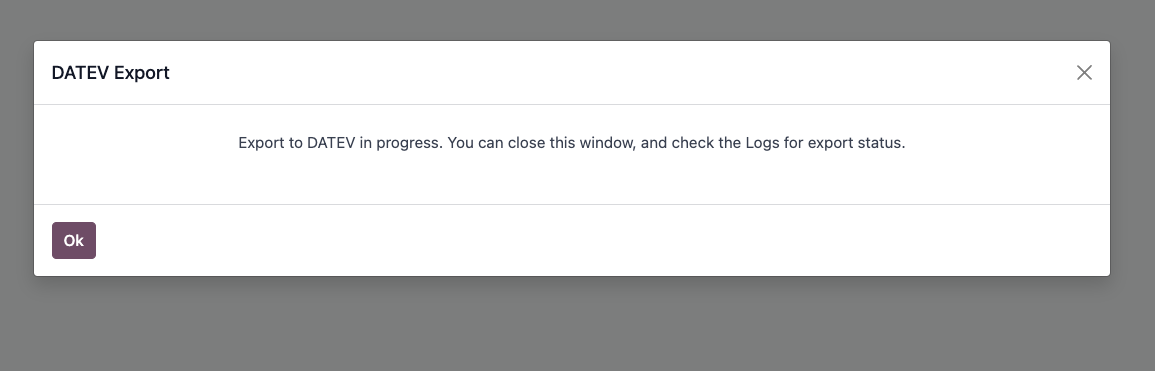
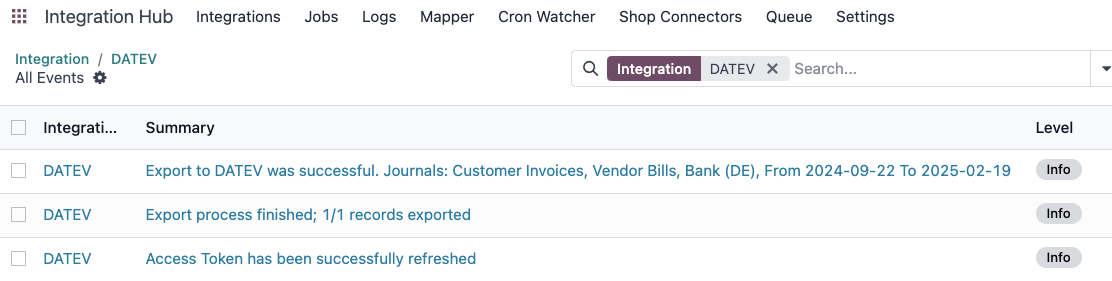
- After a few seconds (or minutes if you have a lot of data), you can go to the logs to see the status of your export :
Error Handling
- Email Notification for Critical Errors
Configuration for Receiving Notifications
- User rights
To ensure a user receives these critical error notifications:
Navigate to Settings > Users & Companies > Users.
Select the desired user.
Under the "Access Rights" tab, ensure they are part of the Administration / Settings group.
- Verify that a valid email address is configured for the user.
2. Email scheduled action
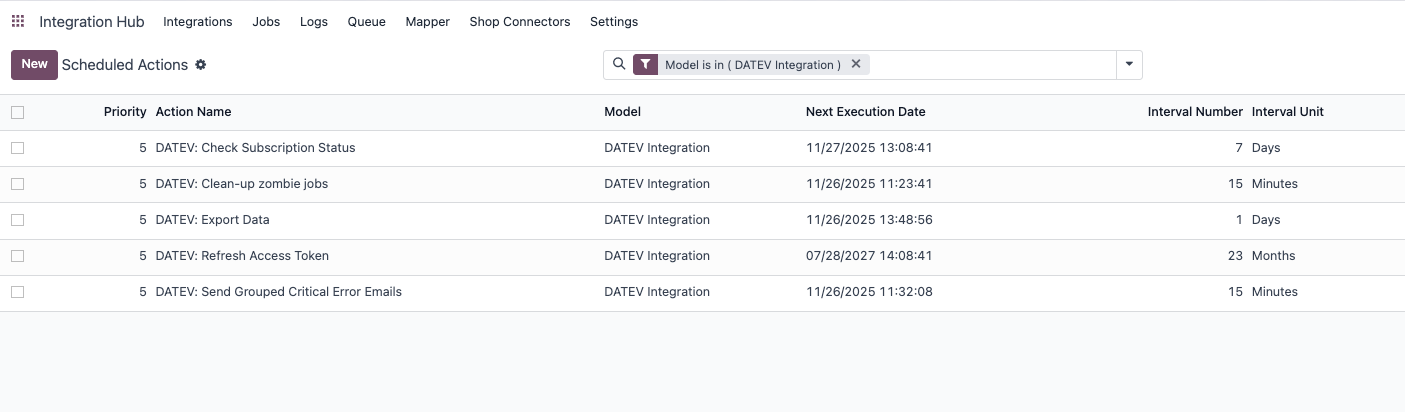
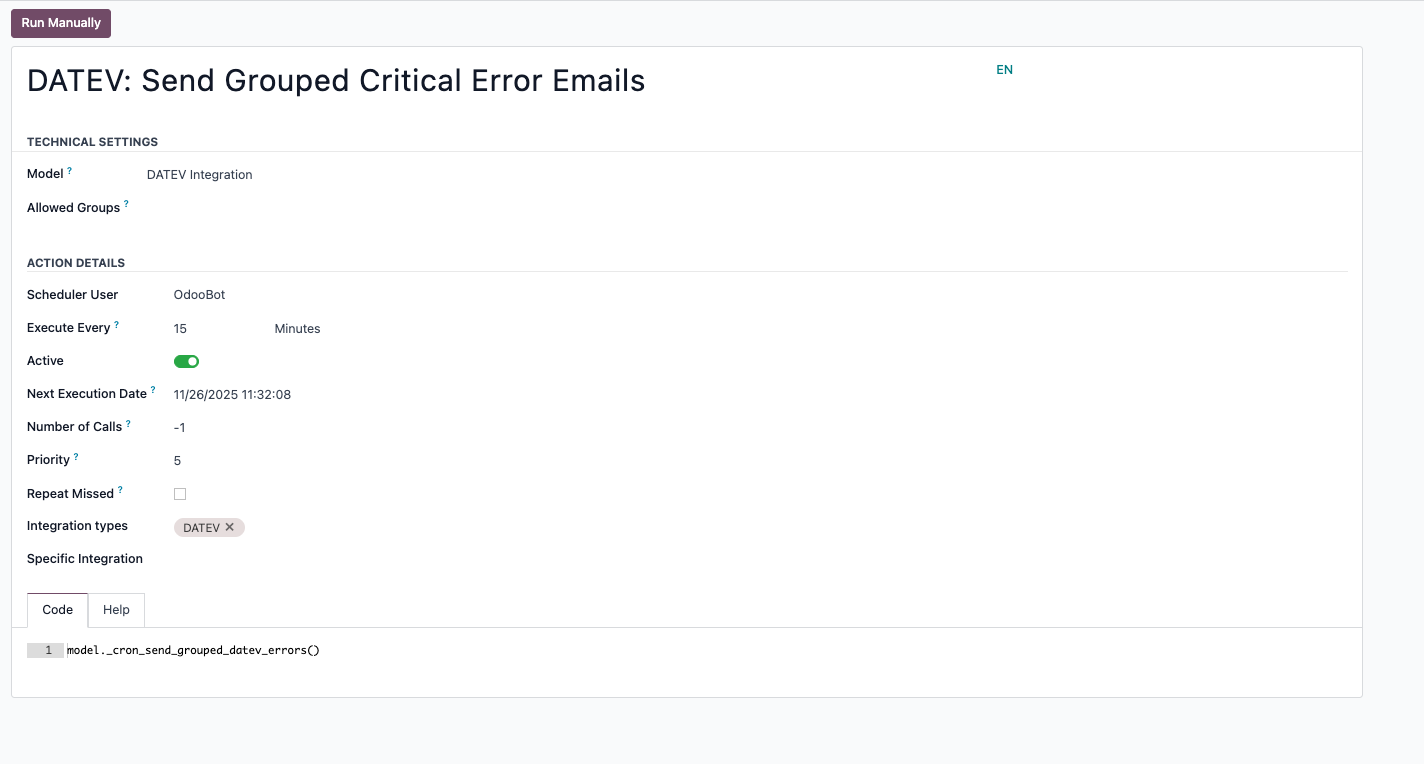
Email sending is managed by a scheduled action called ' DATEV: Send Grouped Critical Error Emails'
To find and manage this scheduled action, please navigate to your DATEV integration > Scheduled Actions :
- Fail safe for Token Failure
The connection to the DATEV API relies on OAuth 2.0 tokens that expire and need to be refreshed periodically. The system handles this automatically. However, if the token refresh process fails for any reason (e.g., a change in credentials, an issue on DATEV's side, or if the authorization was revoked), the following actions are triggered automatically:
Email Notification: An email is sent to the system administrators, informing them of the token failure.
Token Revocation: To maintain security, the module attempts to revoke the invalid token with the DATEV service.
Integration Deactivation: The DATEV integration in Odoo is automatically set to an "Inactive" state. This prevents further failed attempts and makes it clear that user intervention is required.
Scheduled Exports Deactivation: All scheduled exports are disabled. This prevents other integrations from failing if the same token error is occurring.
To resolve this, you will need to go back to the integration settings (Integration Hub > Integrations > Your DATEV Integration) and click Get Access Token again to re-authorize the connection and enable the integration. You then need to click "Re-activate Scheduled Exports" to enable the integration automated exports.
Troubleshooting
The following table lists common error messages you might encounter in the logs, along with their causes and solutions.
Where to find Logs?
Navigate to Integration Hub > Logs.
Filter by Integration: DATEV.
Look for "Error" level logs. The Details tab often contains the raw HTTP response from DATEV, which is crucial for debugging.
| Error Message | Likely Cause | Recommended Action |
403 Forbidden | 1. Missing Permissions: The DATEV user or API client does not have rights for the specific client number (Mandant). 2. Service Not Ordered: The data service (e.g., Buchungsdatenservice or Rechnungsdatenservice 1.0) has not been ordered for this client. | 1. Check Rights: Go to DATEV Rechteverwaltung online and ensure the user/client has rights for Buchungsdatenservice or Rechnungsdatenservice 1.0 for the specific consultant/client number. 2. Check Order: Verify in MyDATEV Mandantenregistrierung that the service is active. 3. Re-authenticate: Revoke tokens and click "Get Access Token" again. |
401 Unauthorized | The Access Token or Refresh Token is invalid, expired, or has been revoked on the DATEV side. | Go to the DATEV Integration settings in Odoo and click Get Access Token to re-authenticate. |
404 Not Found | The Consultant Number (Beraternummer) or Client Number (Mandantennummer) configured in Odoo has not been found in DATEV. | Verify the Consultant Number and Client Number in Odoo's Company Settings. Ensure they match exactly what is set up in DATEV, and that they have the correct subscriptions. |
The refresh token has reached its expiration date | The connection has not been used or refreshed for over 2 years, causing the long-term token to expire. | You must re-authenticate manually. Go to Integration Hub > Integrations, select DATEV, and click Get Access Token. |
Time limit reached; stopping the export process | The volume of data being exported is too large to process within the server's time limit. | Decrease the Batch Size in the DATEV Integration settings (default is usually 150 or 500). This splits the job into smaller, faster chunks. |
Error uploading file to DATEV | A general API error occurred during the file transfer (e.g., validation error on DATEV side). | Check the DATEV Export Jobs logs. The "Details" section will often contain a JSON response from DATEV explaining exactly why the file was rejected (e.g., "Invalid date format") |
DATEV CSV Export
Our module also allows you to export DATEV data manually, either in :
- CSV
- CSV + PDFs :
The system will download a .zip archive containing everything needed for DATEV:
EXTF_customer_accounts.csv: The standard DATEV master data file.
EXTF_accounting_entries.csv: The standard DATEV accounting export file. This file includes a unique identifier in the "Beleglink" column connecting the booking to its document.
documents.xml: A structural file required by DATEV to interpret the links between data and files.
Documents: The actual PDF files (e.g., INV-2023-001.pdf) are included directly in the archive.
- XML.
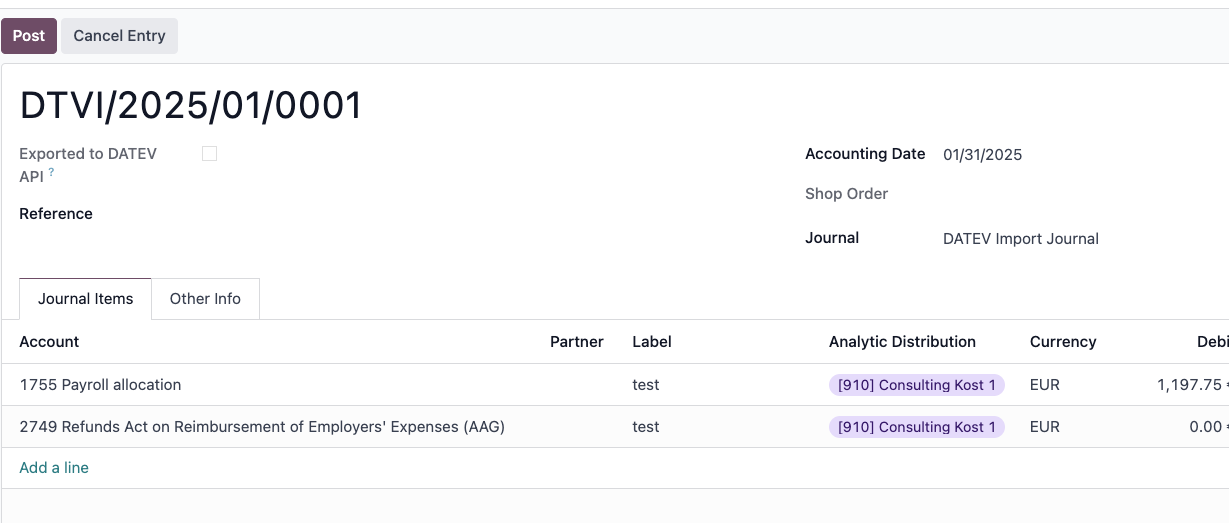
Single Record Export
You can export the DATEV file for a specific entry. To do so :
- Go to Accounting, open the entry you want to export and click on Actions.
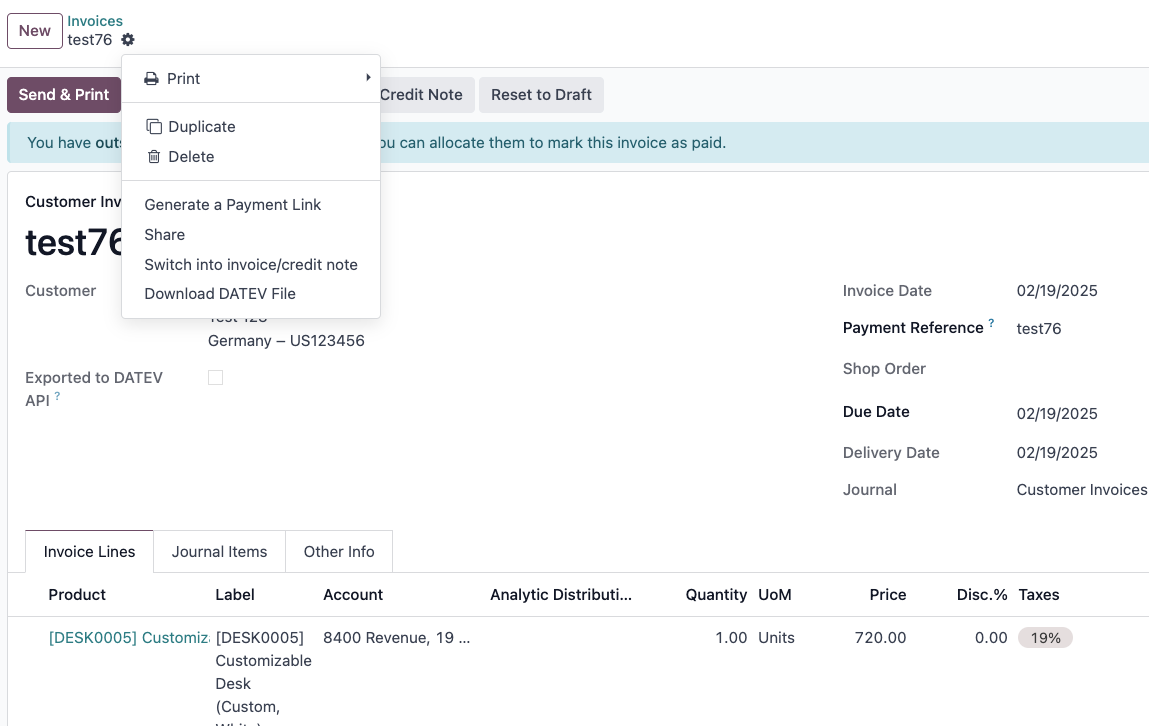
- Click the Download DATEV File button, and in the pop up, select the desired format.

- Click Download.
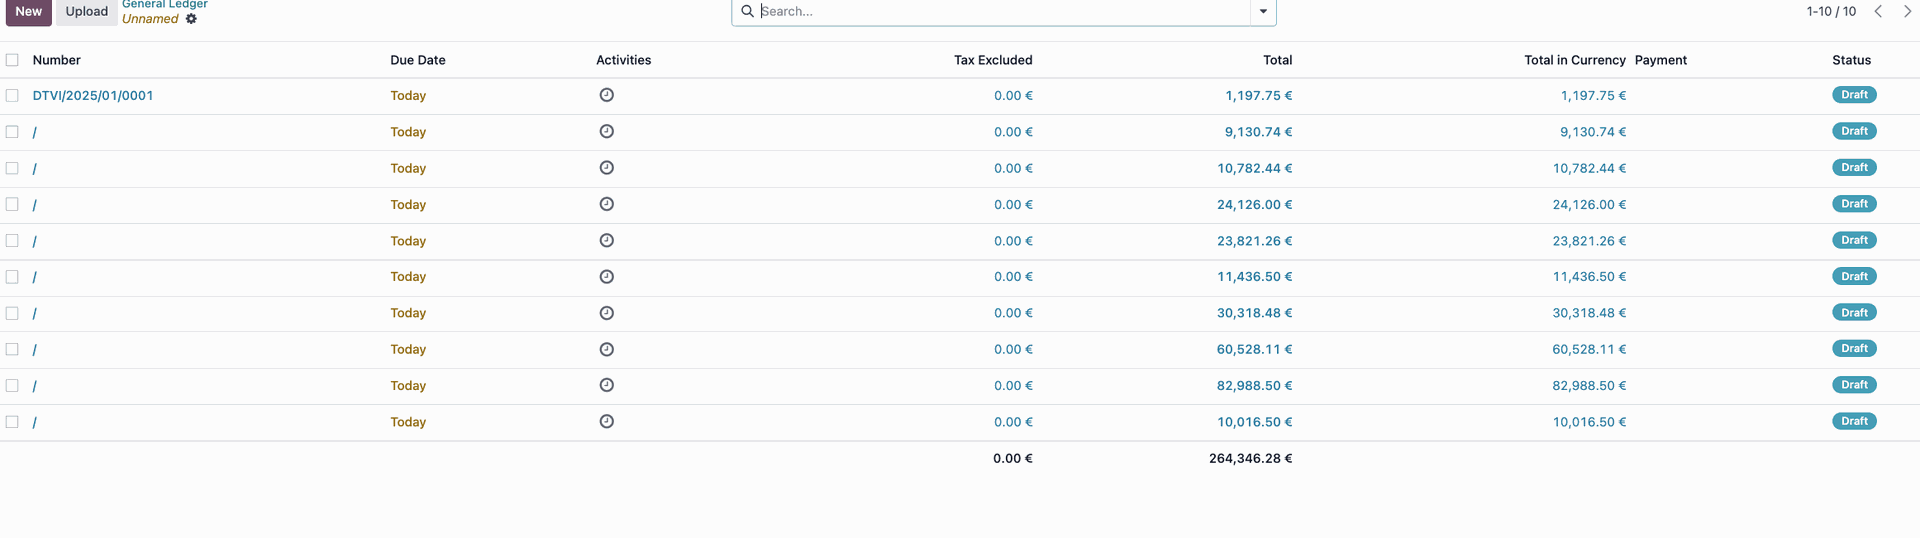
General Ledger Export
You can also export all your entry for specific journals and timeframe. To do so:
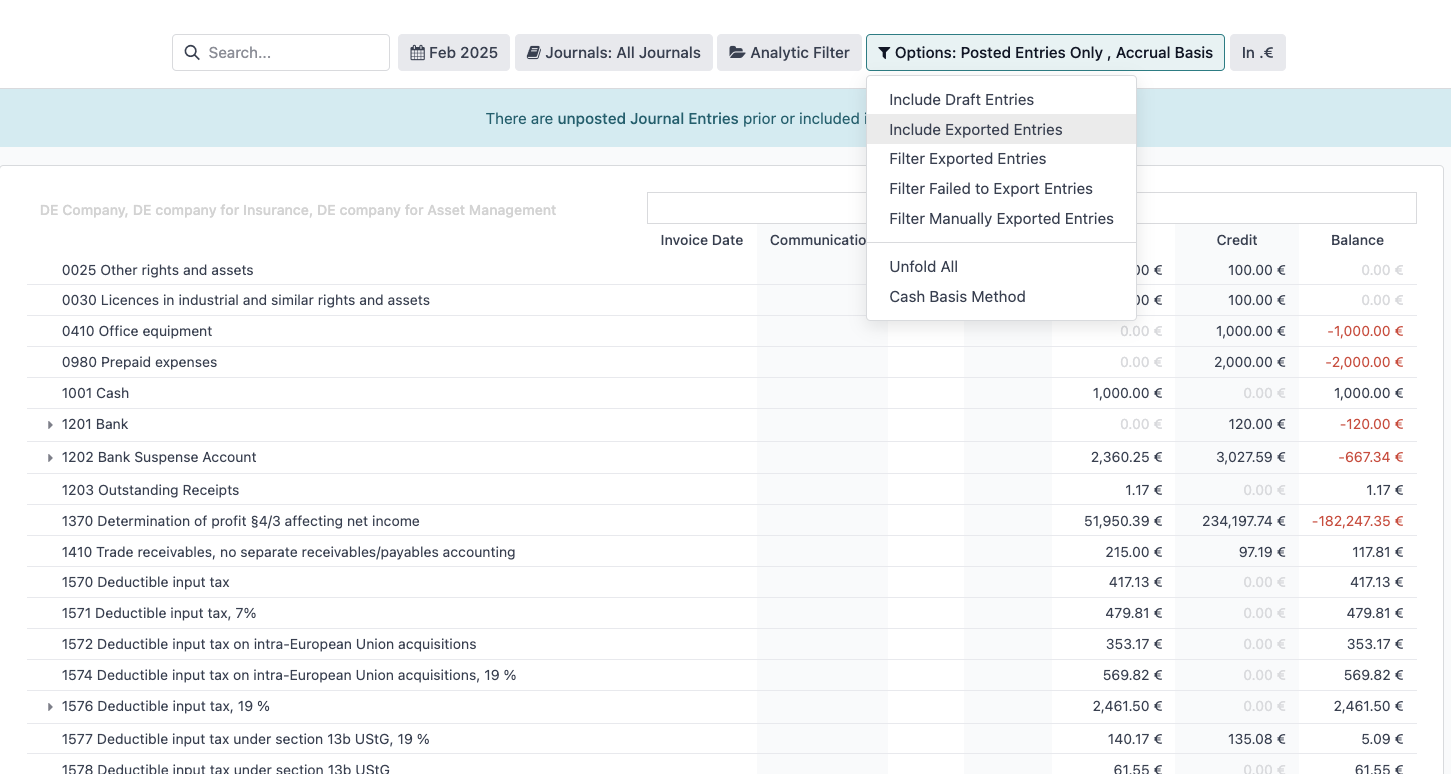
- Go to Accounting > Reporting > General Ledger.
- Use the filters to select your desired Journals and time period. By default, already exported entries will be excluded. If you want to include them, simply click the filter option and select Include Exported Entries.
- Once done with your filtering, click on the down arrow or testing wheel on the top left corner, and select Download DATEV File.
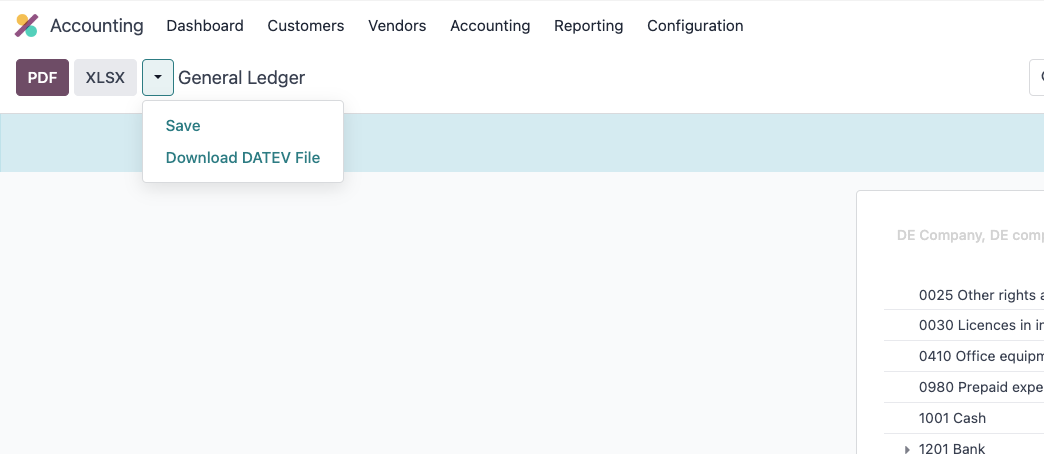
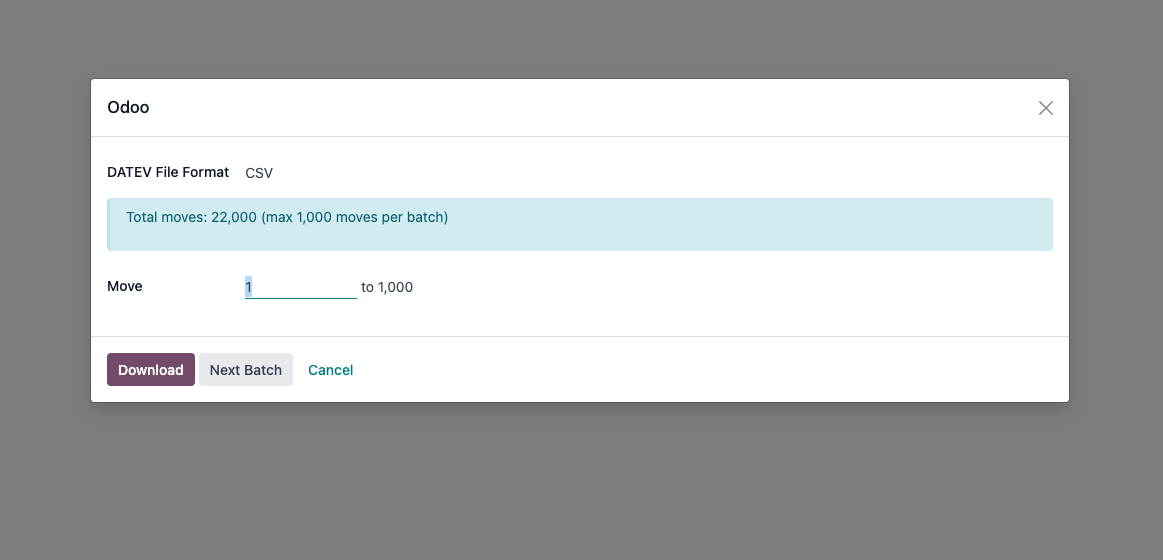
- In the wizard, select the desired format .
- The wizard shows the total move count and allows you to specify the range (e.g., 1 to 1000) for the current download batch.
- A "Next Batch" button is provided in the wizard to easily proceed to the subsequent batch range after downloading the current one.
Filtering Options (DATEV Export Fields)
Export Fields for Invoices & Journal Entries :
- Export Date (`datev_export_date`): Shows when the record was last exported to CSV format
✅ Use this to filter records that haven't been exported yet
📅 Helps track when exports occurred for auditing
- API Export Status (`exported_to_datev_api`): Indicates successful transfer via DATEV API
✅ Set to checked after successful API upload
🔄 Prevents duplicate API transfers
- PDF Export Status (`pdf_exported_to_datev`): Tracks if invoice PDFs were uploaded
📄 Only for documents with attachments
✅ Set after successful PDF upload to DATEV
- Transfer Attempted (`transfer_attempted`): Shows if an export was tried (even if failed)
⚠️ Useful for troubleshooting failed exports
🔍 Helps identify records that need attention
- XML Export Status (`datev_xml_exported`): Marks completed XML exports
- XML Export Date (`datev_xml_export_date`): Timestamp of XML generation

Export Fields for Contacts (Partners):
- Export Status (`exported_to_datev`): Shows if contact master data was exported
- Export Date (`exported_to_datev_date`): When the contact was exported
- API Export Status (`exported_to_datev_api`): Indicates API transfer completion
DATEV Import
The module also gives you the ability to Import data that was previously exported from DATEV. This is useful for example when you first setup your Odoo, to register all your existing partners and their respective DATEV partner id.
To import a DATEV file in Odoo :
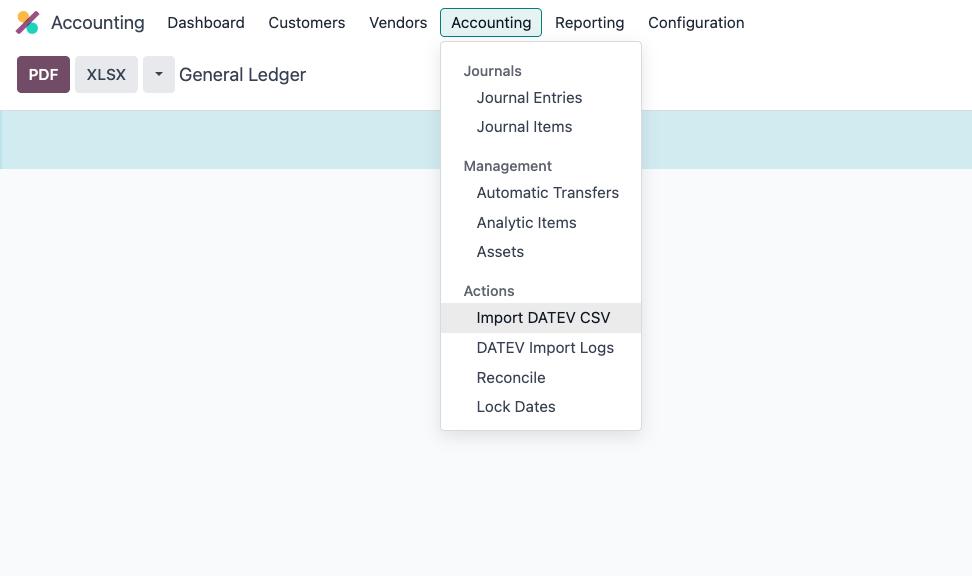
- Go to Accounting > Accounting and click Import DATEV CSV.
- In the pop-up, fill the following information
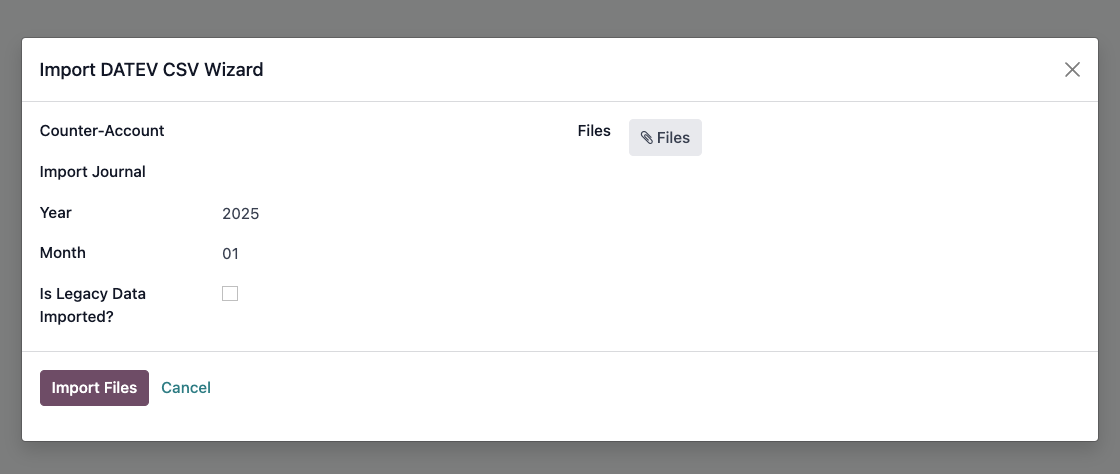
- Counter-Account : Gegenkonto.
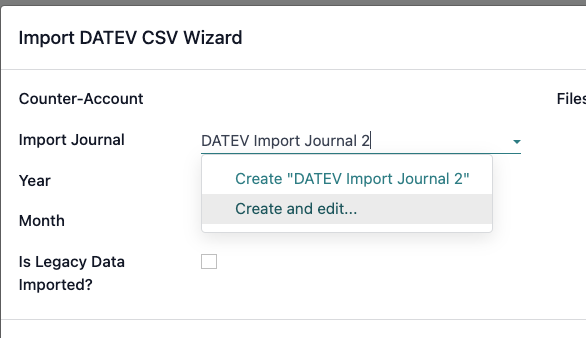
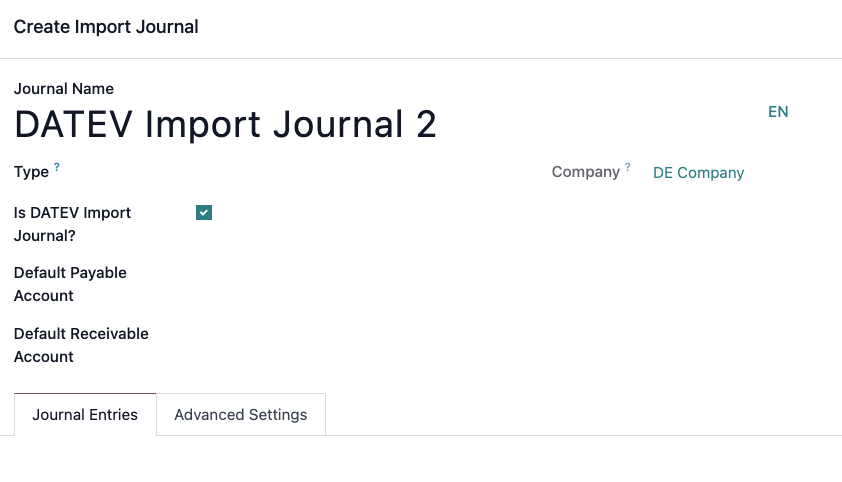
- DATEV Import journal: If you don't have 1 created yet, you must create one and select the Is DATEV Import Journal option.
- Select the Year of the Import.
- Upload your file and click Import Files.