PayPal Official Integration: User Documentation
This guide provides step-by-step instructions on how to set up and use the PayPal Official Integration module in Odoo. This module allows you to offer a complete suite of PayPal payment options to your customers — including PayPal Wallet, Pay Later (BNPL), Google Pay, Apple Pay, Venmo, advanced credit/debit card fields, and local Alternative Payment Methods.
1. Install the Modules
Get the PayPal modules on your Odoo database. The following modules need to be added:
- payment_paypal_suite
- payment_paypal_integration
- payment_paypal_vaulting
- paypal_merchant_configurator
- paypal_webhook_base
- website_sale_paypal
ℹ️ Not sure how to install modules in your Odoo database? Please check out the article on How to install modules.
To activate the modules:
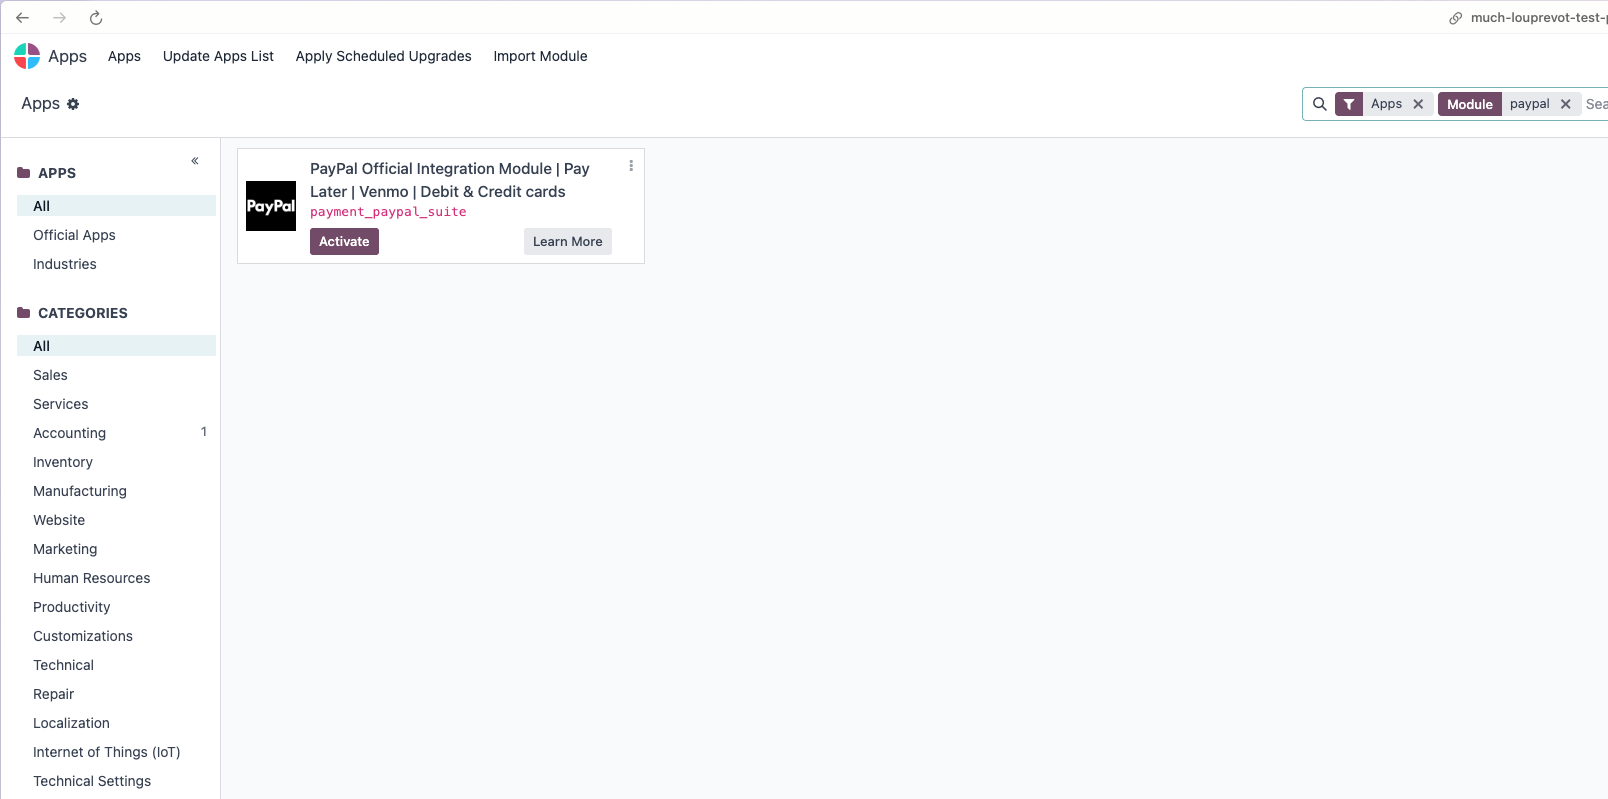
- Navigate to the Apps application.
- Click Update Apps List.
- Search for paypal.
- Click Activate on the payment_paypal_suite module. It will automatically install the other modules .
2. Initial Setup: Connecting Your PayPal Account
After installing the modules, you need to connect your Odoo instance to your PayPal Business account.
Navigate to Website > Configuration > Payment Providers. (Alternatively: Invoicing > Configuration > Payment Providers.)
Find PayPal Business Integration in the list — it is highlighted as "Recommended."
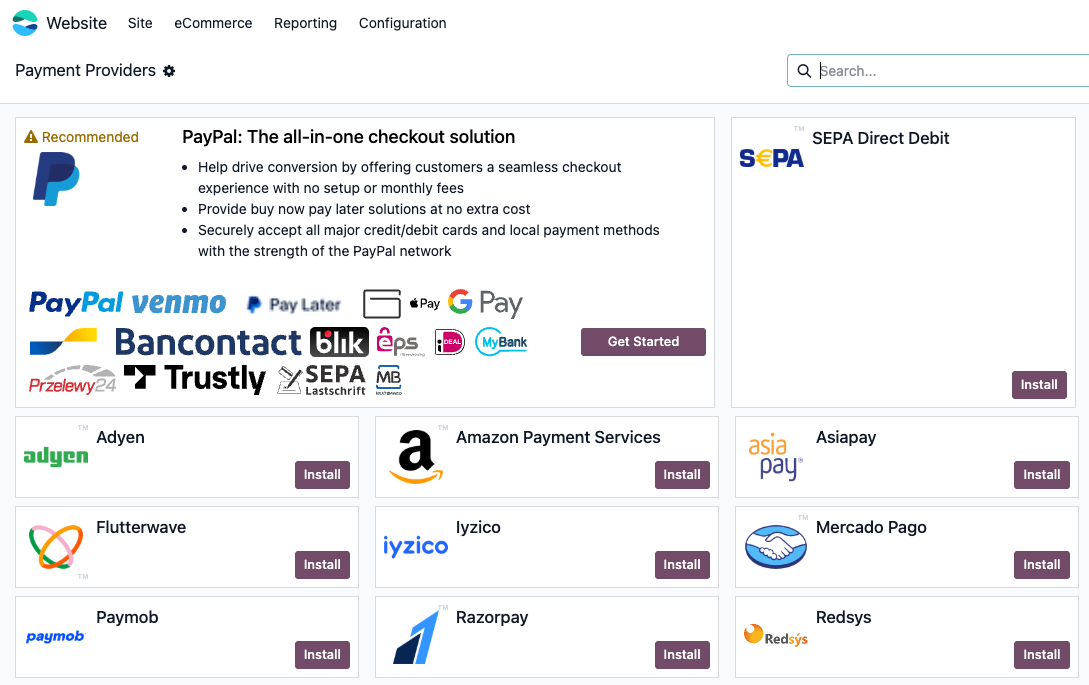
Click the Get Started button.
A setup wizard will appear. Fill in the following fields:
- Environment: Choose Sandbox to test with a PayPal test account, or Production to accept live payments.
- Country: Select the country where your PayPal Business account is registered. This determines which payment methods are available (e.g., Venmo is US-only; Apple Pay and Google Pay require supported countries).
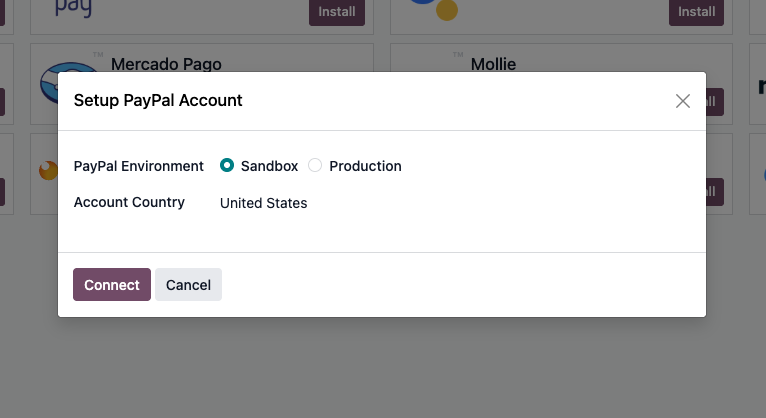
Click the Connect button.
A PayPal popup window will open. Log in to your existing PayPal Business account (or sign up for one).
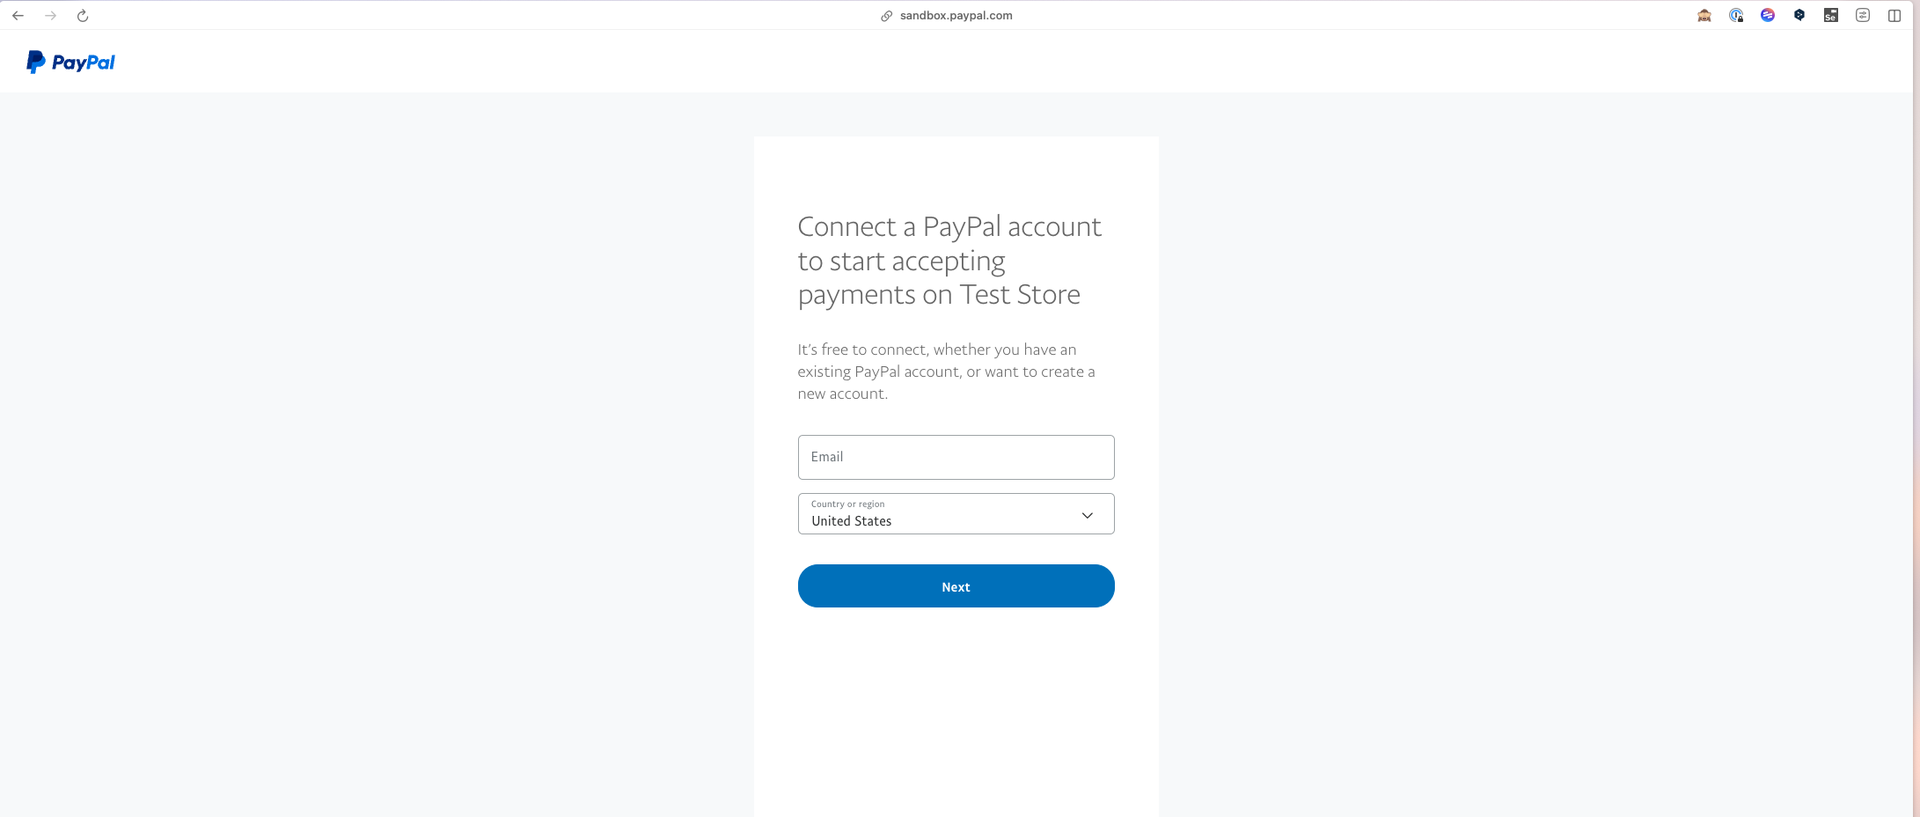
Follow the on-screen instructions to grant Odoo access to your account.
Once done, the popup closes automatically. The Credentials tab is now populated with your Merchant ID, Client ID, and other details.
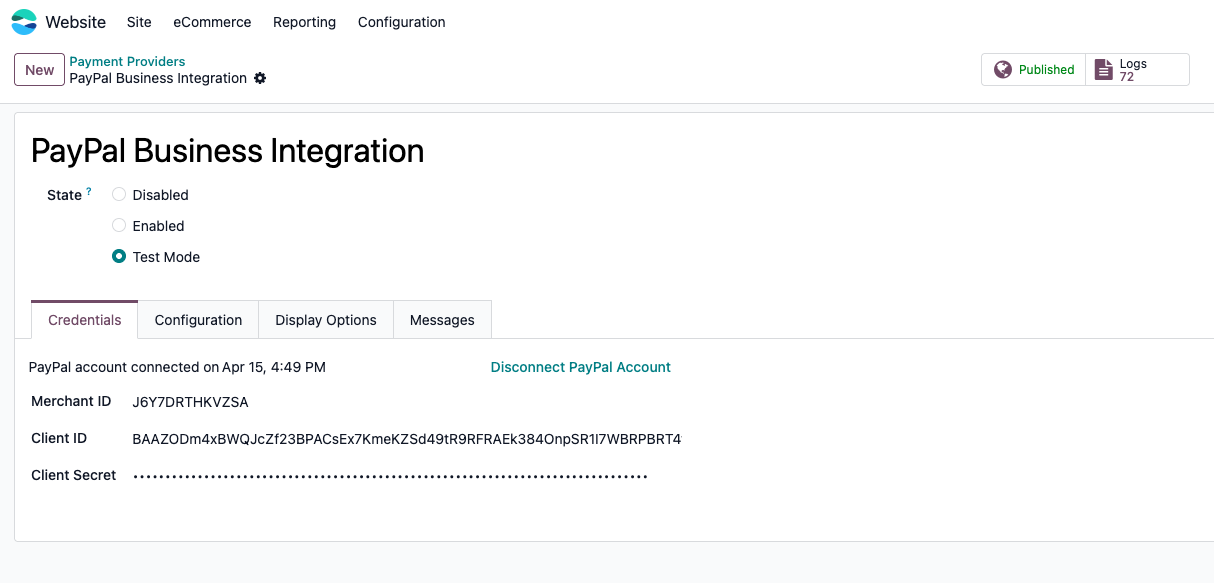
Your account is now connected! Click Publish at the top to make PayPal available to your customers.
3. Configure Your Payment Options
You have full control over which payment methods are offered. On the provider form, open the Configuration tab.
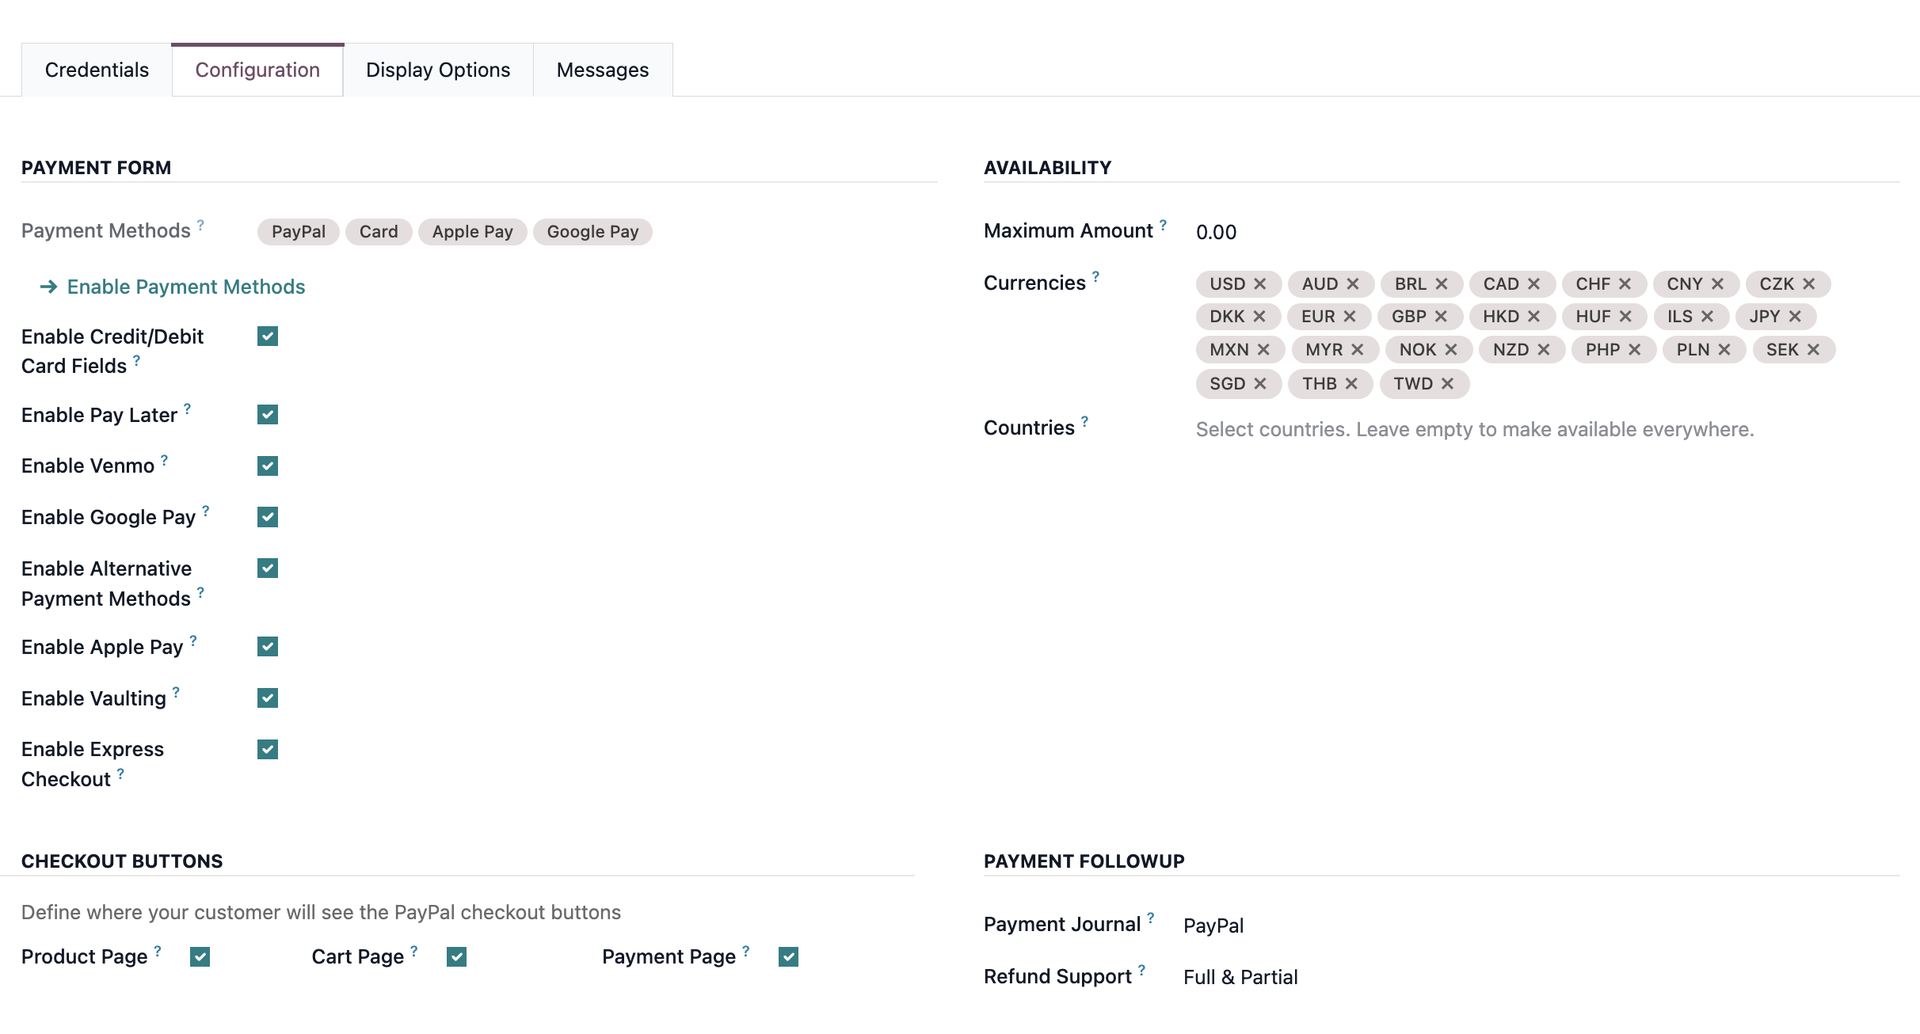
Toggle the payment types on or off as desired:
Enable Credit/Debit Card Fields: Lets customers enter card details directly on your Odoo checkout page — no redirect. Powered by PayPal's Advanced Card Data Collection (PPCP).
Enable Pay Later: Offers PayPal's "Pay in 4" or "Pay Monthly" installment options. A strong conversion tool for higher-value orders.
Enable Venmo (US merchants only): Lets US customers pay with their Venmo account at checkout.
Enable Google Pay: Adds a Google Pay button for customers with a Google Pay wallet on a supported device or browser. Available in 33+ countries.
Enable Apple Pay: Adds an Apple Pay button for customers on Safari on Apple devices (iPhone, iPad, Mac). No separate Apple merchant account needed — everything runs through your PayPal account, and domain verification is fully automatic. Available in 33+ countries.
Enable Alternative Payment Methods: Automatically shows region-specific payment methods to international customers based on their location — for example, iDEAL in the Netherlands, Bancontact in Belgium, SEPA across the EU, BLIK and Przelewy24 in Poland, Trustly in Sweden, eps in Austria, MyBank in Italy, and more.
Enable Vaulting (Highly recommended): Allows customers to securely save their Venmo account, or credit card for faster one-click checkout on future visits.
Enable Express Checkout: Shows PayPal, Google Pay, and Apple Pay buttons on your Product and Cart pages (not just the final payment page), enabling a faster path to purchase.
Payment Follow-up Select the journal for PayPal transactions (defaults to PayPal). Set the Refund option to Full & Partial if you want to issue partial refunds in addition to full ones.
6. Customize Your Website's Display
You can control how PayPal's buttons and promotional messages appear across your website. Open the Display Options tab on the provider form.

Pay Later Messaging
If Pay Later is enabled, promote it across your site with contextual banners:
- Activate Pay Later Messaging: Turns on promotional banners sitewide.
- Placement: Choose which pages show a banner — Home Page, Product Category, Product Page, Cart, or Payment Page.
- Styling: Customize banner color (Blue, Black, White), aspect ratio (20x1, 8x1, 1x4, 1x1), text color, logo type, logo position, and font size to match your branding. Click the → Preview button to see a live preview before saving.
Venmo Messaging
If Venmo is enabled (US only), display a "We accept Venmo" badge across your site:
- Activate Venmo Messaging: Turns on the badge.
- Placement: Choose which pages display it (Home, Product Category, Product, Cart, or Payment Page).
7. How Your Customers Pay
Once the provider is published, your customers see all the payment options you have enabled. Here is what each experience looks like.
Standard Checkout (Payment Page)
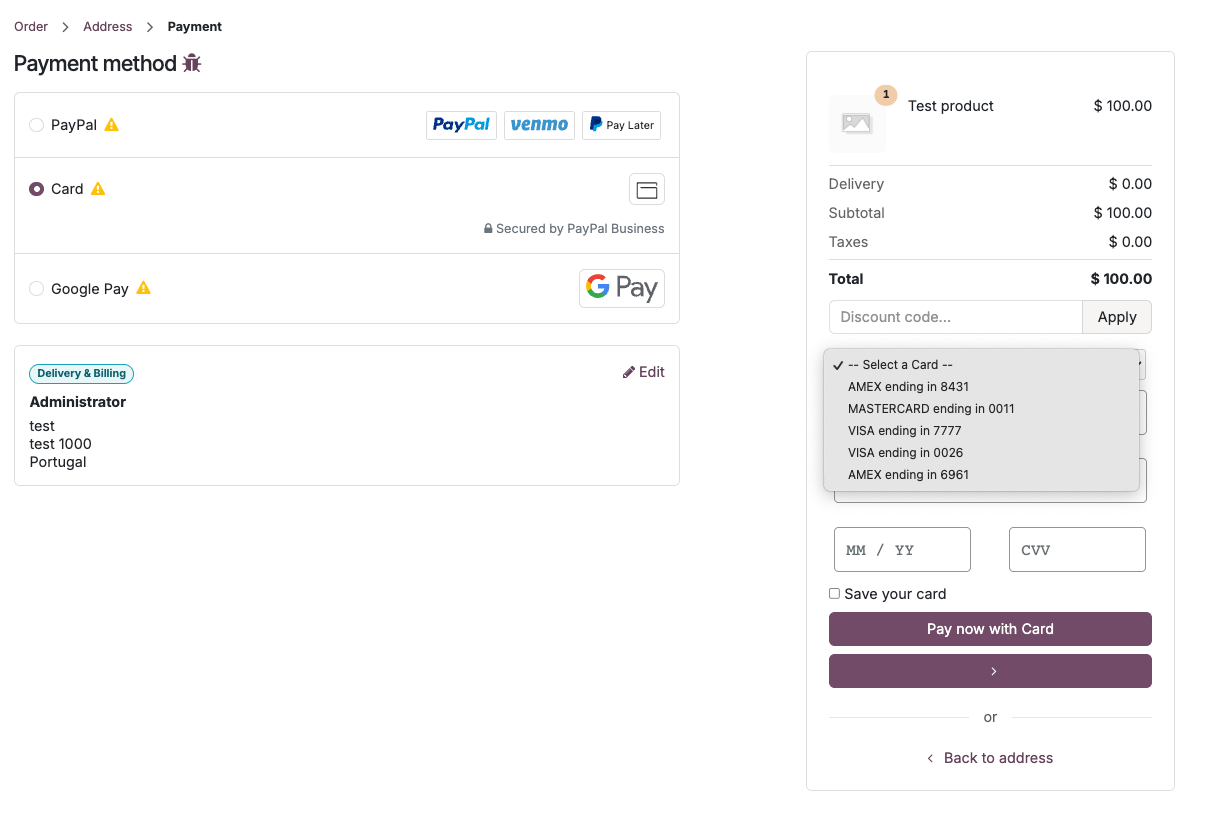
On the final payment page, each enabled method appears as its own clearly-labelled row. Customers select one and proceed:
- PayPal — log in to their PayPal account and approve the payment.
- Pay Later / Venmo / Alternative Payment Methods — shown as additional options under the PayPal row.
- Credit / Debit Card — enter card details directly on the Odoo page.
- Google Pay — one-tap on eligible devices (Chrome on Android or desktop).
- Apple Pay — one-touch on Safari on Apple devices.
The ⚠️ icon is only present in test mode.
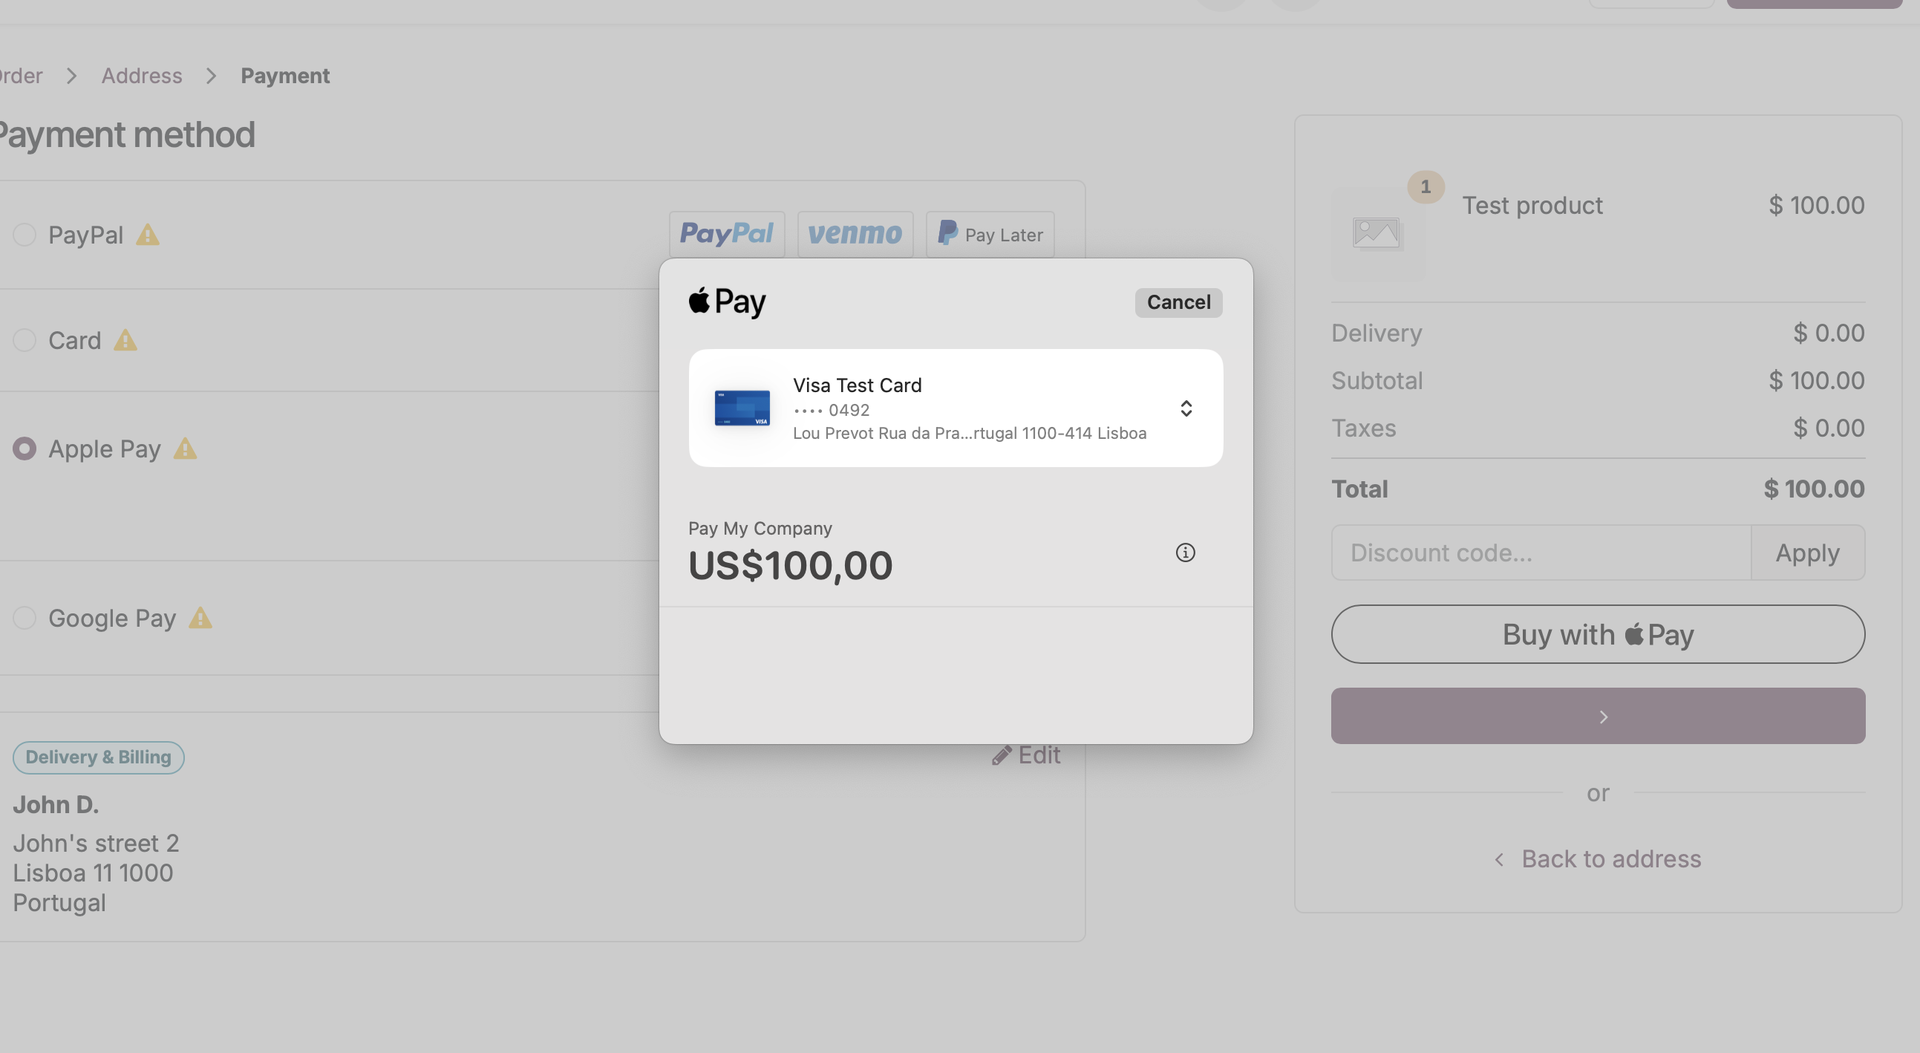
Apple Pay
On Safari on an Apple device (iPhone, iPad, or Mac) with Apple Wallet configured:
- The Apple Pay button appears automatically in the payment method list (and on product/cart pages if Express Checkout is enabled).
- The customer taps it — an Apple Pay authentication sheet slides up.
- They confirm with Touch ID, Face ID, or passcode.
- Payment is complete immediately. No card entry, no redirect, no extra steps.
Google Pay
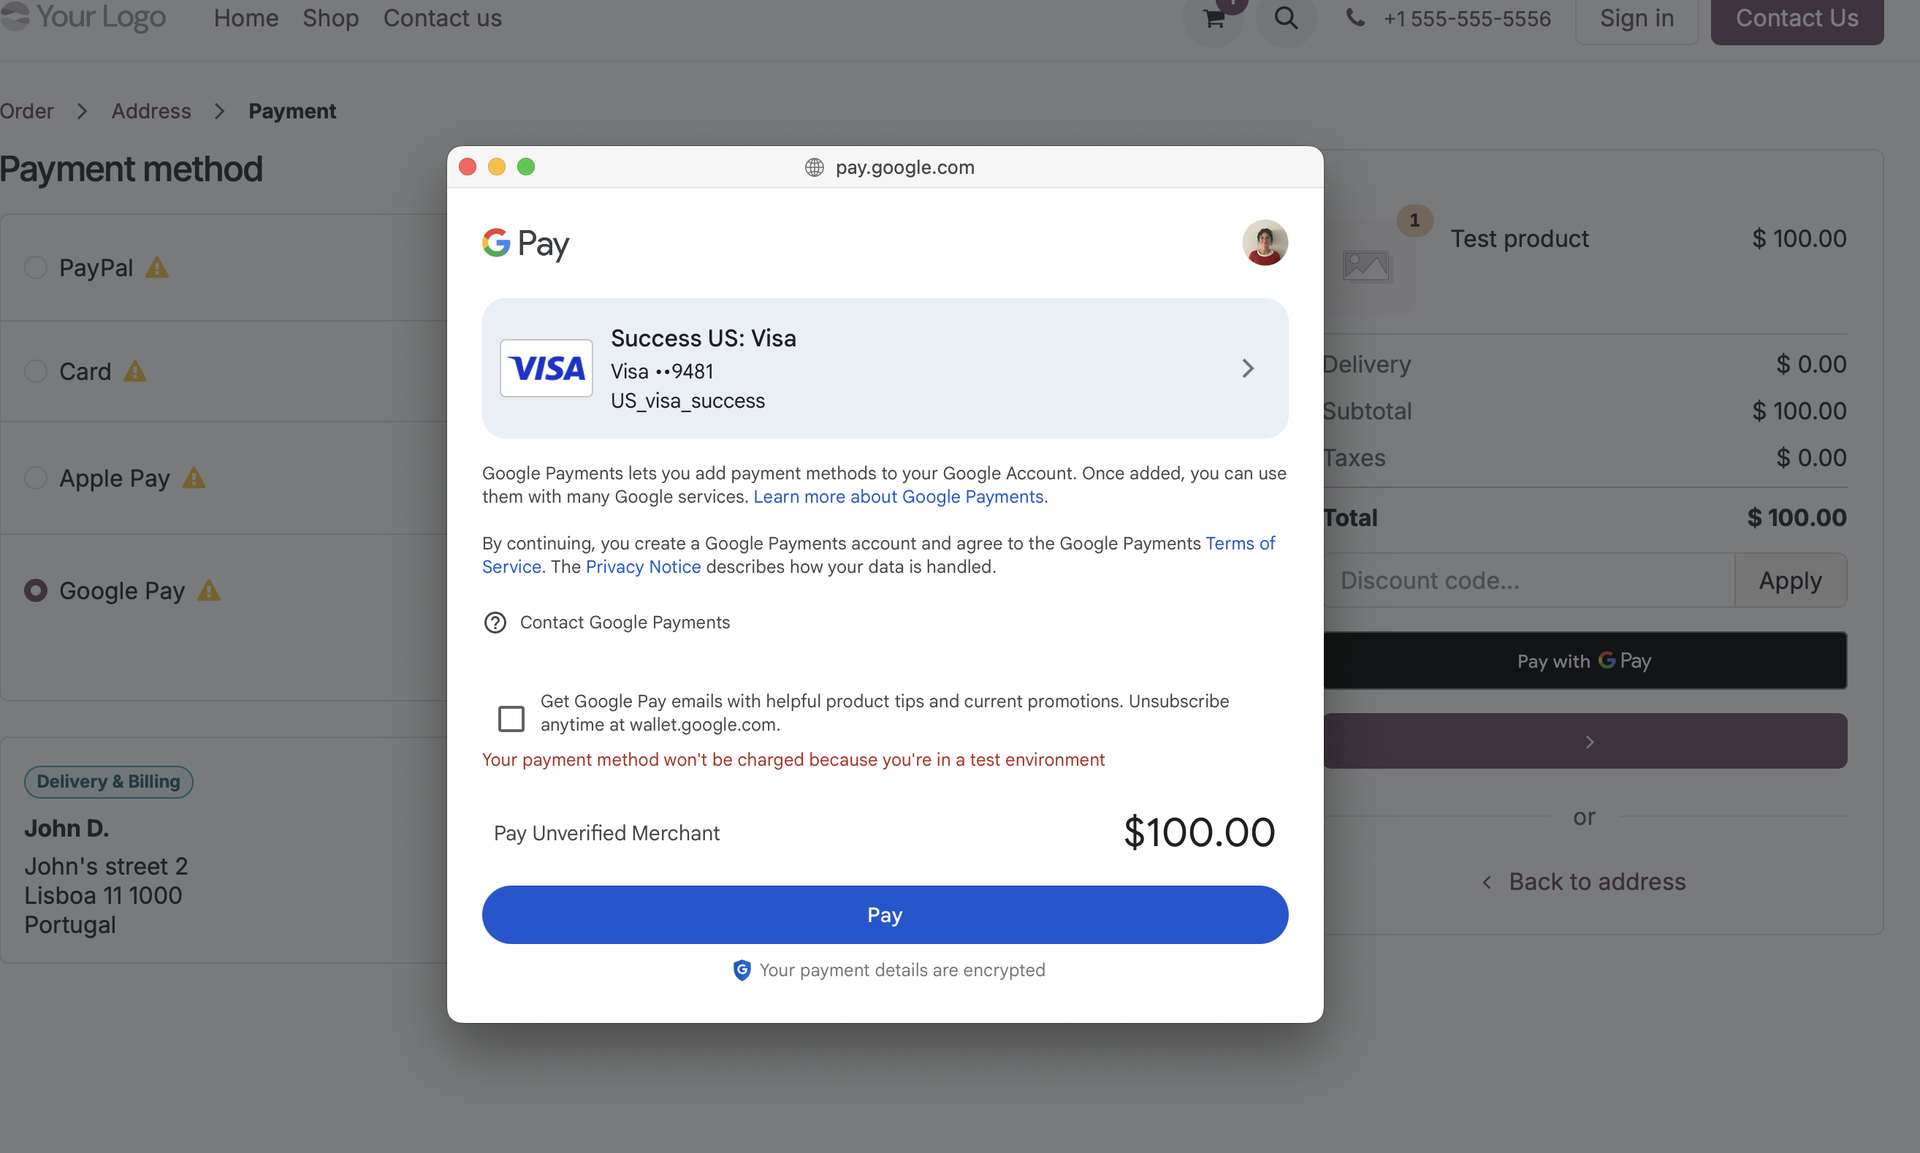
On Chrome (Android or desktop) with Google Pay configured:
- The Google Pay button appears in the payment method list (and on product/cart pages if Express Checkout is enabled).
- The customer clicks it — a Google Pay sheet appears as an overlay.
- They select their saved card or wallet and confirm.
- Payment is complete immediately. No card entry, no redirect.
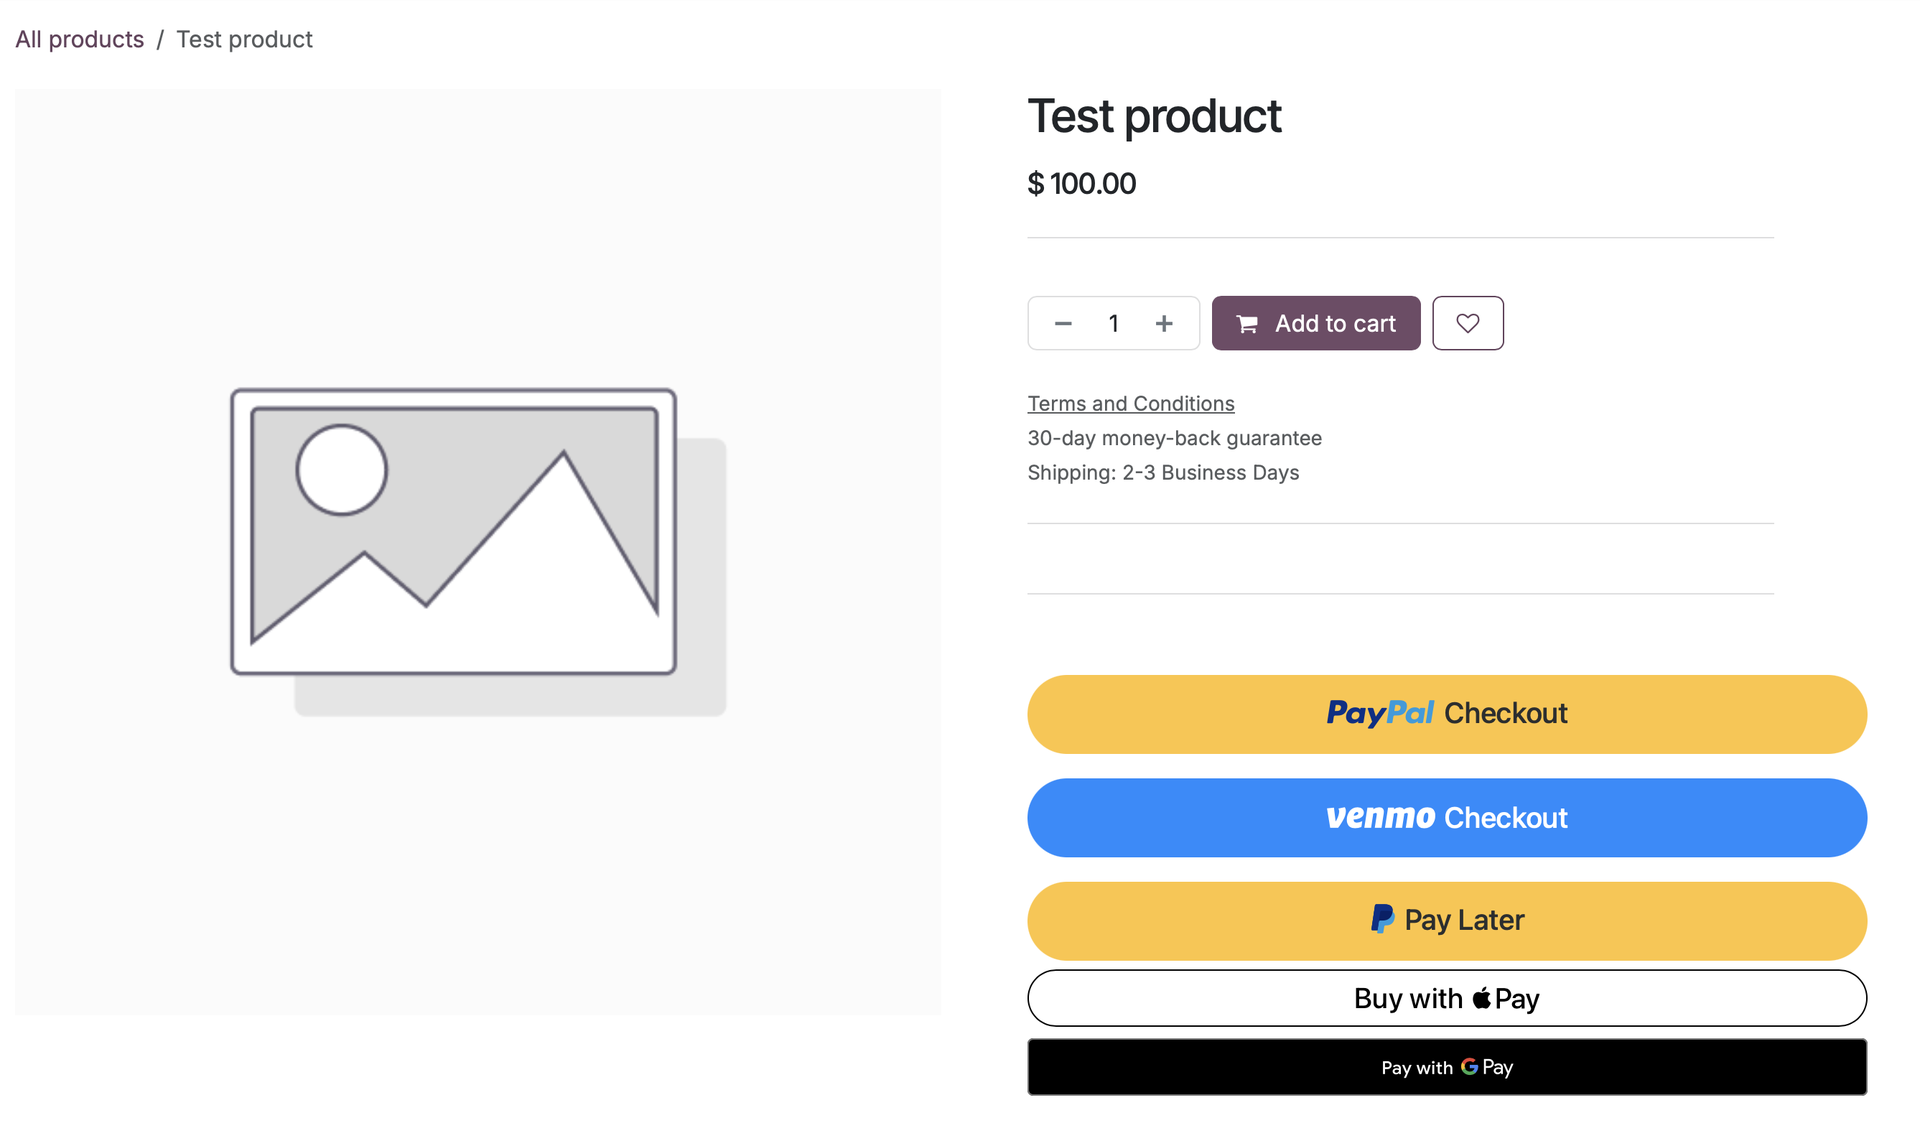
Express Checkout
If Express Checkout is enabled, customers can skip ahead — paying directly from a product or cart page before reaching the standard checkout flow:
- The customer clicks the PayPal, Google Pay, or Apple Pay button on the product or cart page.
- They authenticate in their respective wallet.
- They are returned to Odoo to review their shipping address and delivery method.
- They click Confirm Purchase to finalize the order.
Pay Later
If Pay Later is enabled, customers see it as a payment option at checkout and can choose to split the total into installments ("Pay in 4" or "Pay Monthly"). If Pay Later Messaging is activated, promotional banners remind them of this option earlier in their shopping journey.
Saving a Payment Method (Vaulting)
If Vaulting is enabled:
- Customers paying with a credit card will see a "Save your card" checkbox at checkout.
- Venmo accounts are saved automatically after a successful payment (once the customer opts in via their portal settings).
- On their next purchase, saved methods appear as one-click options — no re-entering details.
8. Managing Saved Payment Methods (Customer Portal)
Customers with a website account can view and manage their saved payment methods at any time.
- The customer logs in and navigates to My Account.
- They click Payment Methods.
On this page, they can:
- See all saved Venmo accounts and credit cards.
- Set a Default Venmo account for future one-click payments.
- Delete any method they no longer want to use.
9. Paying Invoices from the Customer Portal
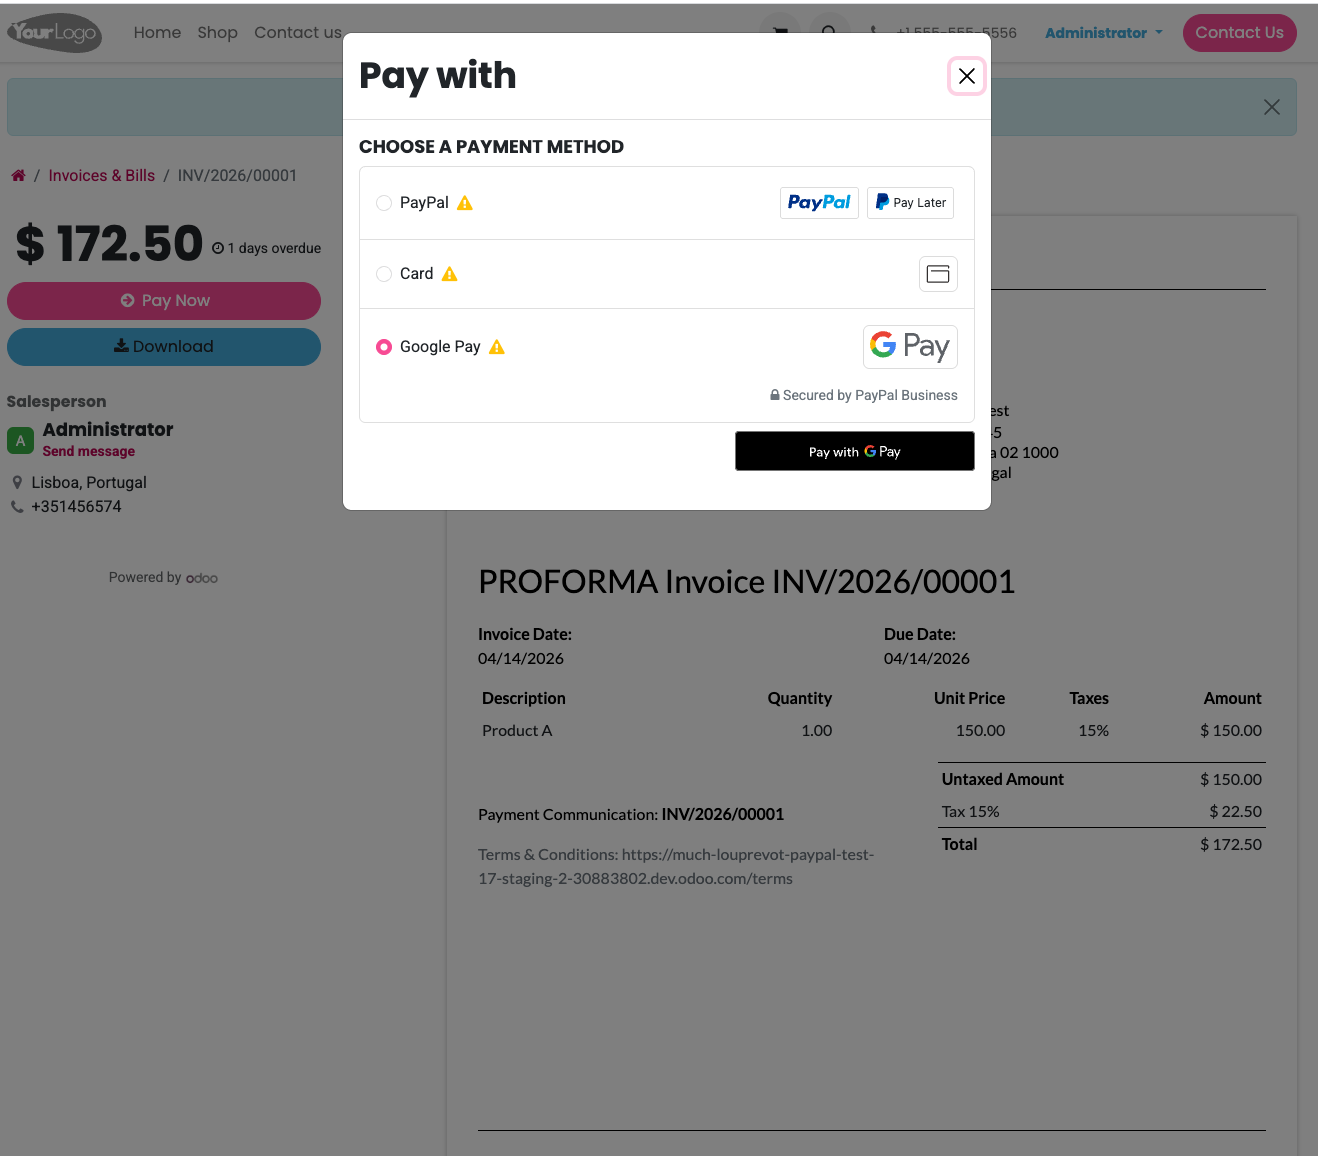
Customers with a portal account can pay their outstanding invoices directly online — without any phone calls or manual bank transfers. All the PayPal payment methods you have enabled are available on the invoice payment page, giving customers the same frictionless experience they get in the shop.
How Customers Access It
There are two entry points:
- Invoice email: When you send an invoice from Odoo, the email includes a View Invoice (or Pay Now) link. Clicking it opens the invoice in the portal with the payment form already visible.
- My Account: The customer logs in, navigates to My Account > Invoices, finds the outstanding invoice, and clicks it to open the payment page.
Available Payment Methods
The full set of enabled PayPal payment methods is available — the experience is identical to the webshop checkout:
- PayPal Wallet — log in to PayPal and approve.
- Credit / Debit Card — enter card details directly on the page.
- Google Pay — one-tap on Chrome on Android or desktop.
- Apple Pay — one-touch on Safari on Apple devices.
- Pay Later — split the invoice total into installments.
- Alternative Payment Methods — iDEAL, Bancontact, SEPA, and more, shown automatically based on the customer's location.
ℹ️ If Vaulting is enabled and the customer has saved payment methods, their saved PayPal accounts, Venmo accounts, and credit cards appear at the top of the payment form for instant one-click payment — no re-entering details.
After Payment
Once the customer completes payment:
- The invoice is automatically marked as Paid in Odoo.
- A payment record is created and reconciled against the invoice.
- The customer sees a confirmation on screen and the invoice status updates in their portal.
10. Admin: Refunds & Troubleshooting
Issuing a Refund
Refund a customer's PayPal payment directly from Odoo — no need to log in to the PayPal dashboard.
- Open the Sales Order that was paid.
- Click the Transaction smart button.
- Open the transaction record (it should be in a Done state).
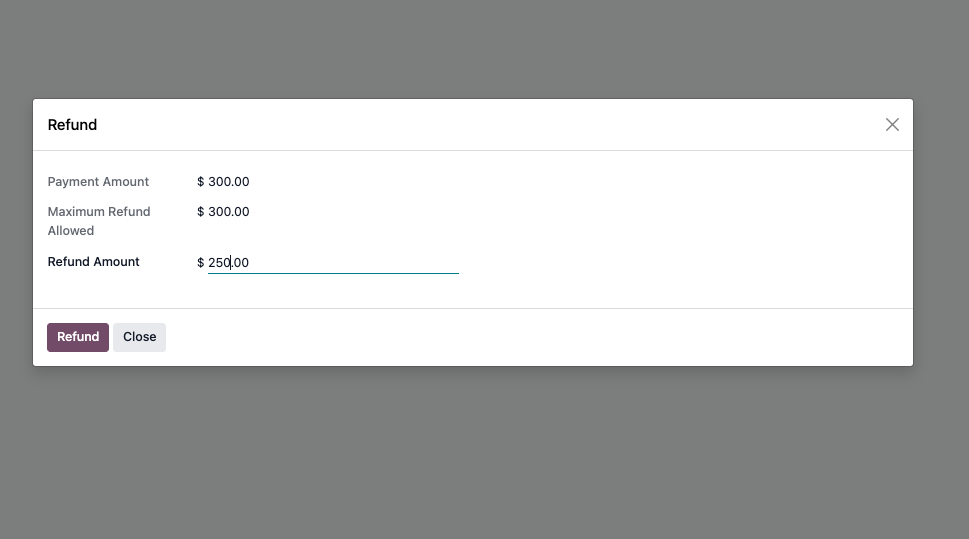
- Click the REFUND button.
ℹ️ Partial refunds are supported. If you set the Refund option to Full & Partial in the provider's Configuration tab, you can enter any amount up to the original transaction total — useful for shipping deductions, restocking fees, or partial order cancellations.
The refund is sent to PayPal immediately, and a corresponding refund transaction is created in Odoo. The customer receives the funds according to PayPal's standard processing time.
Monitoring Webhooks & API Logs
Two diagnostic tools are available directly on the PayPal provider form:
- Logs (Smart Button): A full history of every API request sent to PayPal and the response received. Useful for diagnosing failed payments, refund issues, or unexpected behavior.
- Queue (Smart Button): The list of incoming webhook events from PayPal — payment confirmations, refund confirmations, vault updates, and more. Events are queued so nothing is lost even if your server is temporarily unreachable. A background cron job (PayPal: Process Webhook Queue) processes them automatically; PayPal retries delivery up to 25 times.