Shopify <> Odoo integration : User Documentation
The following documentation will provide you with the information you need to use the much. Shopify - Odoo integration. The objective is to get you familiarised with the integration by providing relevant information as to the main business processes it covers, and how you can configure it to best suits your needs.
Quick start guide
Installation pre-requisites
For the Shopify - Odoo integration to function, please make sure that you have the following Odoo standard modules installed :
- Sales
- Invoicing
- Accounting
- Inventory
Enable the much. Shopify integration
1. Install much. Integration Hub, Order base integration, much_notify and Shopify modules from the Apps.
In Integration Hub > Settings, make sure you have the following settings enabled :
- iHub logs
- iHub mappers
- iHub queues *only for importing returns from Shopify
2. Install much. Shopify integration
- Go to Integration Hub > Integrations and click New

- Add an Integration name
- In the Integration type field, select Shopify.
- In the Company field, select the Odoo company that this integration will be applied to.
2. Enable the much. Shopify integration
- Retrieve your Shopify API credentials.
To get your Shopify API credentials :
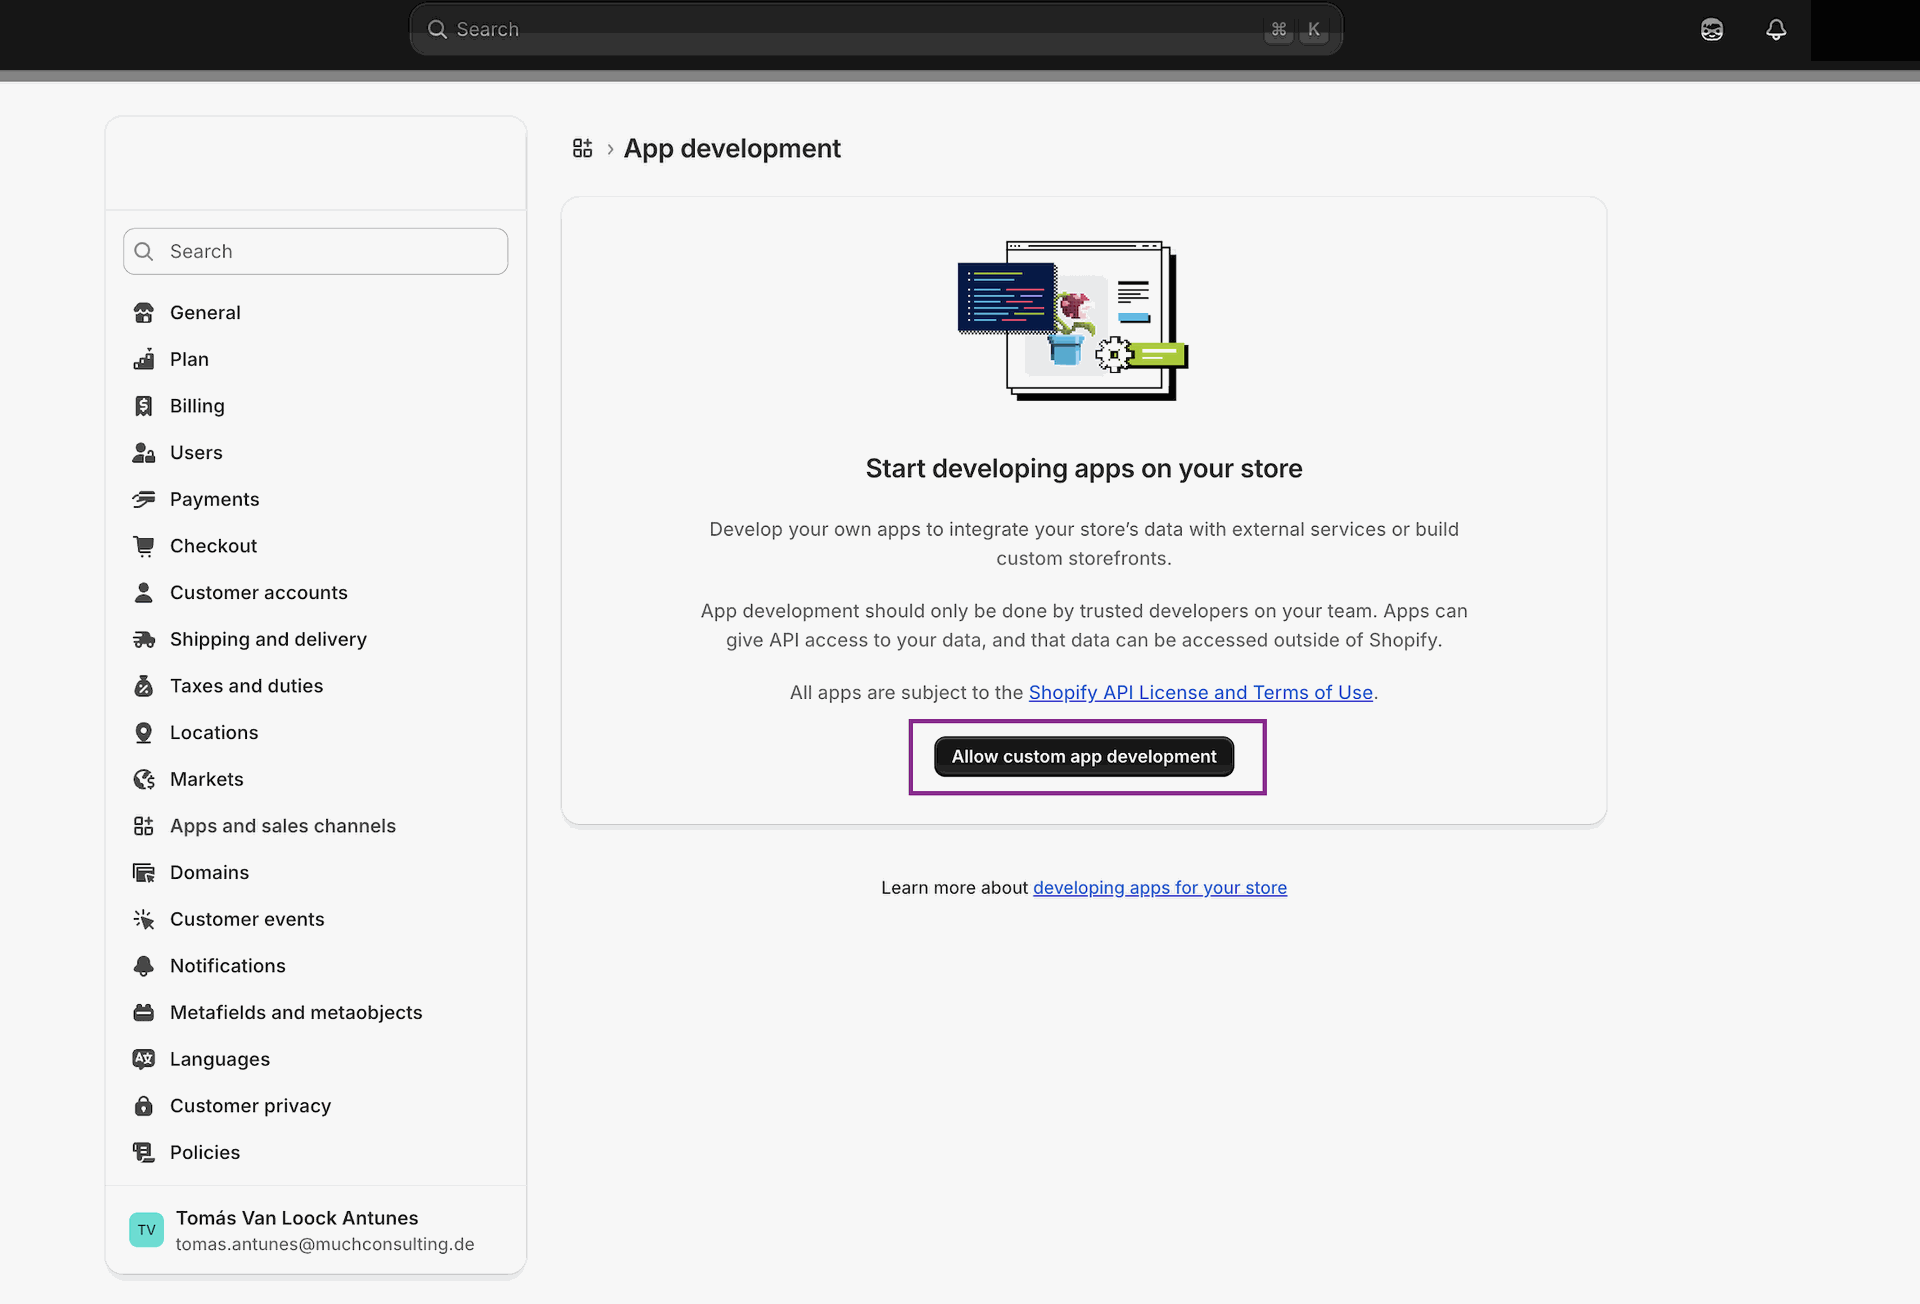
- Shopify Admin > Settings > Apps and sales channels and click Allow custom app development
- Navigate to Develop apps.

- If not created already, click Create an app.

- Give the App a name and assign an app developer.

- Click Configure Admin API Scope and select all scopes and click Save.


- Go to API credentials and click Reveal token

- In Odoo, go to Integration Hub > Integrations > Shopify > Integration Settings.
- In the URL field, paste your Shopify store Url - ex : https://much-integration.myshopify.com/
- In the API Token field, paste your Shopify Admin API access token.
- Click Save.
- Back to Integration Hub > Integrations > Shopify, click Enable Integration.

Synchronise your first product
Export products from Odoo
- In Odoo, go to Sales > Products.
- Open the product template or variant of your choice, open the ⚙️ action menu and click Export to connectors.

- Select Shopify from the drop down menu and click Execute.

- A pop-up appears, informing you of the successful export of the product to Shopify. You can also navigate to Integration Hub > Shopify > Logs to visualise the log associated with your recently exported product.
You can also choose to remove a previously exported product from Shopify. To do so :
- Go to Integration Hub > Shopify > Products, and open the product template or variant that you want to remove.
- Click on Actions > Remove product from connectors.

Import products from Shopify
- In Shopify Admin, go to Products and select the product you would like to import to Odoo.
- In the product page, copy the product ID from the page URL.

- In Odoo, go to Integration Hub > Shopify and click Import


- In the Resource field, select Products.
- If your product already exists in Odoo, select the Update existing products option.
- In the Specific ids field, paste the product ID from the Shopify URL.
- Click Execute.
- Click on the Products smart button to access your newly imported product.

Product template in Shopify
Product Template in Odoo


Product variants in Shopify
Product variants in Odoo


Import your first order
- In Shopify admin, go to Orders and select the order you would like to import to Odoo.
- In the order page, copy the order ID from the page URL.

- In Odoo, navigate to Integration Hub > Shopify and click the Import button.
- In the Resource field, select Orders
- In the Specific ids, paste the order ID from the Shopify URL.
- Click Execute.
- Click on the Logs or Orders smart button to access your newly imported order.

Shopify - Odoo workflows
In this section, you will learn how to use the integration in your daily workflows.
Automated product synchronisation
Automatically import products from Shopify
By default, the integration will automatically import new products from Shopify to Odoo, on a daily basis.
To modify this scheduled action, you can go to Integration Hub > Shopify and click the Scheduled Actions smart button at the top of the page.
If you want the scheduled action to also automatically update existing products in Odoo when a modification is made in Shopify :
- Go to Integration Hub > Shopify > Integration Settings
- In the Product Settings tab, check the Update Existing Products option.
- Save your changes.
Still in the Product Settings tab, you can configure the Pricelist that Shopify products should fall under :

When importing a product, the connector default Pricelist will appear under the Extra Price smart button, in the product template form :

Still from the Product settings, in the Product Import section, you can choose to :
- Exclude Sale Description on Import - will not include the shopify sales description during product import
- Exclude Product Image on Import - will not include the Shopify product images during product import
- Exclude Metafields on Import - will not include the Shopify product metafields during product import
Shopify Product Metafields
To ensure a seamless data synchronisation between Odoo and Shopify, the much. Shopify integration supports the import of Shopify metafields, as long as they are defined in the following types :
Odoo type | Shopify type |
Boolean | True or False |
Char | Single line text |
Float | Decimal |
Integer | Integer |
Datetime | Date and time |
Text | Multi-line text |
Once imported, metafields can be found on the product template form, under the IHub custom field tab :

Automatically export products from Odoo
There is no scheduled action that automatically exports your products to Shopify.
If you manage your product information in Odoo, products must have been exported manually to Shopify at least once to enable automatic updates.
To automatically reflect in Shopify updates that you might do on your products in Odoo :
- Go to Integration Hub > Shopify > Integration Settings
- In the Product Settings tab, check the Export on save option.
- Save your changes.
The option enables real-time updates of your products (template or variants) in Shopify when you make changes and save them in Odoo.
Still from the Product settings, in the Product Export section, you can choose to :
- Exclude Sale Description on Export - will not include the shopify sales description during product export.
- Exclude Product Image on Export - will not include the Shopify product images during product export.
- Exclude Metafields on Export - will not include the Shopify product images during product export.
Click Save.
Automated order import
By default, the integration will automatically import new orders from Shopify to Odoo, on a daily basis.
To modify this scheduled action, you can go to Integration Hub > Shopify and click the Scheduled Actions smart button at the top of the page.
To ensure the automated order workflow happens seamlessly, you first need to configure the integration default sales settings and workflows. To do so, navigate to Integration Hub > Shopify > Integration Settings > Sales Settings.
Default order settings
- Warehouse : define the default warehouse where your products are located. This setting will be overwritten if the Products are configured to be in a different warehouse.
- Shipping method : define a default shipping method for your incoming orders.
- Duty product : if you are using the Shopify duties feature, you can specify a product within Odoo that represents the duties associated with shipping or importing goods. This product acts as the default value for duties and is added as an extra order line when a product is ordered with duties applied.


- Shipping policy : choose whether you would like to ship an order as soon as possible, meaning that the order should have multiple shipment based on product availability, or if you prefer to ship an order in one shipment when all product are ready.
- Salesperson: the selected salesperson will be automatically associated with the record of transaction.
- Sales Team : the selected sales team will be automatically associated with the record of transaction.
- Set prefix before order : this allows you to differentiate orders coming from Shopify by adding a prefix before the order ID. You can for example use SHP as a prefix.
- Shopify Locations : this section allows you to map a Shopify location to one or more Odoo locations. it will then be used as the default location for delivery.

Default order workflows
- Confirm order on import : by activating this option, all incoming orders will be confirmed. automatically, which will trigger the creation of a delivery order for your warehouse to ship the order.
- Create invoice on order import : by activating this option, all incoming orders will trigger the creation of an invoice.
- Exclude order metafields on import : will not include the Shopify order metafields during order import.
- Export returns : enable returned orders to be exported to Shopify (manually or scheduled).
- Auto-export shipment : automatically export order shipment to Shopify (real-time).
- Export shipment daily : automatically export order shipment to Shopify (scheduled)
- Notify customer on fulfilment : sends an email to the customer when their order is ready to be shipped.
After configuring all these settings, click Save.
Automated product stock export
After an order is imported and confirmed, the stock of the included products is updated in the Odoo Inventory App based on the quantities ordered.
To keep your shop up-to-date on products stock, the integration will automatically export product available quantities on a daily basis. In Shopify, the available quantities will be updated, to always match what is tracked in Odoo.
To modify this scheduled action, you can go to Integration Hub > Shopify and click the Scheduled Actions smart button at the top of the page.
Automated shipment export
After an order is imported and confirmed, a delivery order is automatically created for your warehouse to dispatch the order. Once the order is dispatched, and the delivery status is set to Done, it needs to be reflected in Shopify.
To automatically export order shipment on a daily basis :
- Go to Integration Hub > Shopify > Integration Settings
- In the Sales Settings tab, check the Export Shipment Daily option.
- Save your changes.
To modify this scheduled action, you can go to Integration Hub > Shopify and click the Scheduled Actions smart button at the top of the page.
Order shipment can also be exported in real-time. To activate this option :
- Go to Integration Hub > Shopify > Integration Settings
- In the Sales Settings tab, check the Auto-export Shipment option.
- Save your changes.
Automated return synchronisation
After receiving an order, a customer can decides to return one or more products, for many reasons. The customer can then make a return from your shop, where the return would need to be imported to Odoo. The return can also be created in Odoo, where it would need to be exported to Shopify.
Import returns from Shopify
To enable and configure the return import feature, navigate to Integration Hub > Shopify > Integration Settings> Sales Settings :
- Select your Return Operation Type
- Select the Import Return box to enable receiving returns in real-time from Shopify.
- Activate the Odoo developer mode (or ask your engineering team to complete this step) and navigate to the Webhook Settings tab of the Integration settings, to fill your Shopify Client Secret. To find your Shopify Client Secret :
- Go to Shopify Admin > Settings > Apps > Develop Apps.
- Click on the Odoo app.
- Go to API credentials
- Copy the API secret key :

Returns will be received in a queue, waiting for you to process them :

Once processed, a reverse picking will be created. You can access the latest returns by going to the Returns smart button of the Shopify integration :


To automatically process returns from the queue on a timely basis, go to Integration Hub > Shopify> Integration Settings > Sales settings and activate the Auto-create returns feature :

Export returns from Odoo
To enable the export return feature, navigate to Integration Hub > Shopify > Integration Settings> Sales Settings and check the Export return box. From there, the integration allows you to export returns in 3 different ways : Manually, in Real Time, or via Scheduled Action.
Manual Export :
- From the order you need returned, navigate to the Delivery order and create the return (or import the return from Shopify automatically - see Import Return section)
- Once created, wait for your warehouse to confirm the reception of the returned items.
- Once confirmed, validate the return.
- Click Return in Shop to flag in Shopify the related order as returned (or partially returned), and restock the returned products.

Real Time Export :
- To activate Real-time export, go to iHub > Shopify > Integration settings > Sales settings and activate the Auto-export returns option.
- Once the return picking is Confirmed, the order in Shopify will automatically be flagged as Returned for the related returned items.
Automated Daily Export:
- To activate Daily export, go to iHub > Shopify > Integration settings > Sales settings and activate the Export returns Daily option.
- On a daily basis, the integration will automatically send confirmed returns to Shopify, where the related orders will be flagged as Returned for the related returned items.
Export refunds from Odoo
Manual Export :
- To enable the export refund feature, navigate to Integration Hub > Shopify > Integration Settings> Sales Settings and check the Export refund box.
- From the order you want to refund, navigate to the Credit Note and validate it.
- Click Refund in Shop to flag in Shopify the related order as refunded (or partially refunded).


Real Time Export :
- To activate Real-time export, go to iHub > Shopify > Integration settings > Sales settings and activate the Auto-export refunds option.
- Once the credit note is Validated, the order in Shopify will automatically be flagged as Refunded for the related returned items.
Automated Daily Export:
- To activate Daily export, go to iHub > Shopify > Integration settings > Sales settings and activate the Export Refunds Daily option.
- On a daily basis, the integration will automatically send validated credit notes as refunds to Shopify, where the related orders will be flagged as Refunded for the related returned items.
Multi-company support
If you are using Odoo with multiple companies, you can simply create a new integration for each of the companies you want to use the Shopify integration for. You can select the company in the New Integration form.

Multi-instance support
If you want to integrate Odoo with multiple Shopify instances, you can simply create a new integration for each instance. You can fill the connection settings of each instance after creating the integration.